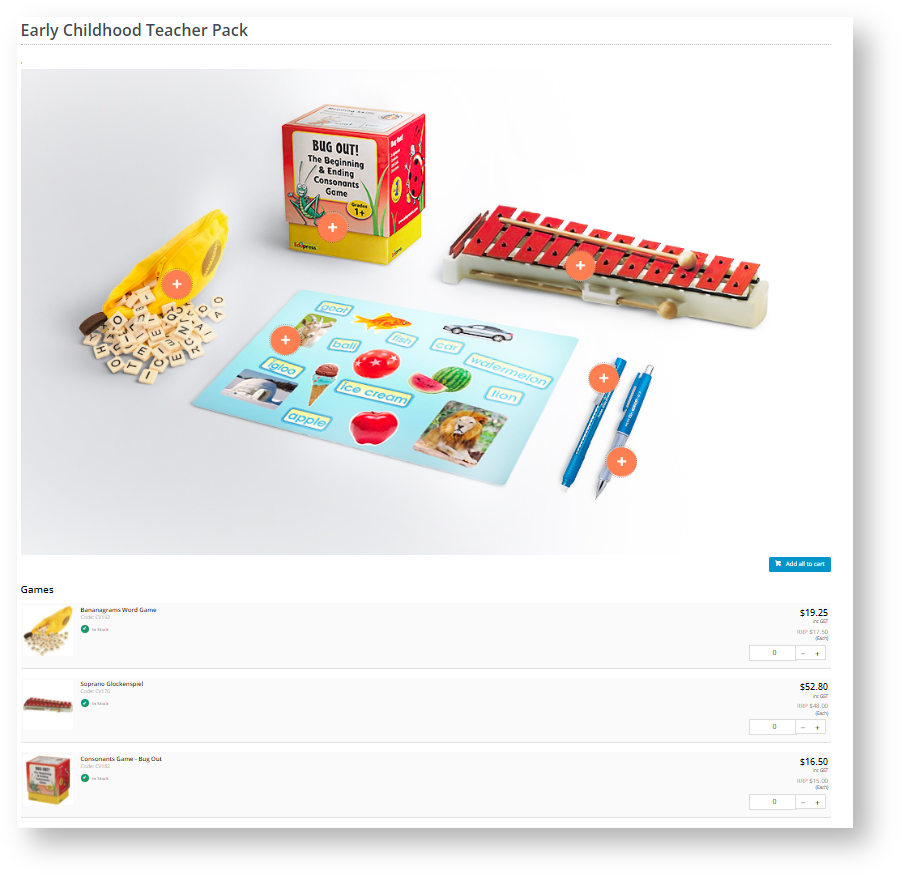
A hotspot banner provides a visual display of products clustered on a page for a particular purpose. It could be a school year book pack. Or the compulsory set of uniform items a new starter has to purchase. Or spare parts for a specific machine. Or even an attractive way to display newly arrived items your site is selling.
Each product in the banner has a clickable hotspot - usually a small circle. When that area is clicked, the viewer is taken to the product on the same page, where it can be added to cart.
Example:
Here, a hotspot is indicated marked by ![]() . A viewer clicks on it to jump to the product (listed below the banner).
. A viewer clicks on it to jump to the product (listed below the banner).
| Panel | |
|---|---|
On this page:
|
Step-by-step guide
| Info | ||
|---|---|---|
| ||
Ensure these have been created: |
This guide provides step-by-step instructions for creating To create a hotspot banner.:
- Navigate Go to Products & Categories → Category Maintenance.
- Find the cluster category for this hotspot banner and click Edit. NOTE - If the category has not been flagged as a cluster, you can do that next.

- If this category has not been flagged as a cluster, in Enable Cluster, select Yes.
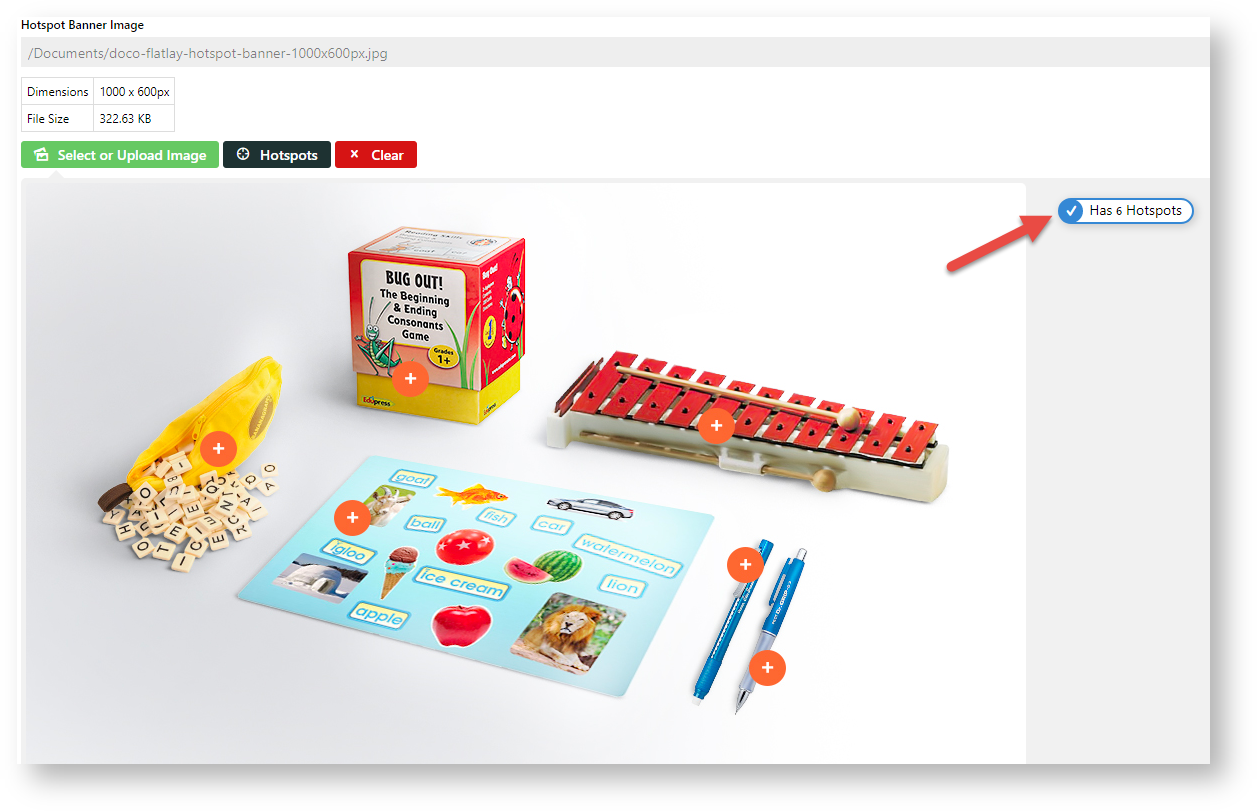
- Scroll down to the Category Hotspot Banner panel.
- Click the Select or Upload Image button.
- Select the required banner image. After insertion, the banner pathway, dimensions and file size are displayed.
- To add hotspots, click the Hotspots
button.
- Position the cross where you want a hotspot and click. The hotspot area is displayed as a revolving circle.
View file
name hotspot.mp4 height 250 - Use the lookup tool to select the product for the hotspot.
- For other hotspots needed, repeat steps 6-7.
- When you have finished adding hotspots, click Confirm.
The number of added hotspots is shown.- To save the hotspots, click Save or Save & Exit.
- Refresh the cache.
- If this cluster category appears in the navigational menu, it will be displayed there. Ensure the Hotspot Image Widget is in the Product List template.


Additional Information
Minimum Version Requirements
Multiexcerpt
MultiExcerptName Minimum Version Requirements 4.31
Prerequisites
Multiexcerpt
MultiExcerptName Pre reqs --
Self Configurable
Multiexcerpt
MultiExcerptName Self Configurable Yes
Business Function
Multiexcerpt
MultiExcerptName Business Function Products & Categories
BPD Only?
Multiexcerpt
MultiExcerptName BPD Only Yes
B2B/B2C/Both
Multiexcerpt
MultiExcerptName B2B/B2C/Both Both
Third Party Costs
Multiexcerpt
MultiExcerptName Third Party Costs n/a
Related help
Content by Label
showLabels false max 5 spaces KB showSpace false sort modified reverse true type page cql label in ("category-maintenance","cluster") and type = "page" and space = "KB" labels how-to new cms ver41700
Multiexcerpt
hidden true MultiExcerptName Features List Headers Macro Instructions for carrying Article Information through to Feature List
Minimum
Version
Requirements
BPD
ONLY
Business Function
B2B
B2CBOTH
Feature
Feature Description
(Written for our customers and can be pasted into comms sent to them)
Additional info
Pre-Reqs/
GotchasSelf Configurable Third Party Costs
Instructions for carrying Excerpts through from this page to the Feature List
Article Page:
Add macro / Multiexcerpt (or copy and existing excerpt and edit) or (Copy existing page and place content into existing excerpt macros)
On Features List page:
Click in the Cell to be populated / add macro / Multiexcerpt Include / Select the Article page and the excerpt (or copy another feature line and edit the 'Article page' source.