...
You can find Layers under the Advanced Content menu in the CMS.
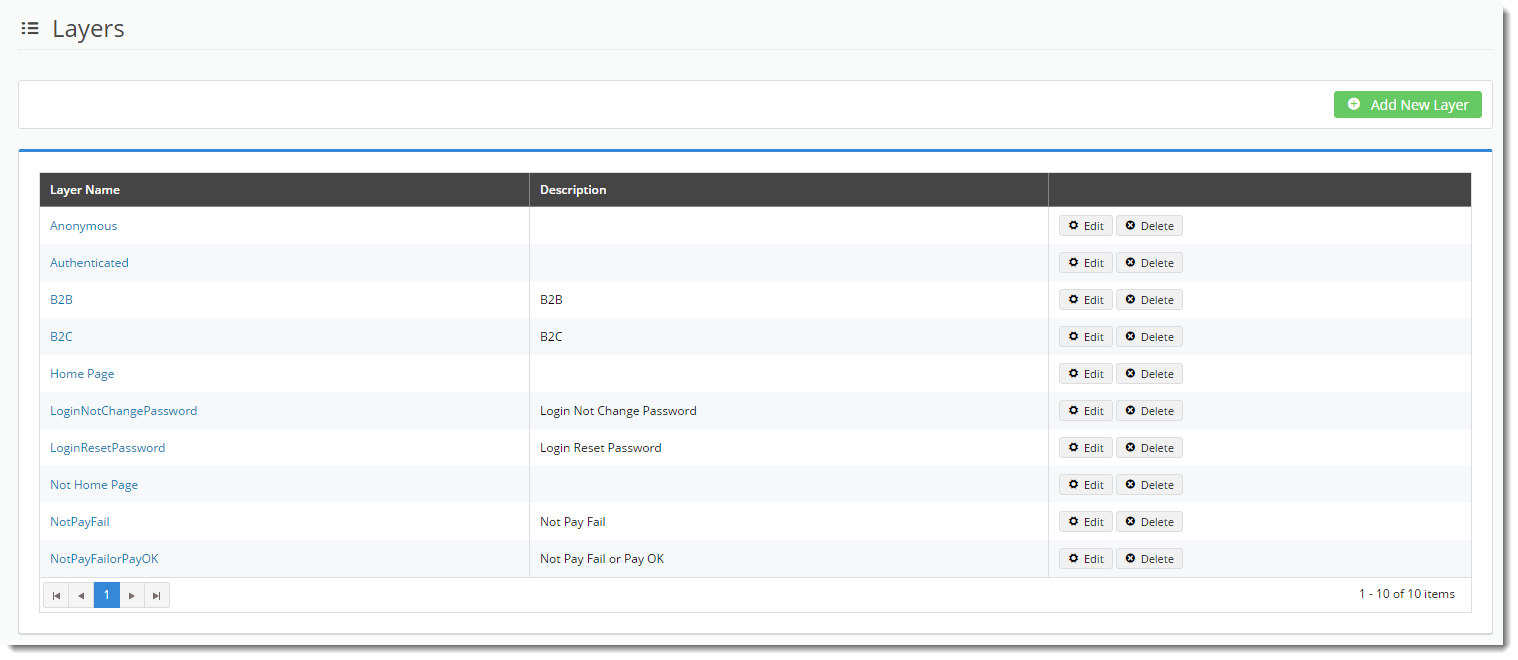
How To Create a Layer
- In the CMS, navigate to Advanced Content → Layers.
- Click 'Add New Layer'.
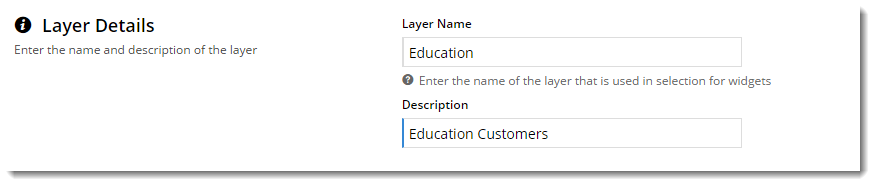
- Give your new layer a Name and a Description; anything that's meaningful to you.
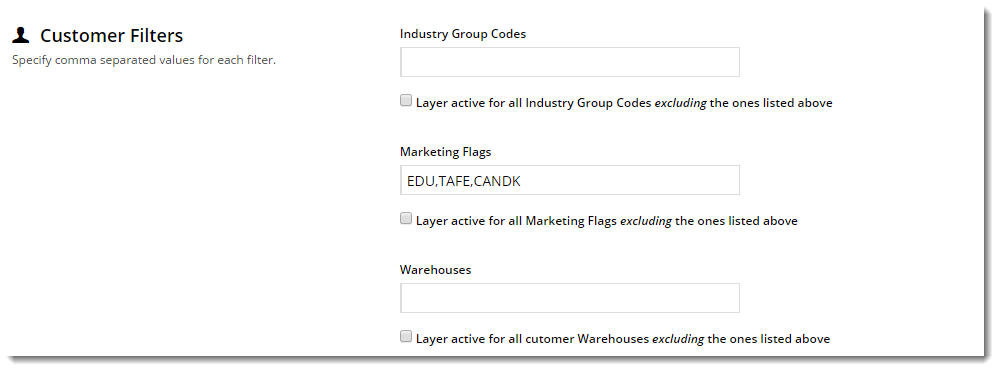
- Next, specify the conditions under which this layer will 'activate'. It could be for particular roles, accounts, or marketing flags, for example.
(For further information on layers and examples of use, see our blog post on Personalisation here!)- Click 'Save & Exit'
- Your new layer is now ready to use! Add it to any widget on your site - it's that easy.

Layer Options
| Field name | Description |
|---|---|
| URL Pattern | The widget will activate when the customer browses a particular page or pages. Use the '*' wildcard to include all like pages, or exclude a page using '!' |
| User Authenticated Status | Defines the layer based on Logged In users (Authenticated), Logged Out users (Anonymous), or Any user. |
| Role | Defines the layer based on the role of the user. You can include, or exclude any role from the list. |
| Account | A single account code, or a list of debtors from PRONTO that should be included (or excluded) from this layer. |
| Bill-to Account | Similar to the Account option, this specifies a Bill-to Account filter, using an include or exclude |
| Catalogue | If your site uses Custom Catalogues, you can define a layer based on what catalogue the user is browsing. Specify the Global Catalogue, any Custom Catalogue, or a list of Custom Catalogues. |
| Customer Filters | There are several Customer fields integrated from PRONTO ERP that can be used to define a layer, including:
Any of the above can be done as a list (separated by commas), and can be set up to include or exclude the values supplied. |