1. Enable Google Analytics version
In the CMS, go to: Settings → Settings → Systems → Analytics.With Analytics enabled on your site, click Configure.
In Analytics Feature Settings, toggle ON Enable Analytics.
In Analytics Version, select 'UA' or 'GA4'.
In Google Tag Manager ID, enter the ID from your Google account.
When the ID is entered, Analytics functions available are listed. Tick at least one.
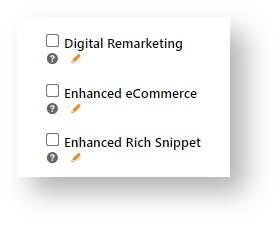
Digital Remarketing - create visitor and buyer user groups so relevant ads can be displayed to them when they leave your site and continue to browse the internet
Enhanced eCommerce - collect data on user interactions with products on your site for reports. Can include: product impressions, product clicks, product detail views, etc
Enhanced Rich Snippet - use a snippet to enhance search results visually
2. Create a template (optional)
This is optional as there is a default template that can be used. It is called CV_OpeningBodyTemplate. This template contains the following:
| title | This tag will output the 'snippet' required by the Google Tag manager. |
|---|
1. Enable Google Analytics version
- In the CMS, go to: Settings → Settings → Systems → Analytics.
- With Analytics enabled on your site, click Configure.
- In Analytics Feature Settings, toggle ON Enable Analytics.
- In Analytics Version, select which version you are configuring: 'UA' or 'GA4'. NOTE - If you are migrating to GA4 or implementing Analytics on your site for the first time, select GA4.
- In Google Tag Manager ID, enter the ID from your Google account.
- When the ID is entered, Analytics functions available are listed. Tick at least one.
Digital Remarketing - if using remarketing tools such as Google Ads or dynamic remarketing, visitor and purchaser behaviour events from Analytics can be included to personalise ads shown to users after they leave your site and continue to browse the internet
Enhanced Ecommerce - data on user interactions with products or their user journeys on your site for use with reporting. For example, interactions with product can include product impressions, product clicks, product detail views, etc.
Enhanced Rich Snippet - snippet added to enhance search results visually- Click Save.
2. Create a template (optional)
This is optional as there is a default template that can be used. It is called CV_OpeningBodyTemplate. This template contains the following:
| Code Block | ||
|---|---|---|
| ||
<!-- Google Tag Manager --> <noscript><iframe src="//www.googletagmanager.com/gtmns.jshtml?id='+i+dl;f.parentNode.insertBefore(j,f); })(window,document,'script','dataLayer','{0}');</script> <!-- End Google Tag Manager --> |
| Note |
|---|
If you create your own template:
|
3. Set templates
There are two templates that you can set:
- Global - one for all users.
- Role-based - one for users in specific roles.
The default template is called CV_OpeningBodyTemplate.
| Info |
|---|
The role-based template will be checked first and used if it exists. If it doesn't exist, the global template will be used. |
Global
To use the tag manager for all users, go to the default templates admin page. Set the Opening Body Template to the default template or another template you created.
Role-based
To use the tag manager for users in specific roles, go to the role management admin page (see Templates tab). Set the Opening Body Template to the default template or another template you created.
Digital Remarketing
| Tip |
|---|
The 'Data Layer Doctor' extension for Chrome may be useful in viewing data objects during testing. It allows you to check the contents of a data layer and verify it against your specifications. |
Remarketing displays relevant Google Ads to users after they have left your site but are still on Google or partner websites. What ads are shown to a user is based on whether their behaviour while on your site matches a behavioral profile for a user segment. If it matches, they are added to that user segment. Segment rules determine what kind of ads such users see. For example, you might create a segment of 'website visitors' - users who leave your site without making a purchase. You might have rules that show them ads of product they clicked on or those they added to cart, as they continue to browse and search the internet. Remarketing in a targeted way like this may help bring them back to your site.
See: Remarketing with Google Analytics
Remarketing data from every page of the website are sent to Google. What data (property + its value) is sent with each page type are listed.
Property
Value
Notes
event
'remarketing'
ecomm_pagetype
- other
home
category
product
cart
purchase
Value determined by the page the user is on. For example:
- 'other' = any other page not specifically listed (eg. Favourites, Checkout Delivery Address, Dashboard, etc).
'home' = the site's home page
'category' = a category page listing products
'product' = the product detail page
'cart' = the shopping cart
'purchase' = the confirmation screen once an order has successfully been submitted
ecomm_prodid
One of the following:
Product code (product pages)
Array of product codes (category, cart, purchase pages)
Optional. Value determined by the page the user is on, and does not apply to page types 'home' or 'other'.
ecomm_totalvalue
The total value of all products and charges (if any)
Optional. Only applies to page types 'product', 'cart, and 'purchase'.
google_conversion_value
The total value of all products and charges
Optional. Only applies to page type 'purchase'.
| Code Block | |
|---|---|
| language | ={0}" height="0" width="0" style="display:none;visibility:hidden"></iframe></noscript>
<script>(function(w,d,s,l,i){w[l]=w[l]||[];w[l].push({'gtm.start': new Date().getTime(),event:'gtm.js'});
var f=d.getElementsByTagName(s)[0], j=d.createElement(s),dl=l!='dataLayer'?'&l='+l:'';
j.async=true;j.src= '//www.googletagmanager.com/gtm.js?id='+i+dl;f.parentNode.insertBefore(j,f);
})(window,document,'script','dataLayer','{0}');</script>
<!-- End Google Tag Manager -->
|

| Note |
|---|
If you create your own template:
|
3. Set templates
There are two templates that you can set:
- Global - one for all users.
- Role-based - one for users in specific roles.
The default template is called CV_OpeningBodyTemplate.
| Info |
|---|
The role-based template will be checked first and used if it exists. If it doesn't exist, the global template will be used. |
Global
To use the tag manager for all users, go to the default templates admin page. Set the Opening Body Template to the default template or another template you created.
Role-based
To use the tag manager for users in specific roles, go to the role management admin page (see Templates tab). Set the Opening Body Template to the default template or another template you created.
Anchor remarketing remarketing
Digital Remarketing
| Tip |
|---|
The 'Data Layer Doctor' extension for Chrome may be useful in viewing data objects during testing. It allows you to check the contents of a data layer and verify it against your specifications. |
Remarketing in Analytics assists in displaying relevant Google Ads and ad personalisation. When users have left your site but are still on Google or partner websites, what ads are shown to a user is based on their behaviour while on your site matching a behavioral profile for a user segment. When added to that user segment, segment rules personalise what kind of ads the user sees. For example, you might create a segment of 'website visitors' - users who leave your site without making a purchase. You could have rules that show them ads of products they clicked on or added to cart, when they continue to browse and search the internet. Remarketing in a targeted way like this may help bring them back to your site.
See: Remarketing with Google Analytics
Remarketing data from every page of the website are sent to Google. What data (property + its value) is sent with each page type are listed.
Property | Value | Notes |
|---|---|---|
event | 'remarketing' | |
ecomm_pagetype |
| Value determined by the page the user is on. For example:
|
ecomm_prodid | One of the following:
| Optional. Value determined by the page the user is on, and does not apply to page types 'home' or 'other'. |
ecomm_totalvalue | The total value of all products and charges (if any) | Optional. Only applies to page types 'product', 'cart, and 'purchase'. |
google_conversion_value | The total value of all products and charges | Optional. Only applies to page type 'purchase'. |
| Code Block | ||||
|---|---|---|---|---|
| ||||
{
    "event": "remarketing",
	"ecomm_pagetype": "home",
	"ecomm_prodid": ["ProductCode", "ProductCode"] or "ProductCode",
	"ecomm_totalvalue": "99.99",
	"google_conversion_value": "99.99"
} |
Anchor ecommerce ecommerce
Enhanced Ecommerce
Enhanced Ecommerce is additional functionality for Google Analytics. It allows richer data to be gathered beyond the standard ecommerce transactional information at the Order Confirmation step. Enhanced ecommerce data provides a more nuanced view of user behaviour, such as content engagement, product views, and cart actions.
Enhanced ecommerce data is pushed for nearly every event type on the website. The data objects, including properties and their possible values, are outlined below.
Anchor ecomimpressions ecomimpressions
Product Impressions
| ecomimpressions | |
| ecomimpressions |
Product Impression data is pushed when a product list is displayed. For example, a page of search results, products in a category, or a user's favourites.
Property | UA Value | GA Value | Notes |
|---|---|---|---|
Data Layer Name | dataLayer | ||
event | enhancedEcomm | Due to infinite scrolling, some pages may load additional data after the initial page load. For this reason, impressions are pushed via an event. Infinite scrolling creates a new event, and therefore a new data push. This also ensures that data is pushed in blocks, so as not to exceed Google's object data limit. | |
Event Type | |||
Cart Url | /cart | ||
Product Pricing | inc or ex | Include or exclude sales tax from price displayed | |
Detail Impression Use from List | Default: OFF | ||
Debug To Console | Default: ON | ||
User | Default: ON | ||
Only Track Logged In User | Default: OFF | ||
Questionaire | Default: ON | ||
Questionaire Url | /{0}/Thank-you/ | ||
Checkout Options | Default: ON | ||
Checkout Options | |||
Event Name | checkout | ||
Checkout Option Event Name | checkoutOption | ||
Login Success | default: ON | ||
(login success) Event Name | login | ||
Logout Success | default: ON | ||
(logout success) Event Name | logout | ||
Remove from Cart | default: ON | ||
(remove from cart) Event Name | removeFromCart | ||
Cart Updated | default: ON | ||
(cart updated) Event Name | cartUpdated | ||
Apply Promo Code Success | default: ON | ||
(Apply Promo Code Success) Event Name | validPromoCode | ||
Apply Promo Code Fail | default: ON | ||
(Apply Promo Code Fail) Event Name | invalidPromoCode | ||
Remove Promo Code | default: ON | ||
(Remove Promo Code) Event Name | removedPromoCode | ||
Order Tracking | default: ON | ||
Event Name | /TrackOrder/ViewOrder/{0} | ||
Template View | |||
(Template View) Event Name | /OrderTemplates/{0} | ||
Product Impressions |
| Default: ON | |
Product Clicked | |||
| productClick | |||
Add to Cart | Default: ON | ||
(Add to Cart) Event Name | addToCart | ||
Banner Clicked | Default: OFF | ||
Event_type | Impressions | Items | |
name | The product description | ||
id | The product code | ||
category | The product's primary category | Includes all levels of the category structure for the product's primary category. | |
list* | One of the following:
| Value determined by the list in which the product is located. *Note - Zoned Product Layout must be used in order for Enhanced eCommerce to work with lists. | |
brand | The product's brand | ||
position | The product's position / sequence in its list | ||
price | The product price (nett price for 1) | If 'hide pricing' is enabled at Role level, this data is not pushed. | |
currency | currency ecommerce.currencyCode | currency ecommerce.items.currency | Add in code snippet if required. |
List Types
List types being used for product impressions, product clicks and add to cart tracking
Product Detail | Product Details | |
Product Category | Product List | |
Search Results | Search Results | |
Recently Viewed | Items Recently Viewed | |
Campaign |
| |
Cart Lines | Cart Item |
| Code Block | ||||||
|---|---|---|---|---|---|---|
| ||||||
{
	"event": "enhancedEcomm",
	"event_type": "impression",
	"ecommerce": {
		"currencyCode": "AUD",
		"impressions": [
		{
			"name": "Product Description",
			"id": "ProductCode",
			"list": "list name",
			"category": "/first level/second level/third level",
			"brand": "brand name",
			"position": 1,
			"price": "99.99"
		}
		]
	}
} |
| Code Block | ||||||
|---|---|---|---|---|---|---|
| ||||||
{
	"event": "enhancedEcomm",
	"event_type": "impression",
	"ecommerce": {
		"currencyCode": "AUD",
		"detail": {
			"actionField": {
				"list": "list name"
			},
			"products": [
			{
				"item_name": "Product Description",
				"name": "Product Description",
				"id": "ProductCode",
				"category": "/first level/second level/third level",
				"brand": "brand name",
				"price": "99.99"
			}
			]
		}
	}
} |
Product Click data is pushed on any click of a product link. For example, a product on a page of search results, or a product on the user's favourites list.
Property
Value
Notes
event
'productClick'
list*
One of the following:
Product List
Search Results
Items Recently Viewed
Campaign - (sent as the Campaign Description, not the Campaign Code)
CrossSell - (Alternate products)
UpSell - (Accessories / Related products)
User Favourites
Prior Purchases
Cart Item
Value determined by the list in which the product is located.
*Note - Zoned Product Layout must be used in order for Enhanced eCommerce to work with lists.
name
The product description
id
The product code
category
The product's primary category
Includes all levels of the category structure for the product's primary category.
brand
The product's brand
position
The product's position / sequence in its list
price
				"item_id": "ProductCode",
				"item_category": "/first level/second level/third level",
				"brand": "brand name",
				"price": "99.99"
			}
			]
		}
	}
} |
Anchor ecomclicks ecomclicks
Product Clicks
| ecomclicks | |
| ecomclicks |
Product Click data is pushed on any click of a product link. For example, a product on a page of search results, or a product on the user's favourites list.
Property | UA Value | GA4 Value | Notes |
|---|---|---|---|
event | productClick | productClick | |
event type | event_type | - | Event type is 'click.ationField' no longer used for this event in GA4. |
Where product is located when clicked | list* ecommerce.click.actionField.list | item_list_name ecommerce.items.item_list_name | Value determined by the list in which the product is located:
*Note - Zoned Product Layout must be used in order for Enhanced eCommerce to work with lists. |
product description | name | item_name ecommerce.items.item_name | |
Product code | id | item_id ecommerce.items.item_id | |
product category | category - primary category ecommerce.click.products.category |
| All levels of the category structure can be shown. 'category' by itself = product's primary category. In UA, when setting the In GA4, you use enumerated category parameters to specify up to five levels of hierarchy. The behavior for category translation is as follows:
|
Product's brand | brandecommerce.click.products.brand | item_brand ecommerce.items.index | |
Product's position / sequence in its list | position ecommerce.click.products.position | index ecommerce.items.index | |
Product price (nett price for 1) | price ecommerce.click.products.price | price ecommerce.items.price | If 'hide pricing' is enabled at Role level, this data |
is not pushed. | |||
Currency | - | currency ecommerce.items.currency | |
Total | - | ecommerce.value | Sum of product price x quantity |
| Code Block | ||||||
|---|---|---|---|---|---|---|
| ||||||
{
	"event": "productClick",
	"ecommerce": {
		"click": {
			"actionField": {
				"list": "list name"
			},
			"products"items": [
			{
				"item_name": "Product Description",
				"item_id": "ProductCodeProduct Code",
				"item_category": "/first level/second level/third levelProduct Category",
				"item_brand": "brandBrand nameName",
				"price": "99.99",
				"positionindex": 1
			}
			]
		}
	}
} |
Anchor ecomuser ecomuser
User Details
| ecomuser | |
| ecomuser |
User Detail data is pushed on every page of the site. There is the option to push data for logged in users only.
'User_ID' = the user's unique identifier (database field = user.userid )
| Code Block | ||||||
|---|---|---|---|---|---|---|
| ||||||
{
	"User_ID": "unique user id"
} |
Anchor ecomquestion ecomquestion
Questionnaire
| ecomquestion | |
| ecomquestion |
Questionnaire data is only pushed for non-widget-based questionnaires.
Since the URL does not change post submission, a virtual URL is pushed. (In contrast, widget-based questionnaires have a URL redirect post submission.)
| Code Block | ||||||
|---|---|---|---|---|---|---|
| ||||||
{
	"virtualURL": "thank you URL"
} |
Anchor ecomcheckout ecomcheckout
Checkout Steps & Options
| ecomcheckout | |
| ecomcheckout |
Steps - pushed as the user progresses through the various steps of the checkout process.
Property | Value | Notes |
|---|---|---|
event | 'checkout' | |
event_type | 'checkout' | |
step | The checkout step number:
| Steps 3 & 4 will trigger additional 'Product Option' data to be pushed, in the form of the option selected at this step. For example, the freight option selected at Step 3 or the payment method selected at Step 4 (sample provided below). |
products | The products in the cart | Standard product data will be pushed for each product in the cart (e.g. name, id, category, brand, price). |
| Code Block | ||||||
|---|---|---|---|---|---|---|
| ||||||
{
	"event": "checkout",
	"event_type": "checkout",
	"ecommerce": {
		"checkout": {
			"actionField": {
				"step": 1
			},
			"products": [
			{
				"name": "Product Description",
				"id": "ProductCode",
				"category": "/first level/second level/third level",
				"brand": "brand name",
				"price": "99.99"
			}
			]
		}
	}
} |
Options - pushed whenever the Checkout Step value (detailed above) is either 3 or 4.
Property | Value | Notes |
|---|---|---|
event | 'checkoutOption' | |
event_type | 'checkout' | |
step | 3 or 4 | Value determined by the step number in 'Checkout Steps' data above. |
option | The option selected at this step | For example - 'pickup' at Step 3 or 'BPAY' at Step 4. |
| Code Block | ||||||
|---|---|---|---|---|---|---|
| ||||||
{
	"event": "checkoutOption",
	"event_type": "checkout",
	"ecommerce": {
		"checkout_option": {
			"actionField": {
				"step": 4,
				"option": "BPAY"
			}
		}
	}
} |
Anchor ecomtrans ecomtrans
Transactions
| ecomtrans | |
| ecomtrans |
Product Transaction data is pushed on successful submission of an order.
Measure a purchase by sending a purchase event with one or more items defined with the relevant fields.
Property | Value | Notes |
|---|---|---|
event | 'purchase' | |
item_name | The product description | Repeated for each product in the transaction. |
item_id | The product code | Repeated for each product in the transaction. |
item_category | The product's primary category | Includes all levels of the category structure for the product's primary category. Repeated for each product in the transaction. |
price | The product price (nett price for 1) | Repeated for each product in the transaction. |
| Code Block | ||||||
|---|---|---|---|---|---|---|
| ||||||
{
	"event": "payment",
		"ecommerce": {
		"purchase": {
			"actionField": {
				"id": 100000000,
				"revenue": 99.99,
				"tax": 9.99,
				"shipping": 10.00
			}
		},
		"products": [
		{
			"item_name": "Product Description",
			"item_id": "ProductCode",
			"item_category": "/first level/second level/third level",
			"price": "99.99"
		}
		]
	}
} |
Anchor ecomlogin ecomlogin
Login Success
| ecomlogin | |
| ecomlogin |
Login Success data is pushed on any successful login.
The 'event' always = "login"
The 'widgetName' = that of the widget used to initiate the login
| Code Block | ||||||
|---|---|---|---|---|---|---|
| ||||||
{
	"event": "login",
	"widgetName": "widget-name"
} |
Anchor ecomlogout ecomlogout
Logout Success
| ecomlogout | |
| ecomlogout |
Logout Success data is pushed on any successful logout.
The 'event' always = "logout"
The 'widgetName' = that of the widget used to initiate the logout
| Code Block | ||||||
|---|---|---|---|---|---|---|
| ||||||
{
	"event": "logout",
	"widgetName": "widget-name"
} |
Anchor ecomaddtocart ecomaddtocart
Add to Cart
| ecomaddtocart | |
| ecomaddtocart |
Add To Cart data is pushed every time a user successfully adds a product to their cart.
Property | Value | Notes |
|---|---|---|
event | 'addToCart' | |
currencyCode | The currency code for the current account | |
products | The product(s) added to the cart | Standard product data is included here (e.g. name, id, category, quantity, brand, price) |
pageType | One of the following:
| Value determined by the page on which the product was added. |
list* | One of the following:
| Value determined by the list from which the product was added *Note - Zoned Product Layout must be used in order for Enhanced eCommerce to work with lists. |
| Code Block | ||||||
|---|---|---|---|---|---|---|
| ||||||
{
	"event": "addToCart",
	"ecommerce": {
		"currencyCode": "AUD",
		"add": {
			"products": [
			{
				"name": "Product Description",
				"id": "ProductCode",
				"category": "/first level/second level/third level",
				"quantity": 1,
				"brand": "brand name",
				"price": "99.99"
			}
			]
		}
	},
	"pageType": "Product List",
	"list": "Product List"
} |
Anchor ecomremovefromcart ecomremovefromcart
Remove from Cart
| ecomremovefromcart | |
| ecomremovefromcart |
Remove From Cart data is pushed whenever a product is successfully removed from the user's cart.
NOTE - This can be a whole line deletion, or a decrease in quantity. Both actions are sent as 'Remove From Cart' data.
Property | Value | Notes |
|---|---|---|
event | 'removeFromCart' | |
currencyCode | The currency code for the current account | |
products | The product(s) removed from cart | Standard product data is included here (e.g. name, id, category, quantity, price). |
| Code Block | ||||||
|---|---|---|---|---|---|---|
| ||||||
 {
	"event": "removeFromCart",
	"ecommerce": {
		"currencyCode": "AUD",
		"remove": {
			"products": [
			{
				"name": "Product Description",
				"id": "ProductCode",
				"category": "/first level/second level/third level",
				"quantity": 1,
				"price": "99.99"
			}
			]
		}
	}
} |
Anchor ecomcartupdate ecomcartupdate
Cart Updated
| ecomcartupdate | |
| ecomcartupdate |
Cart Updates will push the relevant Add or Remove data when product quantities are changed:
Quantity increase triggers an "addToCart" data push
Quantity decrease triggers a "removeFromCart" data push
Anchor ecompromo ecompromo
Promotion Codes
| ecompromo | |
| ecompromo |
The following data is automatically pushed in relation to Promotion Codes:
success adding a promo code ('validPromoCode')
failure adding a promo code ('invalidPromoCode')
removal of a promo code ('removedPromoCode')
The event type and the promotion code is the only data sent in these instances.
| Code Block | ||||||
|---|---|---|---|---|---|---|
| ||||||
{
	"event": "validPromoCode",
	"promoCode": "XXXX"
} |
| Code Block | ||||||
|---|---|---|---|---|---|---|
| ||||||
{
	"event": "removedPromoCode",
	"promoCode": "XXXX"
} |
Anchor ecomvieworder ecomvieworder
View Order
| ecomvieworder | |
| ecomvieworder |
View Order data is pushed when an order is viewed on the Order History / tracking page. The relevant sales order number is sent in this instance.
| Code Block | ||||||
|---|---|---|---|---|---|---|
| ||||||
{
	"virtualURL": "/TrackOrder/ViewOrder/Order Number"
} |
Anchor ecomviewtemplate ecomviewtemplate
View Template
| ecomviewtemplate | |
| ecomviewtemplate |
View Template data is pushed when a saved template is viewed on the Order Templates page. The template name is sent in this instance.
| Code Block | ||||||
|---|---|---|---|---|---|---|
| ||||||
{
	"virtualURL": "/OrderTemplates/Template Name"
} |
Anchor extend extend
Extending or Overriding Pushed Data
| extend | |
| extend |
It is possible to push additional data or to override Commerce Vision's out-of-the-box inclusions. For assistance with this, please contact a Commerce Vision Consultant.
CV internal use:
Determine the type of additional data required to push:
User
Product
Order
Include the new data by adding the field to the relevant JSON field group.
Data Type
Dictionary Table
JSON Field Group
User
Primary Table:
User
Additional Tables:
Role
Customer
SiteTrackerUserData(or SiteTrackerUserData_RoleNamefor role-specific changes)
Product
Product
SiteTrackerProductData (or SiteTrackerProductData_RoleNamefor role-specific changes)
Order
Primary Table:
ProntoSalesOrder
Additional Tables:
ProntoSalesOrderLine
Product
SiteTrackerOrderData(or SiteTrackerOrderData_RoleNamefor role-specific changes)
Finally, construct the tracking code per the format below.
First parameter is the data to manipulate (e.g. "userDetail" in sample code)
Second parameter is the type of manipulation:
extend
override
The third parameter is the function that will perform the manipulation (e.g. "EmailAddress: data.EmailAddress" in sample code)
The data is the raw data that can be used for manipulation (and includes the additional data from the JSON field groups described above)
Code Block title Sample Data Extension code $.cv.css.tracker.track("userDetail", "extend", function(data) { return { EmailAddress: data.EmailAddress }; });
Possible extension methods:
userDetail
pageType (this is for Digital Remarketing)
productImpressions
productClick
questionnaire
checkout
checkoutOption
transactionProducts
loginSuccess
logoutSuccess
addToCart
removeFromCart
promoCodes
viewOrder
viewTemplate
Related help
| Content by Label | ||||||||||||||||||||
|---|---|---|---|---|---|---|---|---|---|---|---|---|---|---|---|---|---|---|---|---|
|