...
Upload and Tag Documents
- In the CMS, navigate to Products & Categories → Product Maintenance.
- Search for the product you require, and click Edit.
- Scroll down to the Documents section (it should be below 'Media'. If it's not there, the feature hasn't been enabled - contact us).
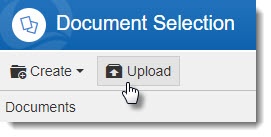
- Click Add Files. A file manager window will pop up.
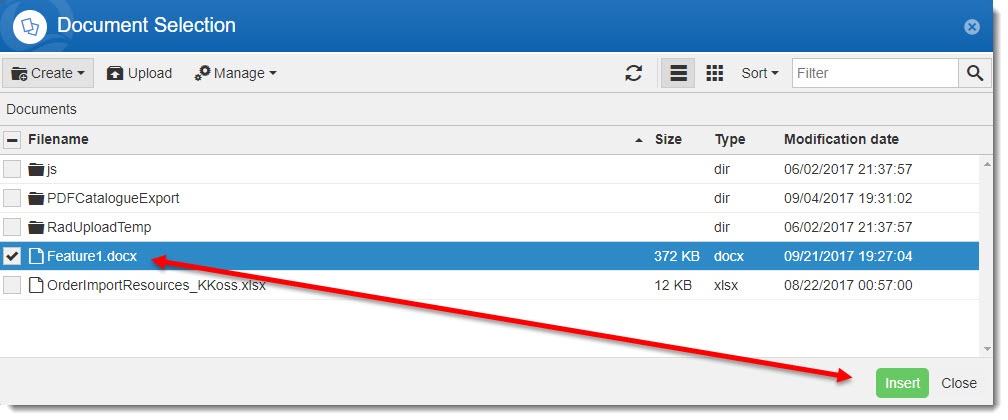
- Select your document from the list, or click Upload to browse to a local file.
- With the document selected, click Insert.
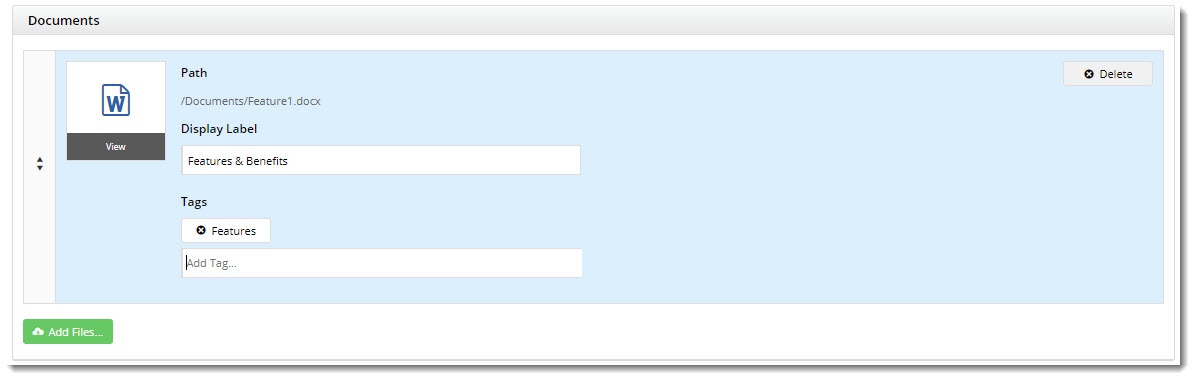
- Now that the document has been added, update the Display Label (the name shown to users). By default, the file name will be displayed.
- Here, you can also add Tags to the document. This is handy if you want a widget on the Product detail page to show ONLY documents with a particular tag (more on that later).
- Repeat these steps for any other documents you wish to add to this product.
- Click Save / Save and Exit.
Add the Widget
Now you'll need a widget on the product detail page to actually display these handy documents!
- In the CMS, navigate to Content → Standard Pages.
Defining File Types
The Feature Settings page is where the permitted file types are specified. You can update the comma-separated list to add or remove file formats.

To edit this list, navigate to Settings → Feature Settings, then Edit the Product Documents feature.
The full list of allowable file types is as follows: .jpg,jpeg,png,gif,html,htm,txt,doc,docx,zip,pdf,xls,xlsx,csv