...

This guide covers the implementation of PayPal Express checkout on BPD websites.
| Info | ||
|---|---|---|
| ||
In order to offer PayPal as a payment option to your customers, you must allow them to pay by credit card. Each customer account has a 'Credit Card Payments for Orders' flag, which must be set to 'Yes' in order for PayPal to work. If the Customer Maintenance page shown below isn't visible to you in the CMS, please let us know. We can also update customers in bulk for you if required.
|

Configuring PayPal Express
- Contact Commerce Vision and have us enable the PayPal Express feature for your site.
- Login to the CMS with your PayPal Merchant credentials handy.
- Navigate to Settings → Feature Management.
- Configure the PayPal Express feature.
In the Configuration Settings section, enter your PayPal Express credentials:
Field Value PayPal Express Endpoint https://api-3t.sandbox.paypal.com/nvp PayPal Express Login URL https://www.sandbox.paypal.com/cgi-bin/webscr?cmd=_express-checkout PayPal Express Username [Your PayPal Merchant username] PayPal Express Password [Your PayPal Merchant password] PayPal Express Signature [Your PayPal Merchant signature]
Info For testing on your Stage site, use the sandbox environment credentials noted here. Contact Commerce Vision Support if you require assistance with this.
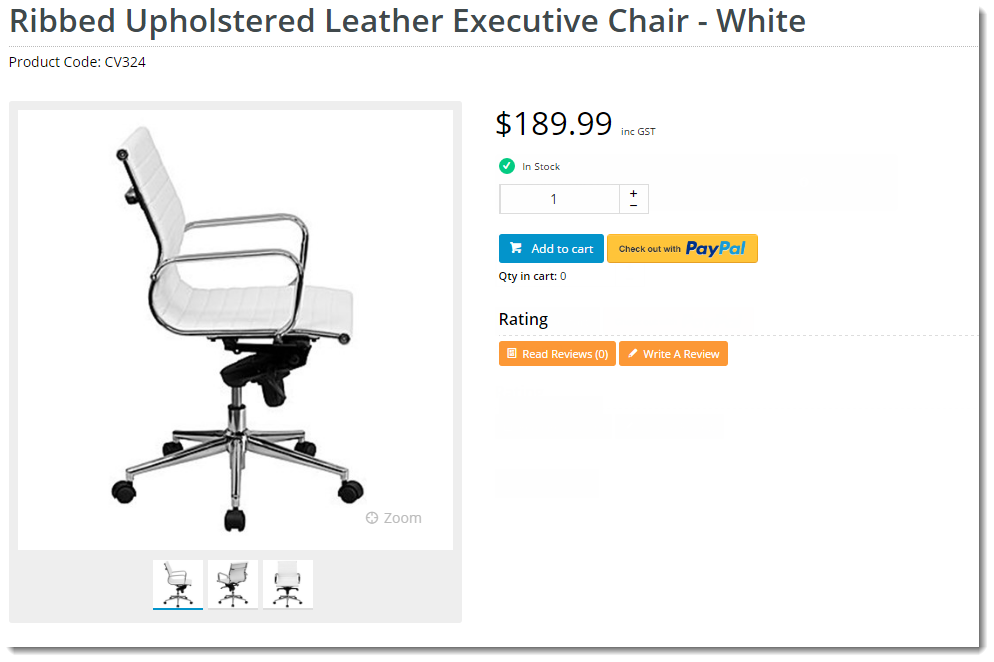
Next, determine where you'd like the 'Checkout with PayPal' button to appear. It can be displayed in the Cart and/or on the Product Detail page. Examples of each are shown below.

Cart Product Detail
- Toggle the options on/off according to your site requirements.
- Click 'Save' or 'Save and Exit' at the top of the page to save your changes.


...
- On the Feature Settings page, click the 'Overrides' icon on the option you wish to edit.
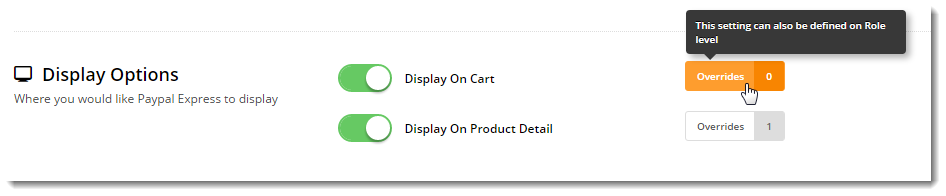
- The Setting Override window will open, with your site's Global setting displayed at the bottom. This is the default value you are about to override at Role level (but you can also update this value here if you wish).
- Under Role Overrides, click 'Add Override Setting'.

- Enter the Role Name in the input box. Suggestions will appear - select the correct role from the list.
- Set the Override Value (toggle the option on/off as required).
- Repeat Steps 2-4 for any other roles that require overrides.
- Click 'Confirm'.

- The window will close and the Overrides counter will be updated to reflect the number of overrides entered.

- Repeat Steps 1-8 for the other display option if required.
- Click 'Save' or 'Save and Exit' at the top of the page to save your changes.

...