...
| Multiexcerpt | ||||
|---|---|---|---|---|
| ||||
...
| Multiexcerpt | ||
|---|---|---|
| ||
**Overview content**
|

...
How does it work?Prior to the introduction of the Product Variant Grid Widget, if the customer wanted to select multiple variations of the master product, they could use the drop-down selection of, in this example, size and colour, and add each selection to the cart. That's a lot of mouse clicks. We've made it easier.
You can add the Product Variant Grid Widget to the Product Detail Template or the Product List Item Zoned Template or both to enable your customers to easily see and select from all available product variants, such as size and colour, from the master product rather than choosing from the individual child products.
|


Step-by-step guide
You can use the Product Variant Widget in multiple locations, which change the view the customer sees.
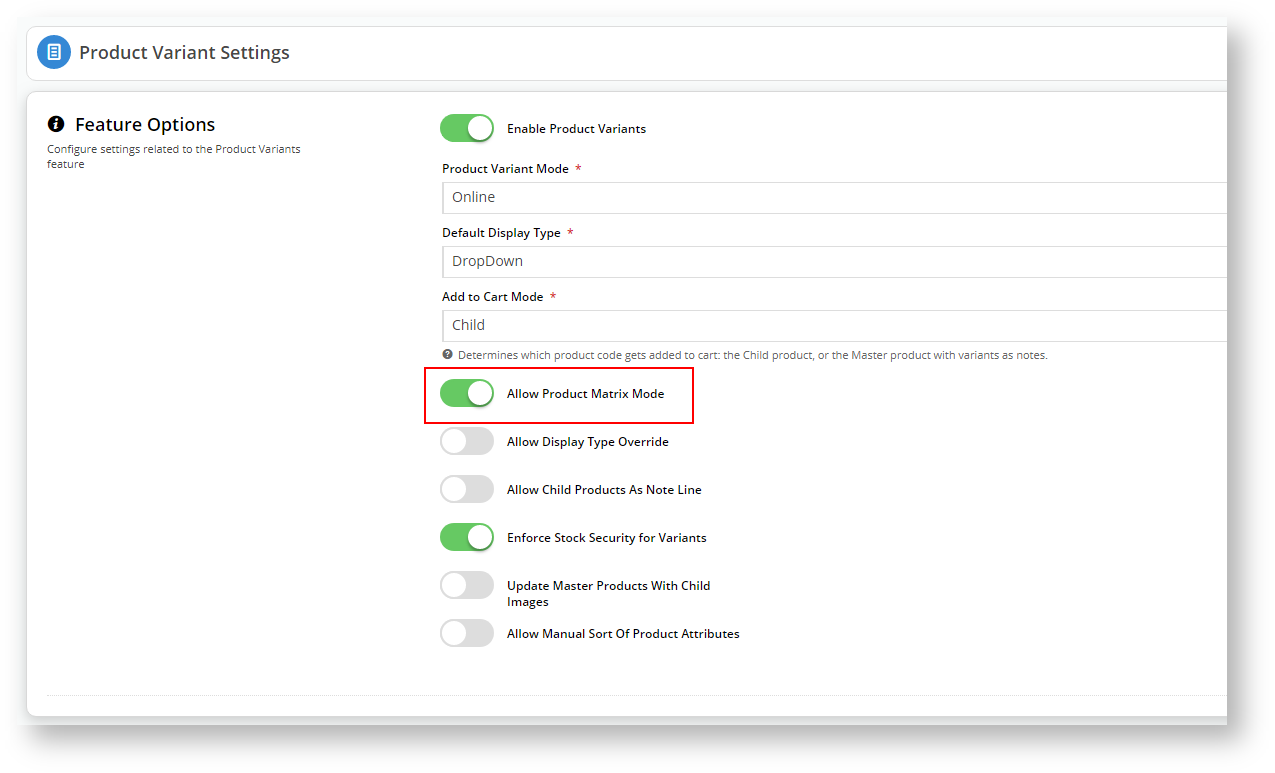
Configure within CMS
1. Log into CMS
2. Navigate to Settings → Feature Management
3. Select Products & Categories
4. Locate Product Variants in the list and click Configure.

5. If it isn't already, enable "Allow Product Matrix Mode".
6. Save your changes.
Let's add the Product Variant Grid to our Product Detail Template so the grid will display when a customer clicks on the master product.
7. Navigate to Content → Pages & Templates
8. Click on Products and select the Product Detail Template.
We will add the Product Variant Grid widget into the same zone where the Product Purchase Details and Product Field Widgets are located. In our example, that is the MainRight Zone.
9. In the Zone:MainRight, click
10. Search for variant and highlight Product Variant Grid in the search results.
11. Click
12. In the widget configuration window, you don't need to change any fields for the widget to work. However, we recommend adding a meaningful description.
13. You can customise the Heading Text. The Heading Text is what the customer will see when they are viewing the master product in detail mode. You can display the Heading Text (or not) by toggling the Show Heading? button.
14. If you disable the Heading Text, the customer won't have to click the drop-down to display the product selection grid.
Info We recommend disabling the Heading Text to encourage buyers to use this easy selection method. What does your customer see?


1. Navigate to your CSS
2. Search for your master product and click on it to open the product detail view. In our example, we are looking at High Visibility Waterproof Safety Trousers.
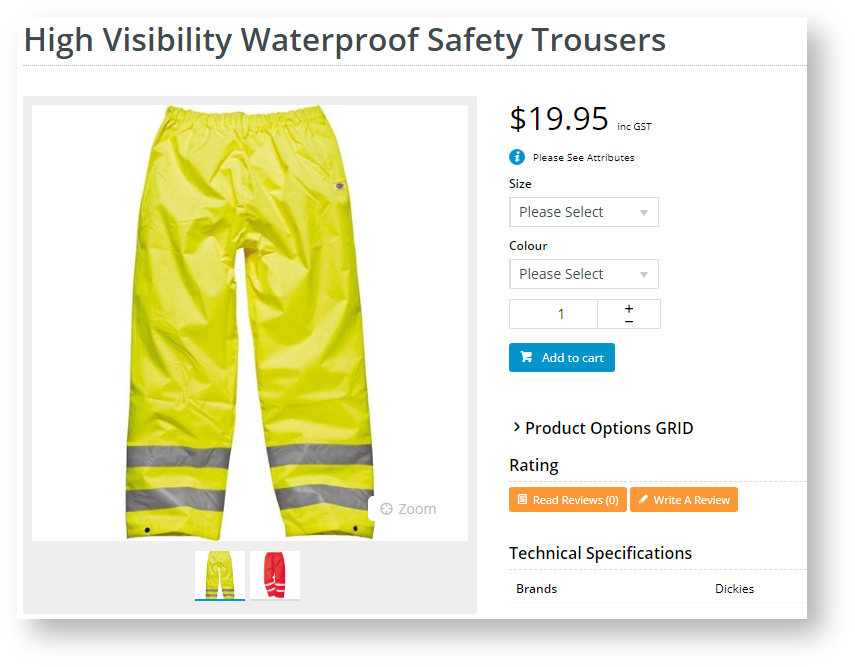
3. If you opted to display the Heading Text, then the Product Options Grid is collapsed. Your customer may not know the easy selection grid exists.
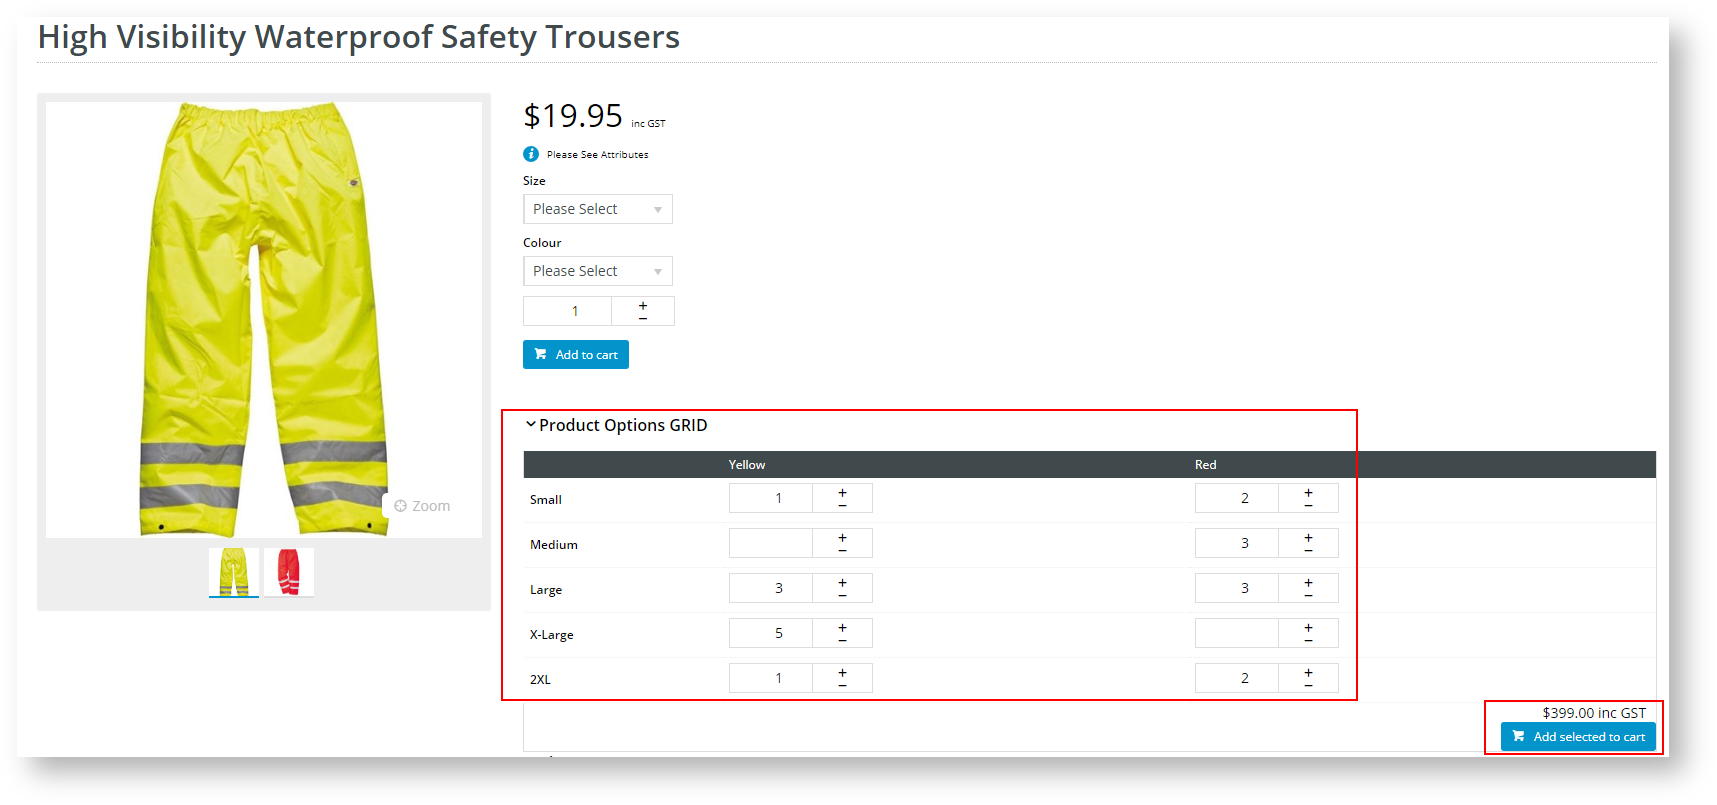
a. Click the arrow next to your Heading Text (Product Options GRID) to expose the grid.
b. Make your selection by clicking the + sign next to each variant combination you need or just type in the number.
4.
If you opted to disable the Heading Text, then your customer will see the easy selection grid as soon as they click on the product.
5. Click Add selected to cart, and follow your usual checkout process.
Additional Information
| Multiexcerpt | ||
|---|---|---|
| ||
...