...
4. Locate Product Variants in the list and click Configure.

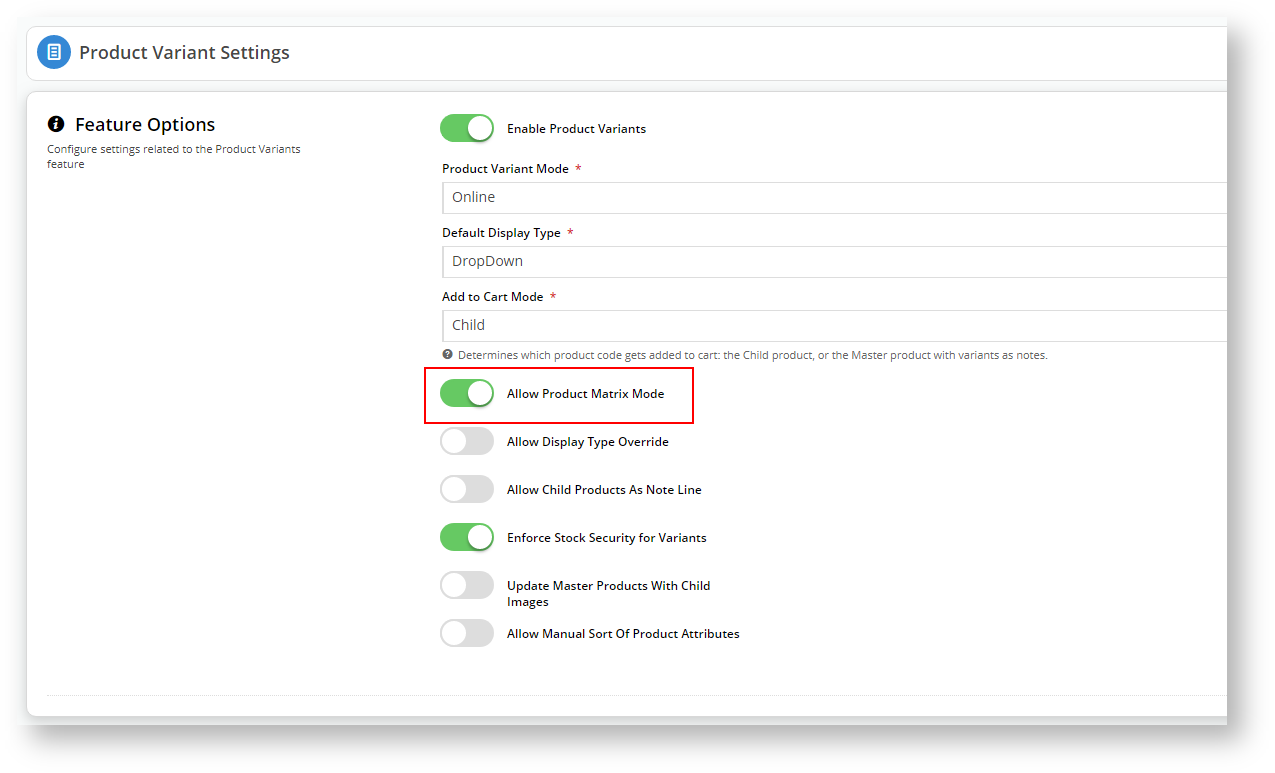
5. If it isn't already, enable "Allow Product Matrix Mode".
6. Save your changes.
Let's add the Product Variant Grid to our Product Detail Template so the grid will display when a customer clicks on the master product.
7. Navigate to Content → Pages & Templates
8. Click on Products and select the Product Detail Template.
We will add the Product Variant Grid widget into the same zone where the Product Purchase Details and Product Field Widgets are located. In our example, that is the
.
Anchor
mainright mainright 9. In the Zone:MainRight, click
10. Search for variant and highlight Product Variant Grid in the search results.
11. Click
12. In the widget configuration window, you don't need to change any fields for the widget to work. However, we recommend adding a meaningful description.
13. You can customise the Heading Text. The Heading Text is what the customer will see when they are viewing the master product in detail mode. You can display the Heading Text (or not) by toggling the Show Heading? button.
14. If you disable the Heading Text, the customer won't have to click the drop-down to display the product selection grid.
Info We recommend disabling the Heading Text to encourage buyers to use this easy selection method. What does your customer see?


1. Navigate to your CSS
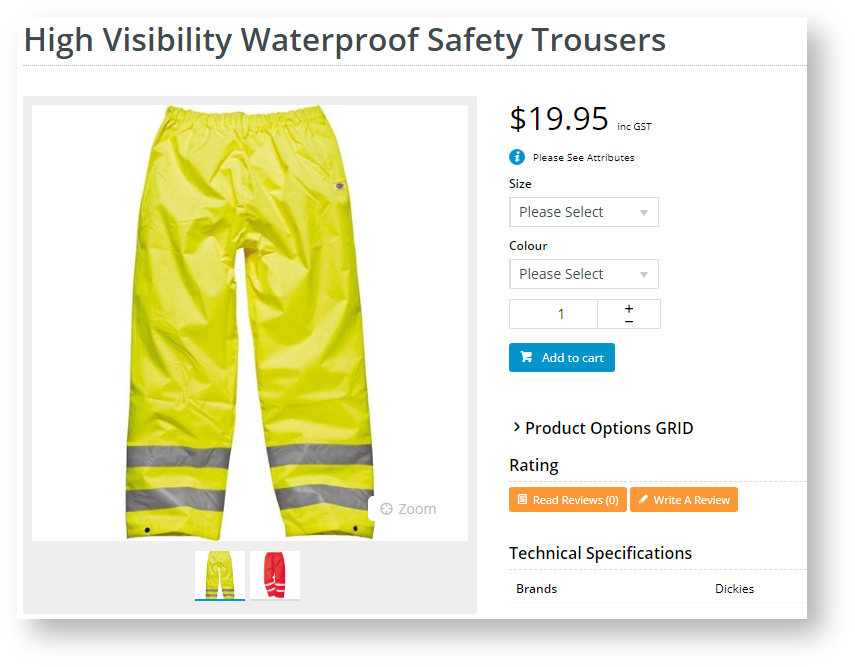
2. Search for your master product and click on it to open the product detail view. In our example, we are looking at High Visibility Waterproof Safety Trousers.
| Info |
|---|
| With the grid collapsed, your customers may not realise that the easy selection grid exists. |
...
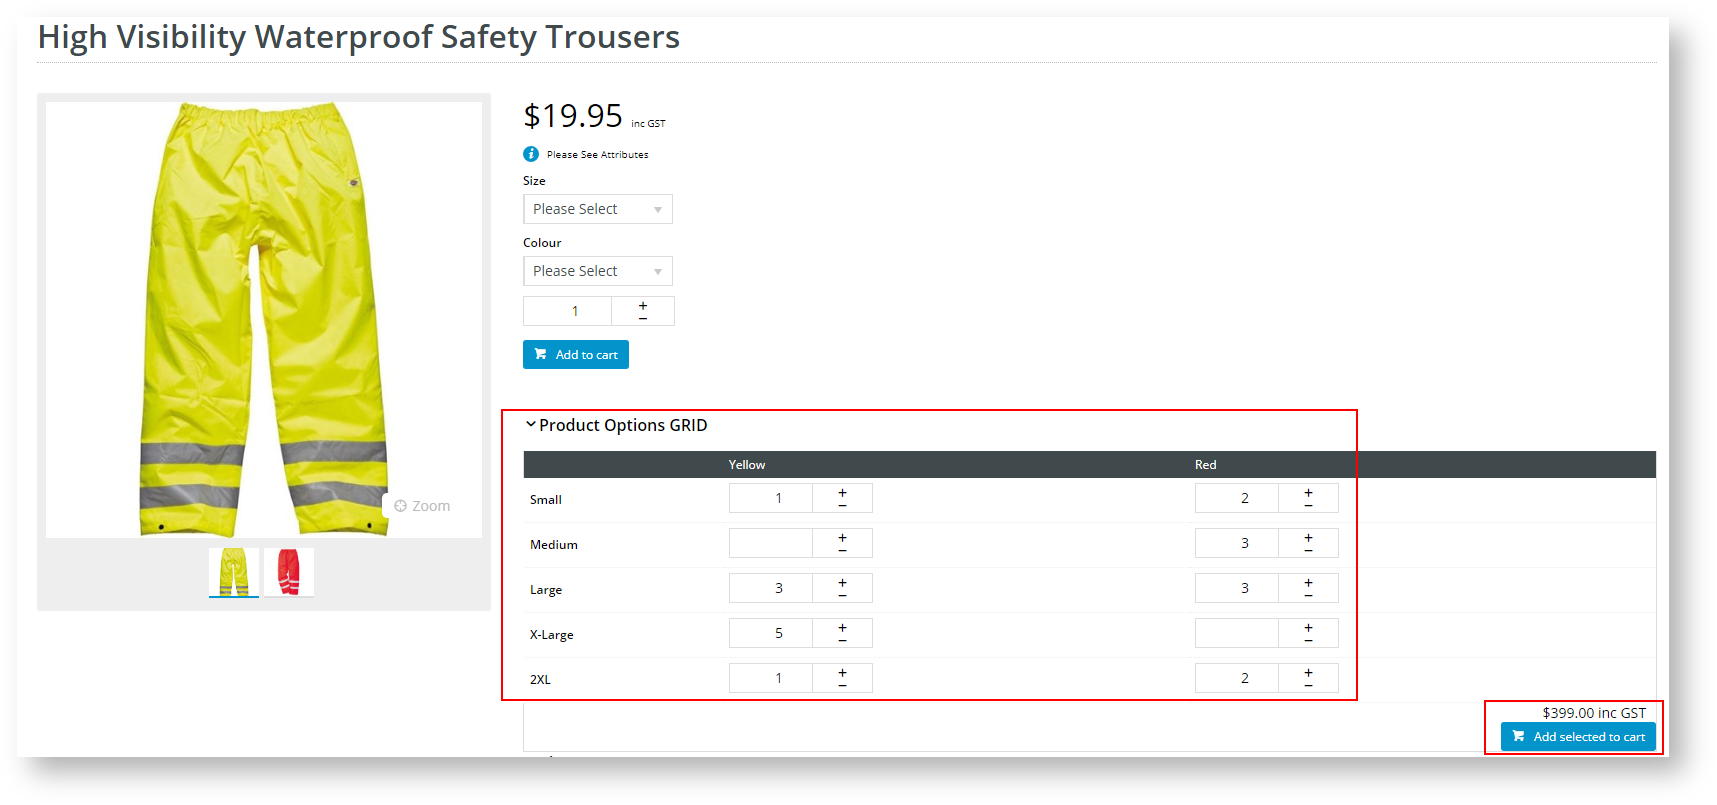
3. If you opted to display the Heading Text, then the Product Options Grid is collapsed.
a. Click the arrow next to your Heading Text (Product Options GRID) to expose the grid.
b. Make your selection by clicking the + sign next to each variant combination you need or just type in the number.
4.
If you opted to disable the Heading Text, then your customer will see the easy selection grid as soon as they click on the product.
5. Click Add selected to cart, and follow your usual checkout process.

...
The display your customer will see changes dramatically when you add the Product Variant Grid Widget to the Product List Item Zoned Template.
1. Navigate to Content → Pages & Templates
2. Select Products
3. Edit the Product List Item Zoned Template
4. Choose a zone in which to add the Product Variant Grid Widget. In our example, we added it to the Column2Right zone.
5. Follow steps 9 to 11 from the Previous Section to add the widget to this zone.
6. As per the previous section, decide whether to turn the Heading Text on or off and save your changes.
7. You should see the widget in your Product List Item Zoned Template.
8. Publish your changes to your CSS.
What will your customer see?
1. Go to your CSS and search for the same product you used in the previous section. In our example, we are searching for High Visibility Waterproof Safety Trousers.
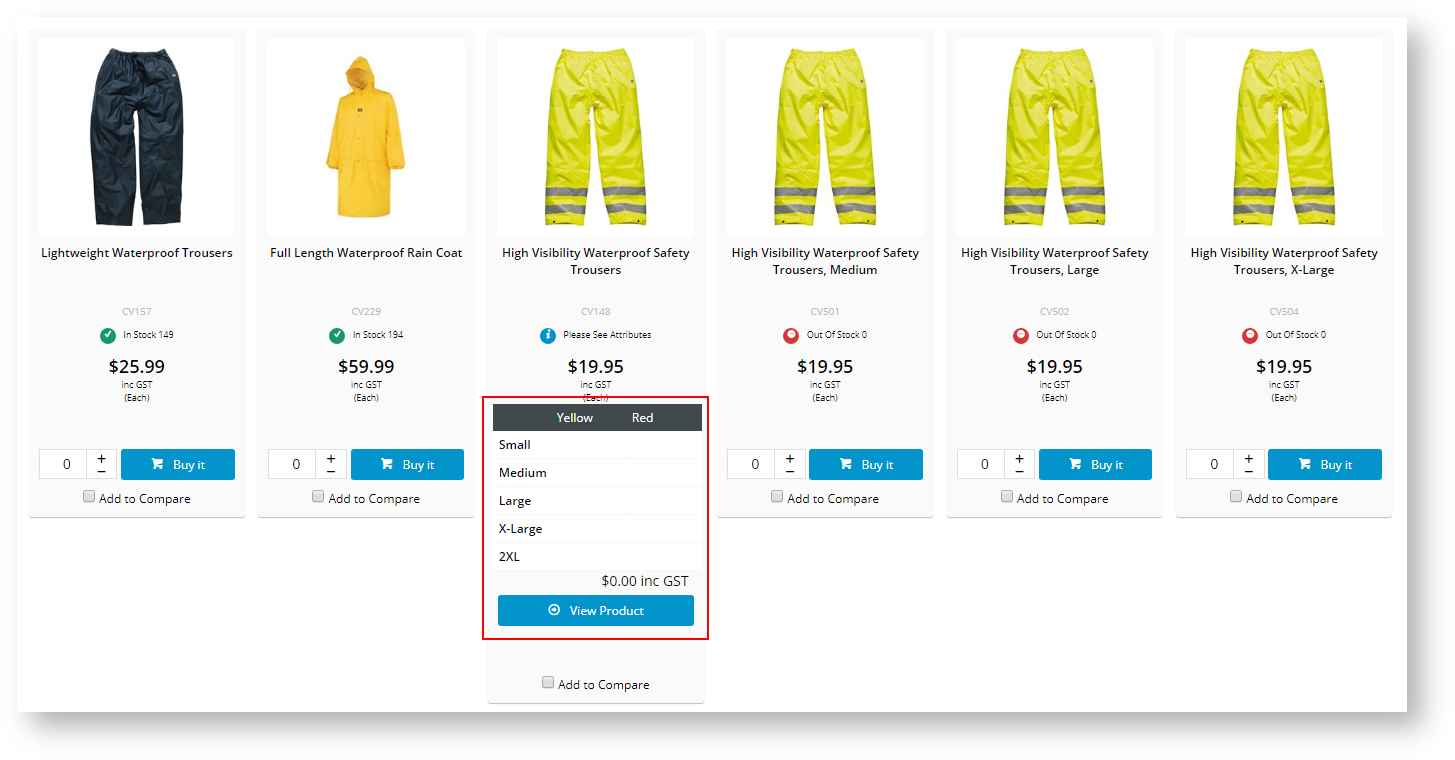
2. In LIST view, your customer can select the product variations and add to their cart all from the search results window.
3. In GRID view, the selection isn't available, as the display allocated to each product in grid mode doesn't leave much room.
4. Based on the discrepancy in display, you may want to disable the Product Variant Grid from displaying in List or Grid mode and only show when the customer clicks on the product.
Other widgets that control your customer's view
1. You can disable existing widgets to change what your customer sees when viewing products with variants.
2. Navigate to Content → Pages & Templates → Products
3. Edit the Product List Item Zoned Template
4. Disable the Product List Attributes widget, the Product List Qty Box widget, and the Product List Add to Cart widget. In our example, they are all located in Zone:Column2Bottom.
5. When your customer now searches for the product with variants, they will see only the Product Variant Grid to easily make their selection.
Let's look at another display adjustment. This time, the product detail view.
6. When your customer clicks on the product, by default, the main variant selector displays in conjunction with the Product Variant Grid widget.
Having two variant option displays gives the customer a choice on how to choose their size and colour, but it may also create confusion. Let's remove the variant selector (outlined in red) and leave the variant grid in place.
7. Navigate to Content → Pages & Templates → Products
8. Edit the Product Detail Template
9. The Product Purchase Details widget is the one we want to disable. However, it also controls the price display and many other features, so for the features that we want to keep, we need to add those widgets individually.
10. We definitely want to display the price, so we need to select to
and search for Product Price.
11. Do you want to show the price that includes or excludes GST? Choose the widget according to your business practices and add it to the same zone as the Product Variant Grid widget.
12. Accept the default values, Enable widget on Save, and click Save.
13. Go to CSS and click on your master product to view the Product Variant Grid selection.
14. Review the other options in the Product Purchase Details widget (the one we just disabled) to see what other features you would like to keep.
a. For instance, do you want to display the Recommended Retail Price (RRP)? If so, click
b. Your customers may often make use of the Favourites Button, if so, add the Favourites widget back in.
c. The Availability Widget will show your customers if products are in or out of stock.
d. If you offer your customers Afterpay, you may want to add the Afterpay Order Summary widget into the zone.
Basically, any option in the Product Purchase Details widget can be added back in as a single widget. Adding them individually gives you the opportunity to reorder them or place them in different zones.
15. Your final Product Detail Template may look something like the following. As you can see, the system gives you the flexibility to add widgets individually into zones that complement your site's layout.


Additional Information
| Multiexcerpt | ||
|---|---|---|
| ||
|
...