Contents
| Table of Contents | ||||||
|---|---|---|---|---|---|---|
|
Overview
| Excerpt |
|---|
The products on your website are all integrated from your ERP, but did you know there's a host of product information that can also be maintained via the CMS, completely independent of ERP systems such as PRONTO? |
...
With the feature enabled, you can edit the settings to configure Product Maintenance options to suit your website and workflow.
1. Configure Feature Settings
Follow the steps below to define your Product Maintenance settings. Once the options have been configured, you're ready to maintain products in the CMS. Simply navigate to Products & Categories → Product Maintenance and select the product you wish to edit.
| Expand | ||||
|---|---|---|---|---|
|


2. Product Search
To perform maintenance on one or more products, the first thing to do is find them. The Search finds products via product name, product code or keywords (from the Product Description field). You can also add a filter to search for products that have specific product attributes.
...
4. To run the search, click Search. All products applicable to your search will be displayed. You can edit a product by clicking on Edit next to the product.
5. To clear your search and return to the default 'Product Search' screen, click Reset Search.
3. Product Maintenance Options
The sections of the Product Maintenance screen are detailed below.
If a particular section does not appear on your Product Maintenance page, it's likely that you have not enabled it in 'Feature Settings'. See Section 1 of this document ('Configure Feature Settings') for guidance.
ERP Product Data
This section displays the product information integrated from PRONTO. This data is not editable via the CMS and is shown for reference only.
You may expand this section to reveal additional product fields from the ERP, such as Stock Group, Unit Description, and Condition Code, to name a few.

Product Information
The Product Information section contains editable product fields. Below is a table containing each field and its usage.
...
| Product Maintenance in CMS | Resulting Output |
|---|---|
|
|


Categories
In this section, you can add the product to as many categories as required.
...
| Field | Description | Example |
|---|---|---|
| SEO Url | The user- and search engine-friendly URL for the product page. | Here's an example of these SEO settings in the real world. The Commerce Vision Blog is obviously not a product, but the principles are the same.
|
| Page Title Tag | The title that displays on search engine results pages, just above the URL. | |
| Meta Description Tag | The blurb that displays under the Title and URL. |

Custom Fields
If you have created any custom fields for the Product table (and they are marked 'active'), the maintenance area will display here.
...
Need more information? See How To Add Custom Fields To Products and Categories.
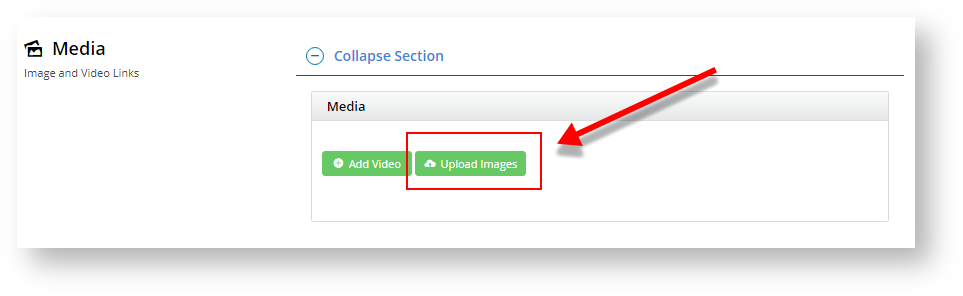
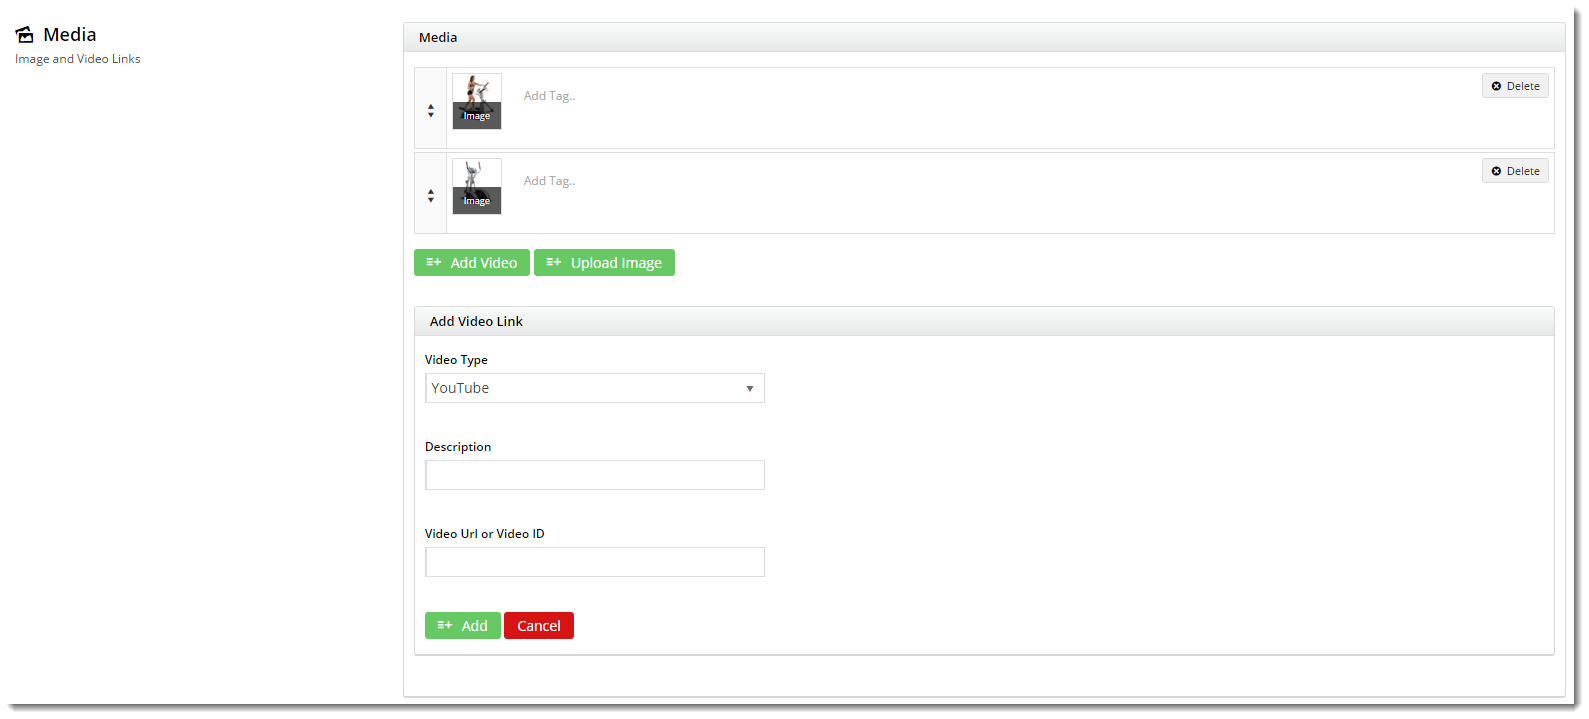
Product Media
You maintain images and videos to display in the product gallery here. Both images uploaded via the Integrator and via the CMS will appear in this section. You can re-order images by dragging and dropping.
| Info |
|---|
By default, the CMS-uploaded image at the top of this list will be the first image displayed in any search on your site and in the Product Detail page. If a product has images uploaded via the Integrator and the CMS and you want the first Integrator-uploaded image to display first, please contact Customer Support to enable this option. Note - this option is available only for v4.21.02 or above. |
Adding Images
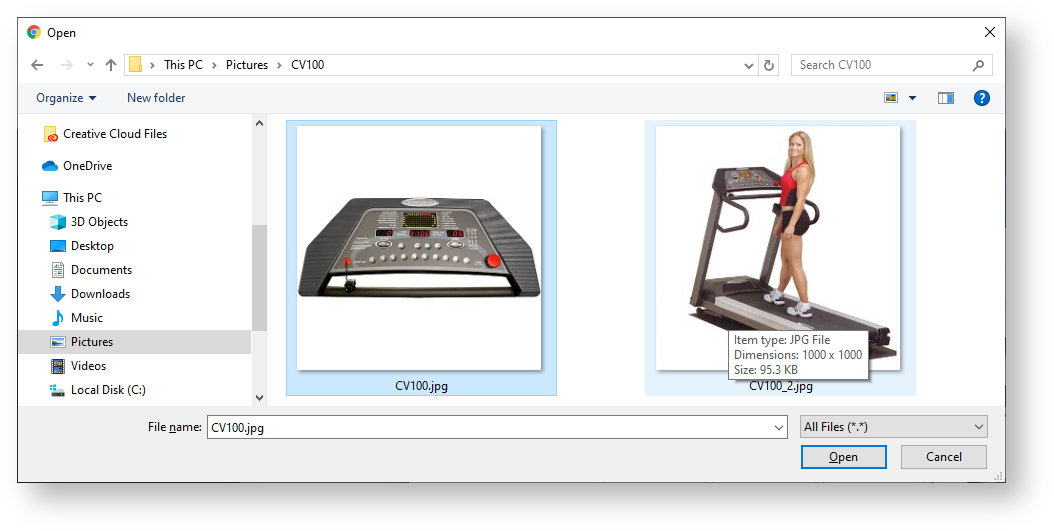
1. To add an image or multiple images simultaneously, click Upload Images.
2. Navigate to your file(s) and click on them to select. Use 'Ctrl-click' or 'Shift-click' to select multiple images. Click Open.
3. Once the images have finished uploading, click Insert.
4. Alternatively, if the images have already been uploaded to the CMS file manager, you can click multiple image checkboxes simultaneously and click Insert.
5. Whichever method you use, once you click Insert, the image thumbnails will now appear in the product's media list.
6. You can add a description and tag your images by entering a value in the 'Add Tag' field.
7. Click 'Save' or 'Save and Exit'.


Adding Videos
Video can also be added quickly and easily. Both YouTube and Vimeo formats are supported. To add a video, see our guide - Adding Video to a Product Page.
Document Links
You can add links to documents relevant to a product, e.g., size guides, product specifications or installation instructions. The links with document information displays in the Product Detail page. You can add a link to a document that is in CMS already or upload it here.
...
| Tip | ||
|---|---|---|
| ||
You can also bulk link multiple products to documents using the Product Document Import function. |
Features
This is another name for your product metadata. The information here is what your customers will use to filter by when viewing a page full of products. This data may also show in the Product Compare window, and in a product's Technical Specifications.
...
If you're unsure which mode your site is using, feel free to check with us.

Accessories & Alternates
If your site has elected to maintain Accessories & Alternates online, this is where you can edit them.
...