...
| Multiexcerpt | ||
|---|---|---|
| ||
|

Contents
...
Guest Checkout can be enabled for your B2C site quickly and easily via in the CMS. Simply follow the steps below.
...
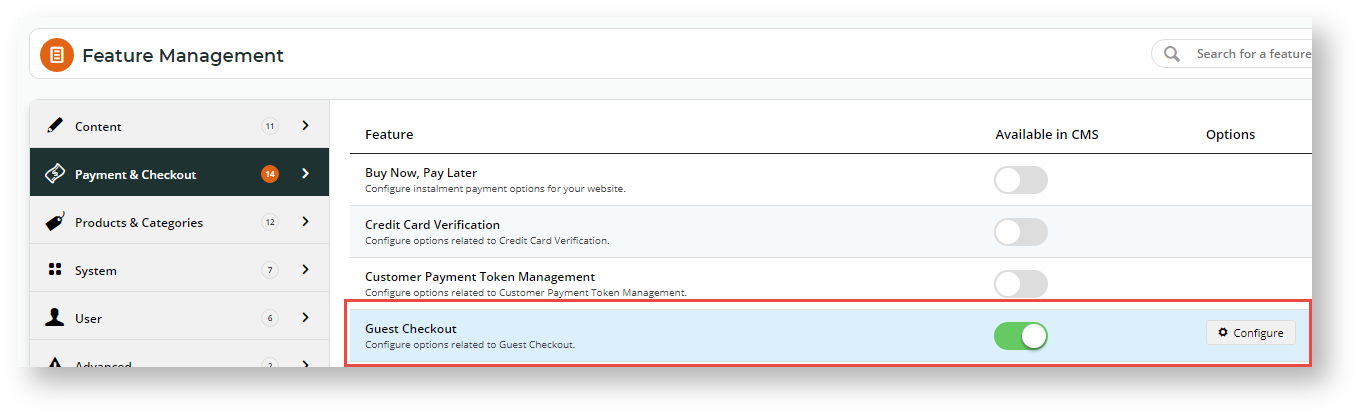
- In the CMS, navigate to Settings → Feature Management → Payment & Checkout.
- Toggle on Guest Checkout, then click Configure.
- In 'Guest Checkout Feature Settings', toggle on Guest Checkout.
- Select the role(s) that should utilise will use the Guest Checkout template. (The most common application is the 'Public', pre-login role). Note - Guest Checkout should not be enabled for B2B, Accounts, or Administrator roles.

- Click 'Save' to save changes and stay on the page, or 'Save and Exit' to save changes and return to the Features indexTo save your changes, click Save or Save & Exit.

Congratulations, Guest Checkout is now enabled!
...
When a user checks out as a guest, they are given the option to create an account at the same time. If the user ticks the 'Create Account' option during checkout, the system will search for check whether the guest user's email address and
...
is already registered.
- If not found, it will create a new login based on the data supplied will be created, and send the standard New User Registration email is sent.
- if If found, the user is sent an email advising that informing them they already have an account. They are also provided with their login ID.
To customise this email template:
- Login to In the CMS.Navigate to Content –> , navigate to Content → Emails.
- Select the 'User Exists Email' template.
- Locate the 'User Registration' widget and click 'lick Edit'.
- Ensure the widget option to 'Show User Exists Message' is is ticked. If not, tick it and click 'Save'.
- Click the 'the Test Email' button to send yourself a copy.

- Review the content of the email and determine whether changes are required.
- The default widgets will be listed in each of the zones on the template.
- Drag and drop widgets to reorder them in the layout.
Click- 'Click Edit' on any of the widgets to configure options as required.
- Click the 'the Test Email' button to send another copy for review.

...
Once Guest Checkout has been turned on, you may wish to customise the look and feel. The Guest Checkout Template becomes available in the Content menu once the function is enabled.
To edit the template:
- Login to In the CMS.Navigate , navigate to Content --> → Standard Pages.
- Select the 'Guest Checkout Template'.

- The default widgets will be listed in each of the zones.
- Drag and drop widgets to reposition them in the layout if required.

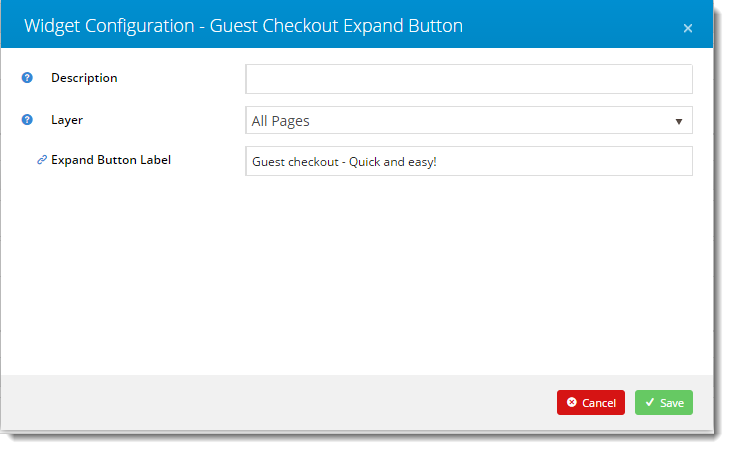
- To customise the text on the Guest Checkout button, add the 'Guest Checkout Expand Button' widget to the Zone Guest Checkout.

- Click 'Edit' on the widget to update the text, then click 'Save'.
- Load your website in another browser / incognito tab and test the output. Adjust widgets and options as required.

...
| Minimum Version Requirements |
| |||||
|---|---|---|---|---|---|---|
| Prerequisites |
| |||||
| Self Configurable |
| |||||
| Business Function |
| |||||
| BPD Only? |
| |||||
| B2B/B2C/Both |
| |||||
| Ballpark Hours From CV (if opting for CV to complete self config component) |
| |||||
| Ballpark Hours From CV (in addition to any self config required) |
| |||||
| Third Party Costs |
| |||||
| CMS Category |
|
Related help
| Content by Label | ||||||||||||||||||||
|---|---|---|---|---|---|---|---|---|---|---|---|---|---|---|---|---|---|---|---|---|
|
...