...
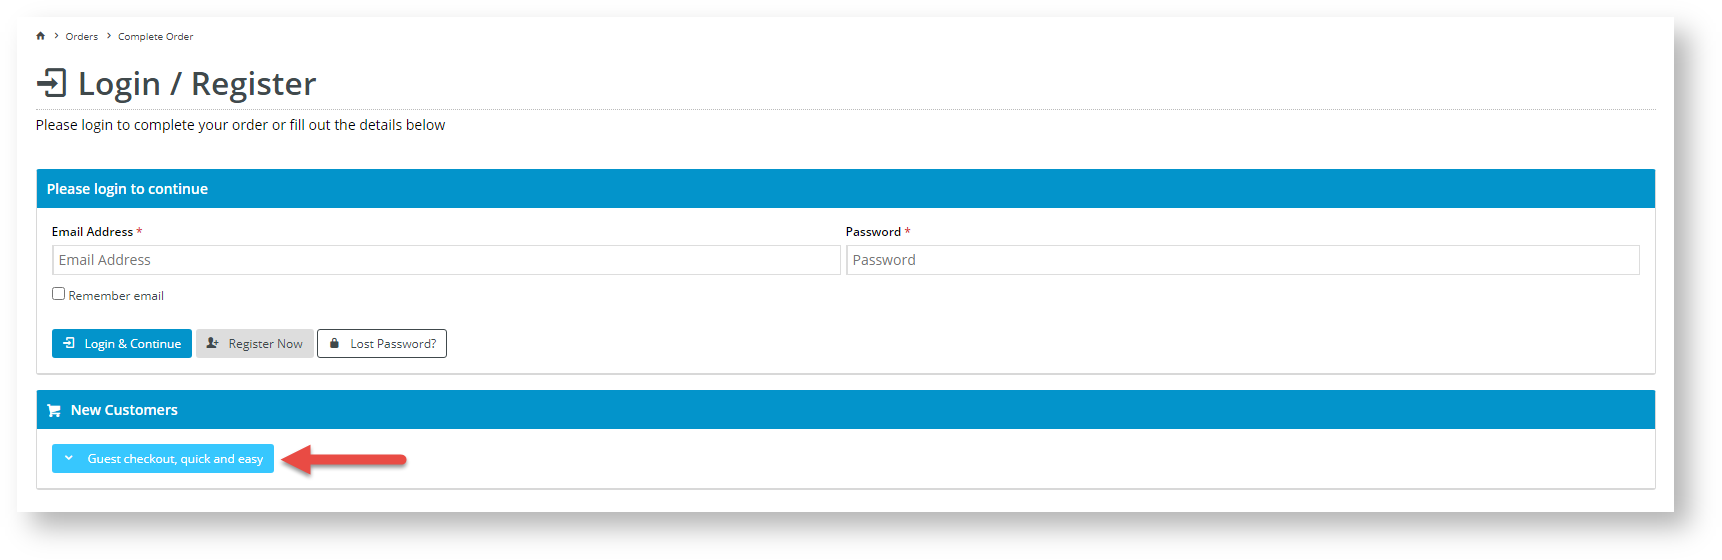
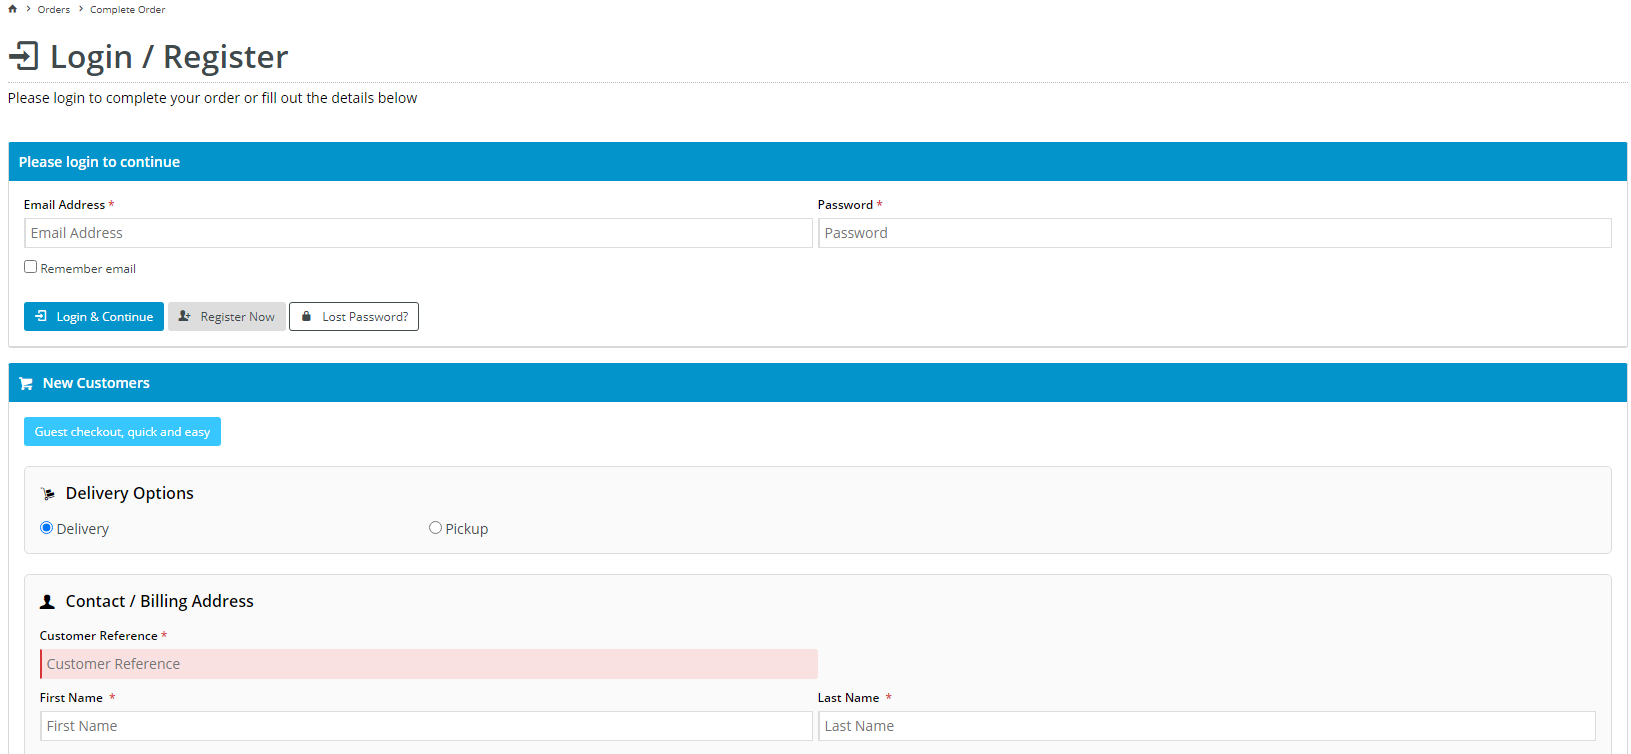
When a new website user or one that is not logged in navigates to the Checkout page, they will see the Guest Checkout button. Clicking it will display the Guest Checkout fieldscontent, which allows the user to complete to enter their contact, delivery and payment details and complete the order without logging in. For sites running 4.23+, the expanded Guest Checkout view can be displayed as the default.
| Unexpanded Guest Checkout view | Expanded view with Guest Checkout viewcontent |
|---|---|
|
|
...
...
Step-by-step guide
Guest Checkout can be enabled and configured for your B2C site or users quickly and easily in the CMS.
Step-by-step guide
1. Enable and configure Guest Checkout
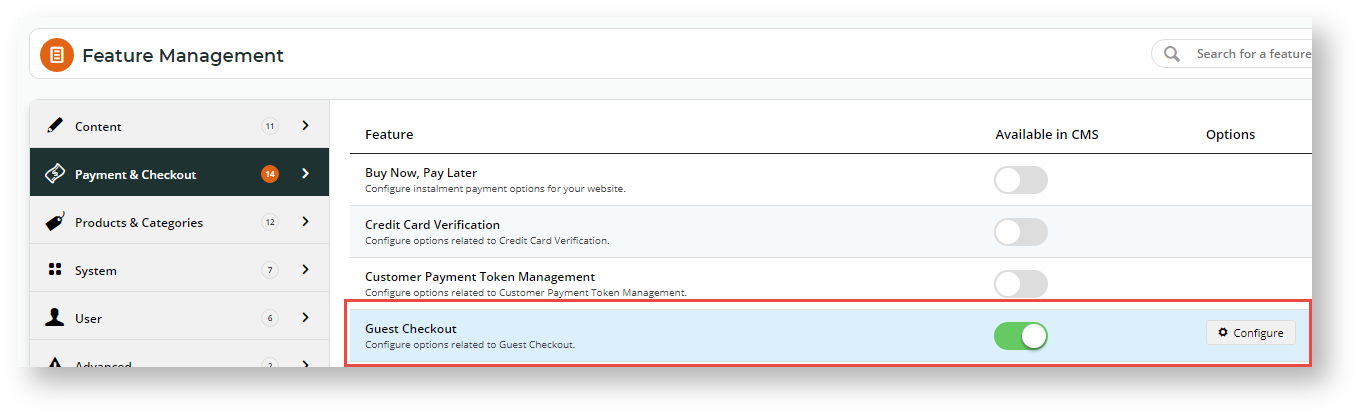
- In the CMS, navigate to Settings → Feature Management → Payment & Checkout.
- Toggle on Guest Checkout, then click Configure.
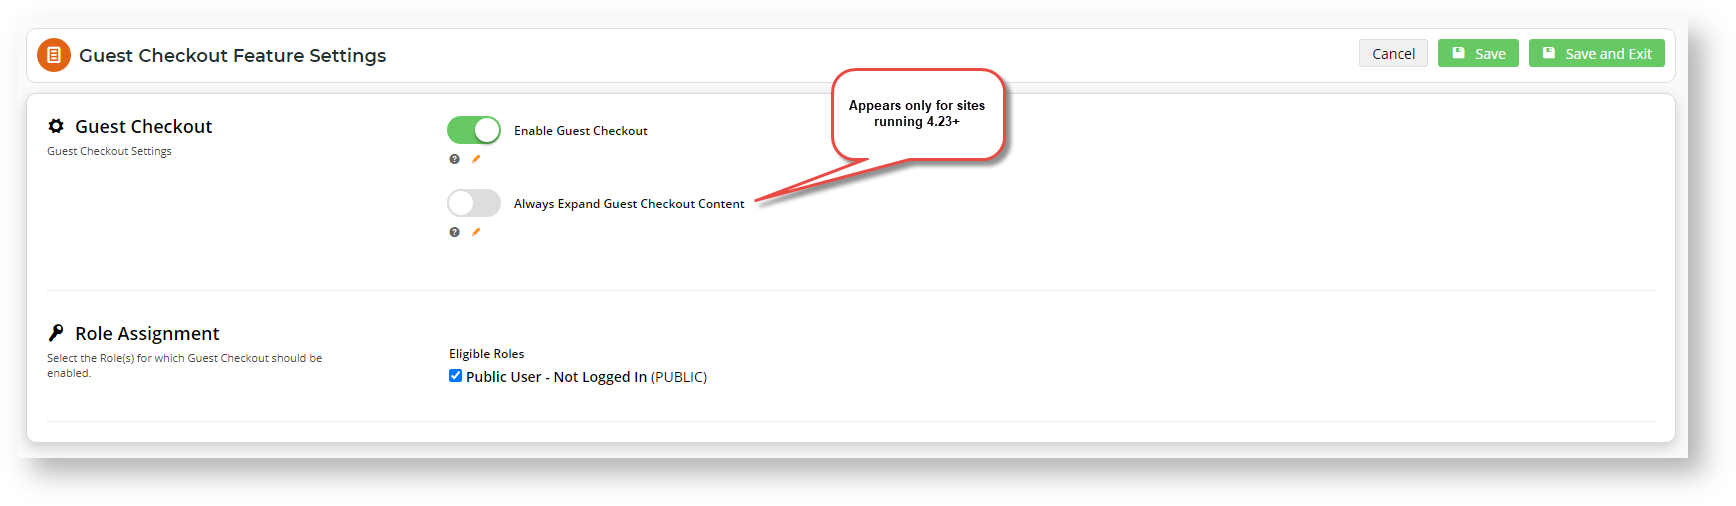
- In 'Guest Checkout Feature Settings', toggle on Guest Checkout.
- If your site is running 4.23 or higher, setting the default to expanded Guest Checkout content in the Checkout page is available. For this option, Toggle on 'Always Expand Guest Checkout Content'. Leave it off to display only the 'Guest Checkout' button.
- Select the role(s) that will use the apply to Guest Checkout template. (The most common application is the 'Public', pre-login role). Note - Guest Checkout should not be enabled for B2B, Accounts, or Administrator roles.
- To save your changes, click Save or Save & Exit.

...