...
The templates for these emails can be customised.
...
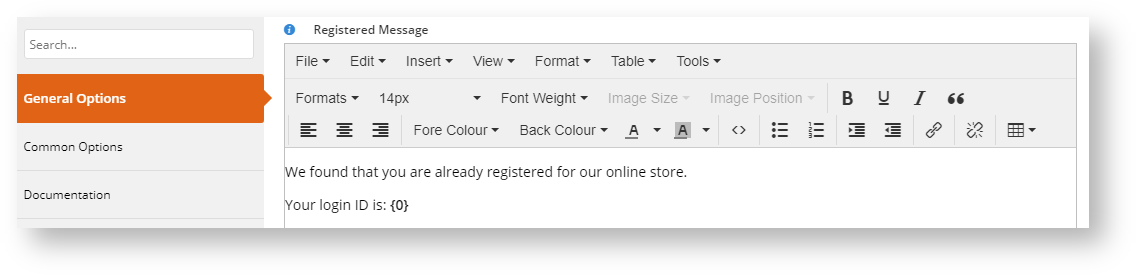
User Exists Email template
- In the CMS, navigate to Content → Emails.
- Select the User Exists Email template. The default widgets are listed in each of the zones on the template.
- Locate the User Registration widget and click Edit.
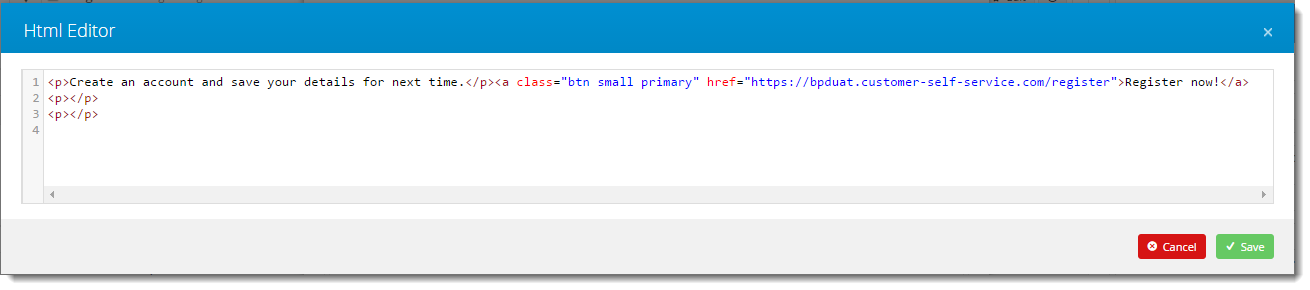
- Edit the Registered Message textbox as required. This provides the content for the email. (See help for the User Registration widget for customisation of other content.)
- Click Edit on any of the widgets to configure options as required.

- When you have finished editing, click the Test Email button to check that the content and layout of the email is correct.
- If the 'Page Preview' feature is active on your site, click Publish to save changes to the template.
...
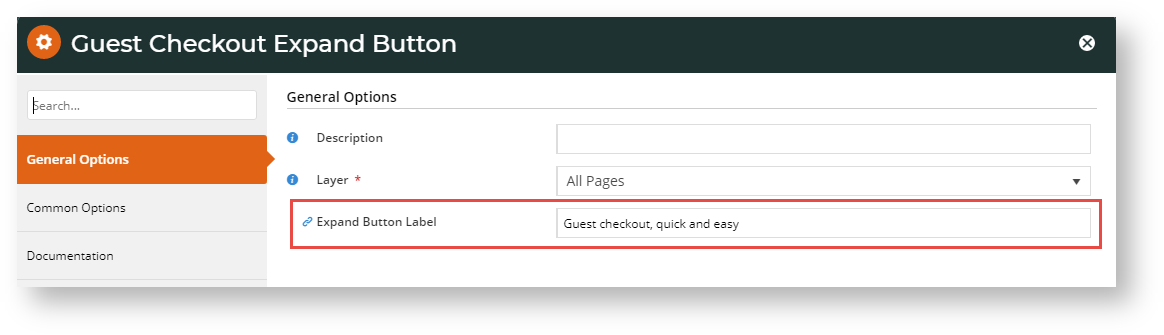
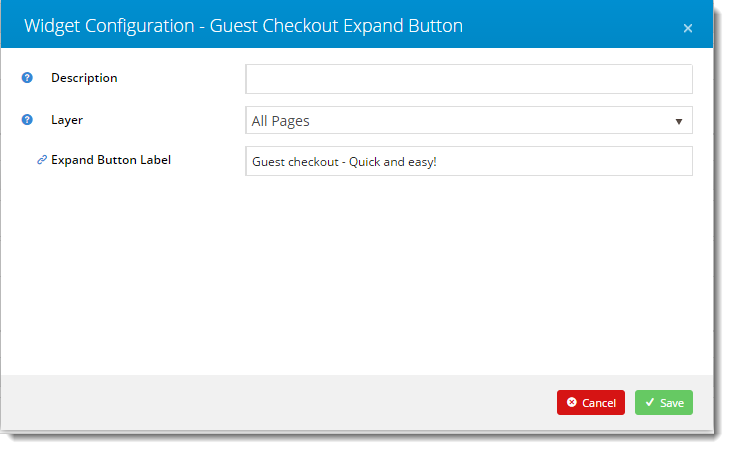
- To customise the text in the Guest Checkout button, add the 'Guest Checkout Expand Button' widget to the Zone Guest Checkout.

- Click Edit on the widget to update the text, then click Save. (See the Guest Checkout Expand Button widget help for more details),
Guest Checkout page content
...
Edit the content (Guest Checkout options label/button texts) in the widgets as required. (See Related widgets at the bottom of this page for specific help on customising each widget.)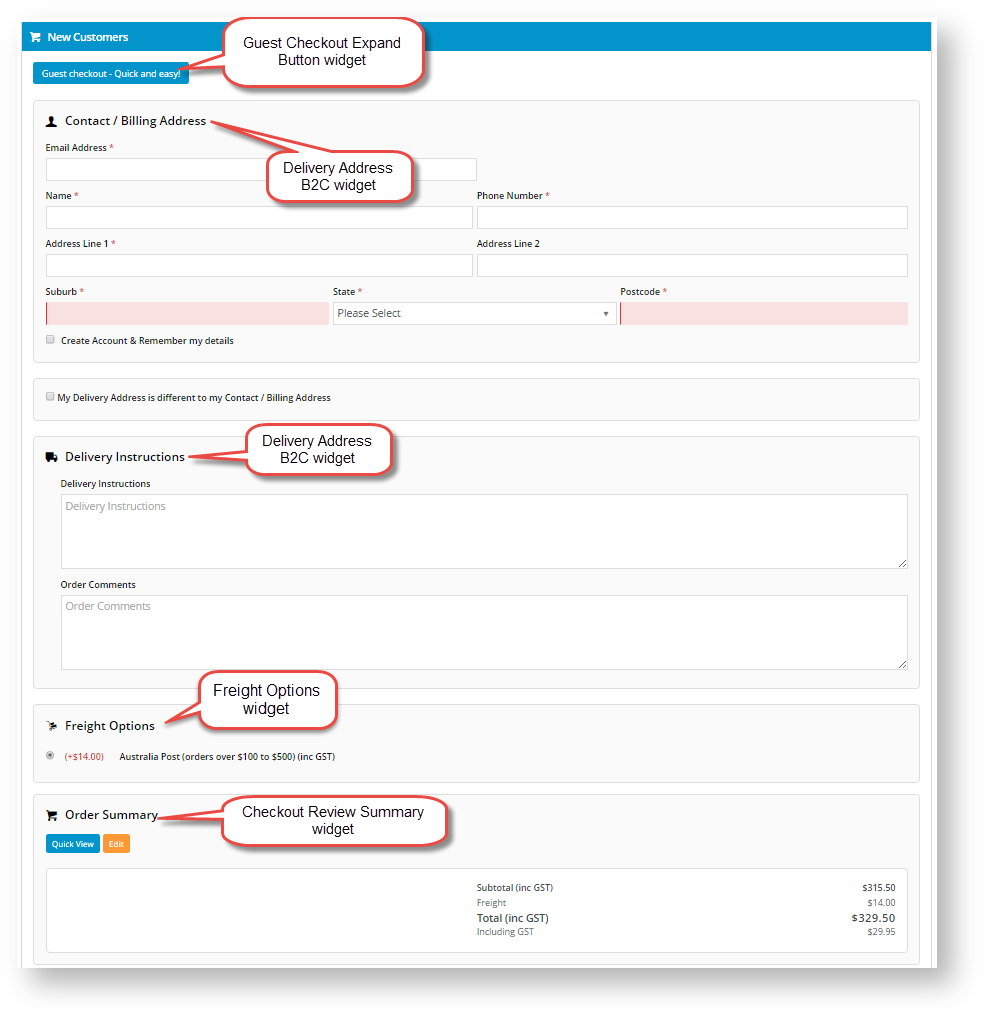
...
| Expand | ||
|---|---|---|
| ||
|

See Layout Creator help if you want to change the Guest Checkout page layout altogether.
Additional Information
| Multiexcerpt | ||
|---|---|---|
| ||
| -- |
...
| Content by Label | ||||||||||||||||||||
|---|---|---|---|---|---|---|---|---|---|---|---|---|---|---|---|---|---|---|---|---|
|
...