| Excerpt |
|---|
The Scheduled Reporting feature allows Admin to group specific reports and set Role permissions so that only certain Users can access these reports for the Report Generator and/or Subscription functionalities. |
| Children Display |
|---|
Overview
Report Generator permits Role-defined groups of users to re-run (generate) reports they have access to while logged into your website. During the report design stage, a report can be assigned to a Report Group. When configuring Report Generator, Admin adds the Report Groups that can be accessed via the Report Generator. Access restrictions can be set against Report Groups so that they are available only to nominated Roles in Report Generator. Before a User generates a report, they can change the order of sorting and grouping fields, add notes, and edit the report name, if they wish. A user-generated report does not edit the original report. It has a unique ID number, is saved with a new file name, and is also only available to the User who generated it.
As an additional option, Report Subscription can be enabled for Report Generator. This feature allows Admin to set the original report as subscribable. If a User has been granted Subscribe permissions, they can set a scheduled reporting task for their generated report to be automatically updated and emailed to themselves or other nominated recipients on a daily, weekly or monthly basis during the subscription period.
| Info | ||
|---|---|---|
| ||
|
Step-by-step guide for Admin
During the Report Design stage, a report is assigned a Report Group. When configuring Report Generator, you decide the following:
- which group(s) of Users (all or by Role) have access to Report Generator.
- which group(s) of Users (all or by Role) have access to Report Subscription. (Note - This additional functionality can be disabled but if used, permissions for Roles should be coordinated with those in Report Generator.)
- which Report Groups are accessible by which group(s) of Users (all or by Role). (Note - Permissions for Roles should be coordinated with those in Report Generator.)
Enable and configure Report Generator settings
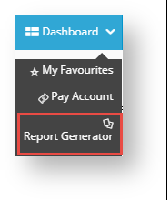
Report Generator can be enabled globally (for all Users) or restricted to specific Roles using the Override feature. If a User has access to Report Generator, when logged into the website, the Report Generator item appears in the Dashboard menu.
| Expand | ||
|---|---|---|
| ||
|
To enable Report Generator:
- In the CMS, navigate to Settings → Feature Management → System.
- Toggle ON Scheduled Reporting and click Configure.
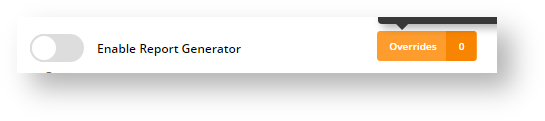
In the 'Scheduled Reporting Features Settings' screen, go to the Enable Report Generator toggle.
The Enable Report Generator toggle is is the global ON/OFF setting for the feature. You have the option to:
Toggle ON Global for all Users to have access to Report Generator, and set overrides for selected Roles, e.g., B2C customers, so the feature is not visible on their Dashboard.
Leave it OFF Global and set access overrides for selected Roles.To add an override,
- Click Overrides.
- Click the Add An Override button.
- In Role, select the role you want to add.
- To switch on the Override, toggle on Override Value.
- Click Confirm.
- To add any other Role Override required, perform steps b-e.
- Once you have exited the Overrides screen, in the main screen, click Save or Save & Exit.
- (Optional) Toggle ON Enable Report Subscription to allow all Users to schedule report updates to be emailed to themselves and/or other selected recipients. Leave OFF and set overrides for this functionality to be available only for selected Roles. (See Subscribe to Report.) Note - This option can be switched off but its use requires Report Generator to be enabled.

- To save your settings, click Save or Save & Exit.

| Warning | ||
|---|---|---|
| ||
Since reports may contain confidential data, it is strongly suggested that Report Generator configurations are tested in Stage before sending it to 'Live'. |
2. Configure Report Generator widget options (optional)
The Report Generator widget allows you to customise labels and text displayed in headings and fields in the Report Generator screen on your website. To access the widget,
- In the CMS, go to Content → Pages & Templates and find the Report Generator Template.
- Click Edit for the Report Generator widget.
- Edit the fields as you required. See Report Generator Widget help for more details.

Additional Information
| Multiexcerpt | ||||
|---|---|---|---|---|
| ||||
...