| Info | ||||
|---|---|---|---|---|
| ||||
|
Overview
| Info |
|---|
This guide is for the use of non-PRONTO ERP system only. |
systems only. For PRONTO, see Invoice Reprints (PRONTO). |
| Multiexcerpt | ||
|---|---|---|
| ||
Let your B2B customers reprint account invoices for all otheir orders online 24/7 - regardless of the entry point (Online, POS, etc). |
They can do this online without your assistance in Pay Accounts by :
selecting the invoices, entering an email address
Invoice reprint requests are sent from the web to your ERP, and then 'printed' using either email2me, or TrueForms Director, and clicking Send Reprint Request.
| Panel | |
|---|---|
On this page:
|
| Excerpt | ||
|---|---|---|
| ||
Allow your B2B customers to reprint invoices for their orders. (For PRONTO.) |
| Multiexcerpt | ||||
|---|---|---|---|---|
| ||||
| Warning |
|---|
If you do not have all of the prerequisites listed in the table below, please contact Commerce Vision to discuss your needs.
|
Step-by-step guides
In PRONTO
Using email2me
- Ensure the latest proledb.spl import program is installed.
- Access the Override program table (SYS.M359)
- Set CSS_INVPRT to 'E2ME'
- If the default email2me printer queue is NOT email to me
- Set CSSE2ME to '<printer name>'
- (Refer to $PRONTO/lib/printers for the name or consult the customer)
- Ensure the latest proledb.spl import program is installed.
- Set up a new entry in the $PRONTO/lib/printers file as follows:
cssinvoice, type=trueform, lpr=/xxx/lbin/cssinvoice $1, no_ff, no_form_type,
where xxx is the pronto directory (e.g. /home/pronto/lbin/cssinvoice would be the full path if /home/pronto was the PRONTO directory) - cd $PRONTO/lbin
- vi cssinvoice
- insert the following code: (use i for insert)
cat $1 >/tmp/cssinvoice - Save the file (:wq!)
- chmod +x cssinvoice
- Determine the PRONTO virtual printer for emails from TrueForms - its normally called "email" or "ztf-email" or similar
- Login to PRONTO
- Access the Override program table (SYS.M359)
- Enter the following codes:
- CSS_EMAIL: set the the name of the virtual printer (from h. above)
- CSS_FR_EM: the name of the from address (e.g. accounts)
- CSS_FR_DM: the domain name (e.g. bhp.com.au) - this would make the full from email = accounts@bhp.com.au
- CSS_INVPRT: set to TF or TFN
(If you are using True Forms Director - TF or True Forms NEO - TFN)
- Ensure the Commerce Vision user (normally commvisi) does not have the "spool" option set in the Credit Release Officers table (SYS.X053).
On the Integrator
- Select the Settings gear icon.
- Select the Timing Items tab.
- In the Reprints section, check the 'Invoices' box.
- Click 'Apply', then OK.
- Stop and restart the Integrator.

Online (website)
- In the CMS, navigate to Advanced Settings → System Preferences.
- Select the Browse tab.
- Tick Enable ERP Invoice Reprint.
- Click Update.
- For a BPD site, that's it.
- For a Classic site: Create a new content template for the message to show customers once the request has been made.
- Navigate to Content' → Assign Default Templates.
- Assign your new template in the Invoice Re-print Confirmation Template field.
- Click Update.

Path to Credit Limit Officers Table:

Your Customer Experience
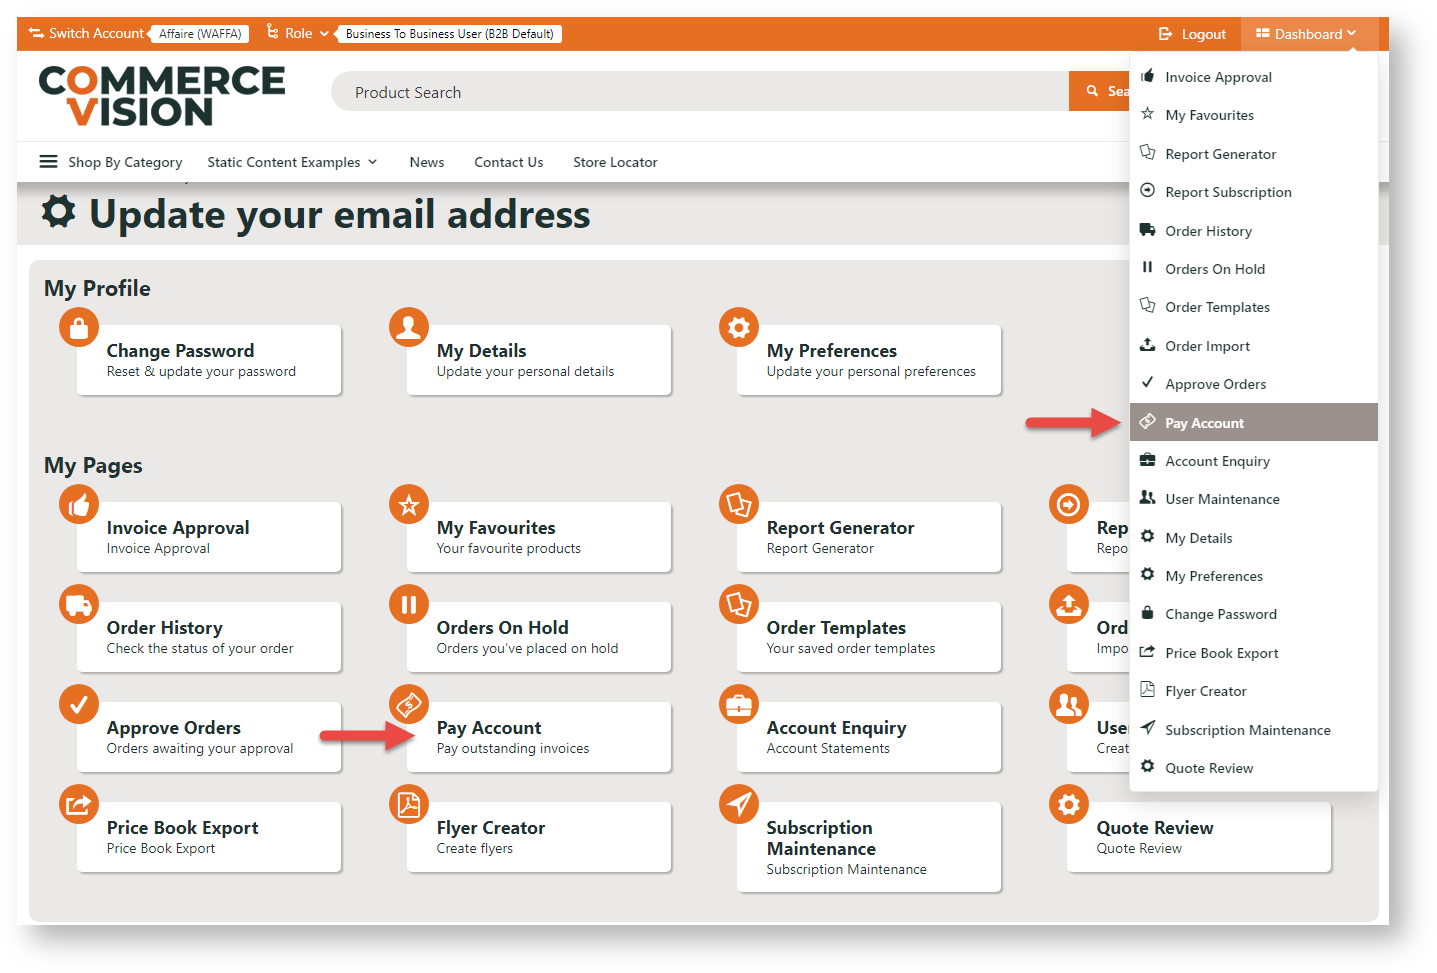
Your B2B user with Customer Account access logs on to your website. They access Pay Account (on the Dashboard navigation menu or via the quick access button.)
They simply search for the invoice or invoices, then click Reprint Selected.
In the popup, they enter their email address, then click Submit Reprint Request.

Step-by-step guide
Enable Reprint Settings
- In the CMS, go to Settings → Settings → Feature Management → Payment & Checkout.
- Ensure Invoice Reprint Settings is ON.
- Click Configure.
- Toggle ON Enable Generic Invoice Reprints.
- Click Save & Exit.


Edit Invoice Reprint Template
To change text, labels and prompts on the page :
- Go to Content → Pages & Templates → Invoice Reprint Page.
- Click Edit for the Invoice Reprint Widget.
Additional Information
| Multiexcerpt | ||
|---|---|---|
| ||
|
Minimum Version Requirements |
| ||||||
|---|---|---|---|---|---|---|---|
| Prerequisites | |||||||
| Self Configurable |
| ||||||
| Business Function |
| ||||||
| BPD Only? |
| ||||||
| B2B/B2C/Both |
| ||||||
| Third Party Costs |
|
Related help
| Content by Label | ||||||||||||||||||
|---|---|---|---|---|---|---|---|---|---|---|---|---|---|---|---|---|---|---|
|
| Content by Label | ||||||||||||||||||||||
|---|---|---|---|---|---|---|---|---|---|---|---|---|---|---|---|---|---|---|---|---|---|---|
|