Widget Use
Places the 'Export to Excel' button in the shopping cart and enables the User to have their cart contents emailed to them in an Excel file.Example of Widget Use
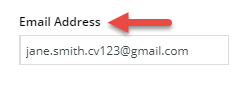
Following is an example of the widget in use:

Where can the Widget be placed?
The widget can be used in the following templates:
- Cart Template
Widget Options
| Option | Use | Comments | Available from Version |
|---|---|---|---|
| Description | A short description of the widget's use. | We recommend this field be updated so the widget's purpose is clear at a glance from the template page. | All |
| Layer | The layer the widget is valid for. | The layering technology allows for the content to be shown to specific audiences. This is handy if the content is only valid for a certain type of user or if the same widget is required for more than one audience but different configurations are needed. The widget can be added to the zone more than once and the layer feature can determine which audience can see each widget. | All |
| Export to Excel Label | The text displayed on the button
| Default: Export To Excel | 4.30 |
| Button Icon | The icon displayed with the button. | Default: cv-ico-general-file-excel Select another icon from the dropdown | 4.30 |
| Excel Template | This is the excel template used to export the cart contents. | Default: Cart Select 'Custom' if your site will not be using the default excel template. Need help? The custom option requires consultation with Commerce Vision as it has to be specially configured. | 4.30 |
| Excel Template Path | For the Custom option only. Upload a custom Excel file. | Default: blank. To upload the required file, click the Select or Upload File button. | 4.30 |
| Excel Template Data Sources | For the Custom option only. Determines the data to be included in the custom Excel file. | Default: blank | 4.30 |
| Send Email Title Label | Header text for the popup displayed after the Export to Excel button is selected.
| Default: Export to Excel | 4.30 |
| Email Address Label | Text for the Email Address field prompt.
| Default: Email Address | 4.30 |
| Cancel Button Label | Text for the button to cancel the export request in the popup.
| Default: Cancel | 4.30 |
| Send Email Button Label | Text for the button to send the export file email in the popup.
| Default: Send Email | 4.30 |
| Email Subject | Text for the email's Subject line. | Default: Excel Export | 4.30 |
| Email Body | Content for the email message. | Default: Please find your Excel export attached. Use the WYSISWYG editor to edit or format the message to suit your requirements. | 4.30 |
| Excel Export File Name | File name of the Excel file sent. | Default: ExcelExport | 4.30 |
| Excel Export Processing Message | Message that displays after the User selects the Send Email button. | Default: Your Excel export is currently processing, and will be sent via e-mail when ready. | 4.30 |
| Captcha Version | Determines whether a Captcha feature is included in the popup.
| Default: None To use the Captcha feature, select 'reCaptcha v2'. Using reCAPTCHA To use this Captcha feature, reCAPTCHA v2 must have been set up for your site and you have the key and secret. | 4.30 |
| reCaptcha Site Key | The reCaptcha key valid for this site. | Default: blank Leave the field blank to use the global key for your site. If your site does not have a global key entered, enter the key here. | 4.30 |
| reCaptcha Site Secret | The reCaptcha secret for this site. | Default: blank Leave the field blank to use the global secret for your site. If your site does not have a global secret entered, enter the secret here. | 4.30 |
| reCaptcha Theme | Determines the reCaptcha background colour.
| Default: Light To change it to Dark, select an option from the dropdown. | 4.30 |
| reCaptcha Size | Determines whether the Captcha size is normal or compact. | Default: Normal
To change the size to Compact, select an option from the dropdown.
| 4.30 |
| reCaptcha Badge | Determines the location of the Captcha badge.
| Default: Bottom Right To change the location of the badge, select an option from the dropdown. | 4.30 |


Other Widgets
-
Order Payment Links Form Widget — Renders an order details stepper with an order form that can be automatically populated with query strings, and/or manually entered by the user. The form doesn't validate the order details are accurate in order to stay both secure and accessible to unauthenticated users.
-
Magic Link Authentication Message Widget — Renders the Magic Link authentication message.
-
CUSTOM_Side by Side Content Tiles Widget — Renders two side by side content tiles in a zone with widget options for selecting or adding background colour, image, text and link/button positioning.
-
Stock Dialog Widget — Displays the Stock to Receive Detail dialog window.
-
Stock to Receive Widget — Displays the Stock to Receive page.
-
Stock Levels Widget — Displays Stock Levels page.
-
Order Declined Pending 3rd Party Installment Msg Widget — Renders the message body for the email sent when the user selects to sign up and pay with a Buy Now Pay Later provider but approval is subject to further checks.
-
Order Field Static Widget — Renders an additional order field in email templates.
-
Online Quote Validation Widget — Renders the appropriate message to the user after the current status of an online quote accessed via an email link is validated.
-
Header Level Cost Centre Widget — Renders the cost centre input field on the order header in the shopping cart.
-
Openpay Summary Widget — Renders Openpay marketing information for a product on the product detail page. Use this widget instead of the Product Purchase Details widget if you want to customise tagline placement on the template.
-
Order Line Availability - Click and Collect Widget — Displays product availability and delivery methods at the order line level in dynamic scenarios such as the cart when Click & Collect is enabled.
-
Account Activation Email Content Widget — Renders the message content in the Invitation to Register an Account email.
-
Order Template Cost Centre Widget — Renders the cost centre input field on each product line in an order template.
-
BPAY Account Payment Detail Widget — Renders BPAY payment information in the body of the BPAY Account Payment email. This email is sent to users who pay invoices or pay down their account balance using BPAY.