Step-by-step guide
This guide provides step-by-step instructions for configuring and using clusters.
1. Enable Cluster Maintenance
To use the feature, it needs to be switched on in the CMS.
- In the CMS, go to Settings → Settings → Feature Management → Products & Categories
- Toggle ON Cluster Line Type Maintenance.
Once 'Cluster Line Type Maintenance' is toggled on in 'Settings', Cluster LineType Maintenance will appear as a menu item in the Products & Categories menu. You can select it to navigate to the Cluster Line Type Maintenance page to maintain cluster line types at any time.
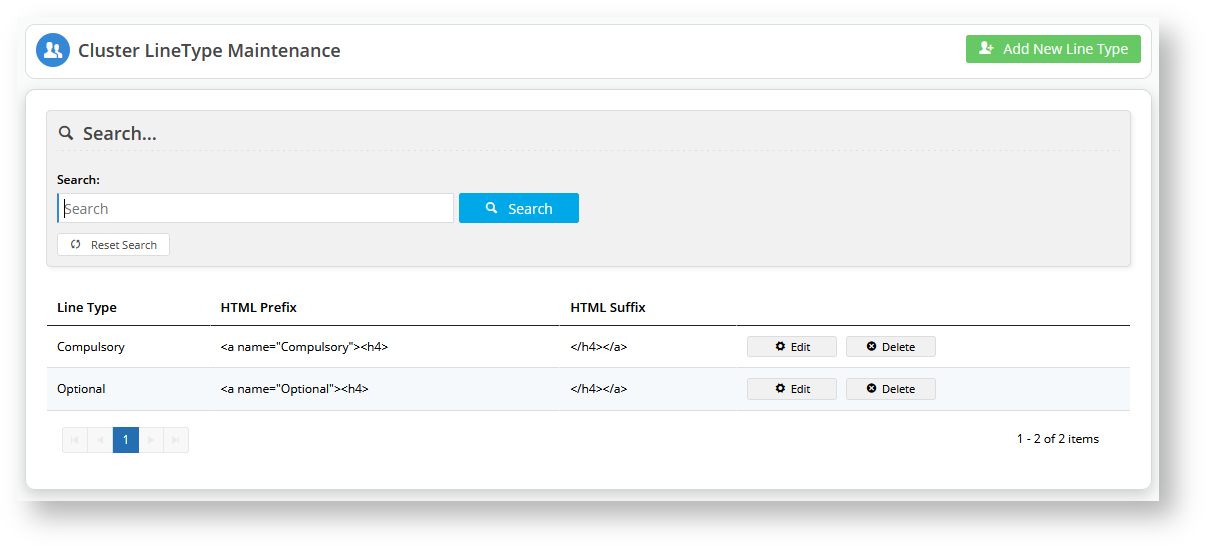
2. Add Cluster Line Types
A cluster 'line type' is a header the system uses to group and sort products in a cluster category. Once created, a line type will be available for selection for all cluster categories but you can always create new ones to suit a specific category cluster. For our example, we know that some products will be compulsory, others optional, for purchasers and we want to use these buying conditions as line types. So we can create headers for two line types: 'Compulsory' and 'Optional'. (NOTE - You can also create a line type that allows customers to choose options from two or more products listed. For instance there may be various brands available for 'black gel pens' but the purchaser needs to buy only one. We will look at this line type later. (See Create a 'choose one' cluster line type below.)
To create a cluster line type:
In Settings → Cluster Line Type Maintenance, click Configure to go to the 'Cluster Line Type' page.
- Click Add New Line Type.
- Enter details for Line Type, HTML Prefix, and HTML Suffix.
- Click Save. The line type will be available for selection when you configure a cluster.
- Create any other line types you need. For our example, repeat steps 3-5 to create the 'Optional' line type.

3. 'Enable cluster' for a category
A category has to be enabled to contain clusters (instead of directly displaying 'products' and 'sub-categories'). You can set an existing category to contain clusters or create a new category for this purpose. Just as for other categories, a cluster category is maintained in Category Maintenance. For our example, we will create a new category, then 'enable cluster' for it. (If you are working with an existing category and just want to 'enable cluster' for it, go straight to step 3.)
To add a category and 'enable cluster' for it:
- Go to Products & Categories → Category Maintenance.
- In Add New Category..., enter the category name and click Create. The new category will be added at the bottom of the list.
- To enable the category to contain clusters, click Edit for the category.
- Go to Enable Cluster and select 'Yes'.
- Click Save & Exit. You are returned to the list of categories. Notice that next to this category, '0 clusters' instead of '0 products' is displayed.


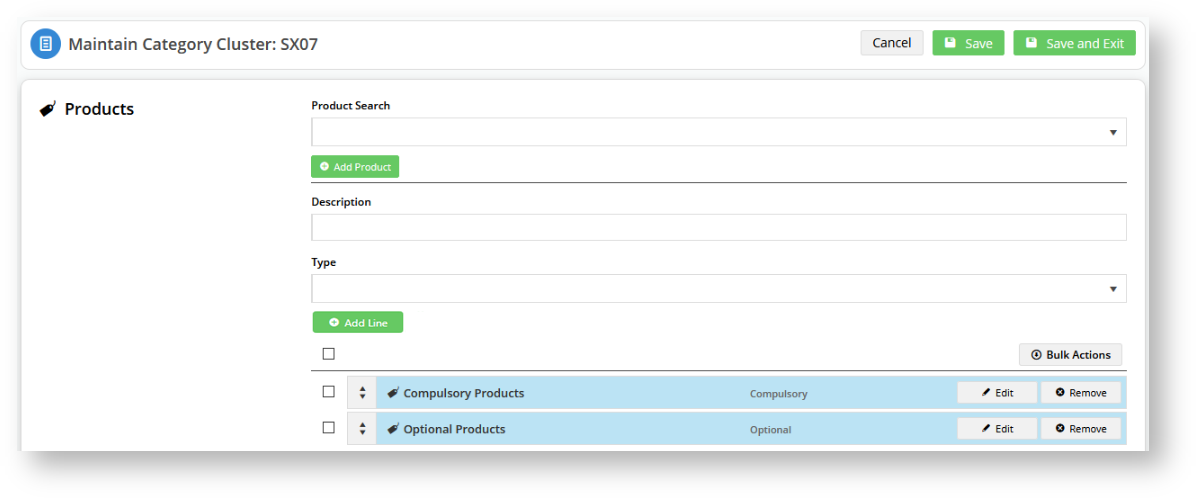
4. Build a cluster for a category
Once a category has been enabled to contain clusters, you can populate it with one or more cluster sections. A cluster section consists of a heading and a line type. Products are added to each cluster section as needed. For our example, we are going to create two cluster sections, one group of pens that are compulsory, and another, for optional ones.
- In the list of categories, hover over Options for the category and select Cluster.
- In Description, enter the heading for the cluster. This text is displayed as a heading on your site so it should be informative for customers. For the example, we will add the header 'Pens: compulsory' as this tells customers they need to buy all products under this heading.
- In Type, select a line type. Here, we will select 'Compulsory'.
- To save this cluster section, click Add Line. The cluster section will appear in the list.
- Repeat steps 2 to 4 for any additional section clusters you need. For our example, we have added 'Pens: optional'.


You can also create a cluster section around products that are grouped together, from which the customer can select one.
Create a cluster section with product choices
You can configure a section to contain a list of products from which the customer can select one (or more).
- In the Cluster LineType Maintenance page, create a line type header with an appropriate name, e.g., 'Choose One'.
- Navigate to the Category Cluster (Products & Categories → Category Maintenance), hover over Options next to your cluster and select Cluster.
- In Description, enter a suitable heading. For our example, we will enter 'Pens: select one'.
- In Type, select 'Choose One' (or the line type you created in step 1).
- Add the products that are under this cluster section. Drag and drop them to make sure they appear under this heading. In our example, those products are: _.
Click Edit for each product to configure its cluster properties:
Description: the product's current description will default but you can change it to something more meaningful for this cluster if you wish.
Suggested Quantity: leave at '0'.
Is Compulsory: leave box unchecked.
Tags: add the product code of each linked product separately. Type in a product code, then hit 'Enter' on your keyboard. This must be done for each linked product.You must hit return so each product code displays under the field header 'Tags'. To remove a product code, click on the 'x' next to a product code.
- Save your changes.
- Repeat steps 6-8 for each product.

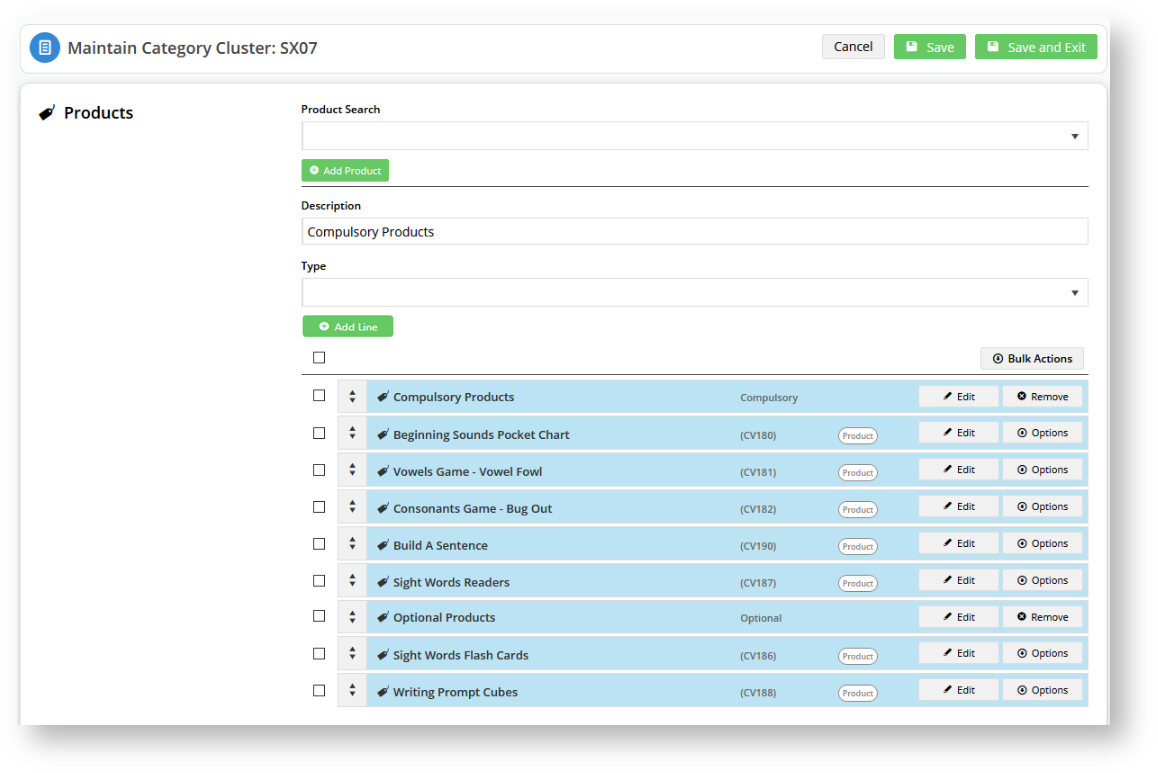
5. Add Products to Cluster Sections
Once cluster sections have been created, you can add products and sort them in a particular order under each section as you wish.
- In the Maintain Category Cluster page, click Edit for the line type you want to add products to.
- In Product Search, type in the name of a product and click Add Product. The product will appear at the end of the list.
- Make sure the product is is the right cluster section. If you need to, drag and drop it so it is under the right heading. In our example, we will add our first product to 'Pens: compulsory'.
- Repeat steps 2-3 for all the products you want to add to each cluster section. Note - if you have more than one product in a section, you can drag and drop products so that they will display in that order on your website.
- Once you have finished, click Save. IMPORTANT - if you do not click Save (or Save and Exit), any changes made here will not be saved in the system,


6. Assign Products to cluster category
The products added under a cluster section have to be assigned to the cluster category in the system.
Assigning products to the cluster category is done in the same way that products are linked to any other category, through the Product Maintenance page. Once a product is saved in a cluster section, you can directly access this function rather than exit out of Category Maintenance and navigate to Product Maintenance.
- Find the product and hover over Options, then select Edit Product Categories.
- Click Add Categories.
- In the drop down list, select the cluster category.
- Click Save. The product is now assigned to the cluster category and you will be returned to the Maintain Category Cluster page.
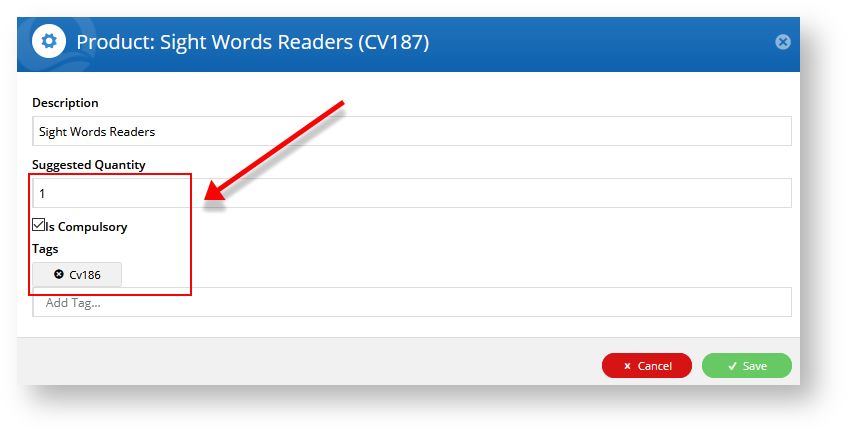
7. Edit cluster properties for a product
Products assigned to cluster categories have special properties that need to be configured, for example, the specific buying condition (compulsory or not) and minimum number needs to be set.
- For each product in the cluster, click Edit next to it.
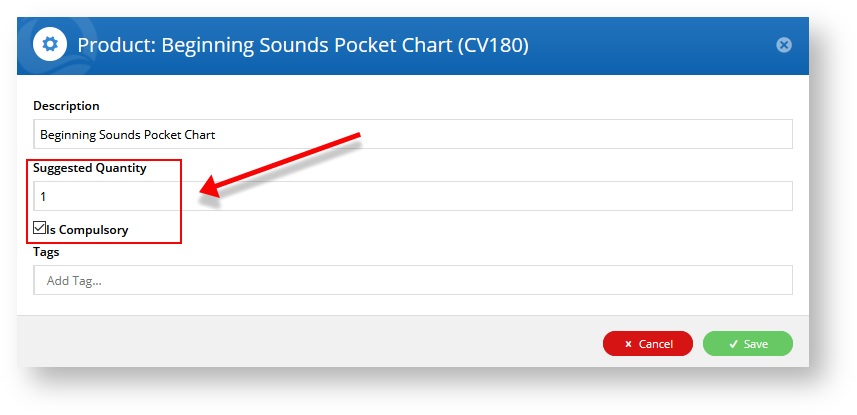
- Edit the fields as required.
Description: the pre-existing product description will default but you can change it to something more meaningful for listing in this cluster if you wish.
Suggested Quantity: if the product is compulsory, enter '1' or another number for the minimum the buyer has to buy; if the product is optional or is a choice between two or more products, leave it at '0'.
Is Compulsory: check the box if this product is compulsory. Note- if this box is checked, the system will set 'Suggested Quantity' to 1 even if it is left at '0'.
Tags: tags are used to link two or more products when the customer is given a choice to select one of them. To link a product to this one, type in its product code, then hit 'Enter' (Return) on your keyboard. Product codes of each linked product must be entered individually,
3. When you have finished editing the product, click Save.4. The system will advise you that you will need to refresh the Cache Management for your changes to display on the website.
5. Click on the Cache Management link,
6. For Product Cache, click Clear Cache.
7. When the process is complete, click Close.

8. Create Cluster Hotspot Banner (optional)
See Cluster Hotspot Banner help.
Additional Information
Minimum Version Requirements 4.17.00
Prerequisites --
Self Configurable Yes
Business Function Products & Categories
BPD Only? Yes
B2B/B2C/Both Both
Third Party Costs n/a
Related help