Whilst our default Article layout is admittedly pretty sweet and you can use the zoned template option to arrange content within a template as you please, there may be times you might prefer to create your own unique layout for a particular article. You can now override our Article templates altogether and create a custom layout just for a specific article.
Step-by-step guide - custom templates for articles
1. Check Articles Settings
- In the CMS, navigate to Settings → Feature Management → Content → Articles.
- If Articles is disabled, toggle it on.
- Click Configure.
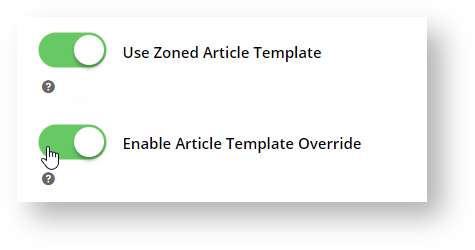
- In Article Feature Settings, ensure Use Zoned Article Template' and Enable Article Template Override are toggled on. Note - both must be on to override article templates.
- To save these settings, click Save & Exit.
2. Create and assign a template to an article
Now you can completely create or choose a different template for a specific article.
- Navigate to Content → Articles.
- Choose the article you want to create a template for and click Edit.
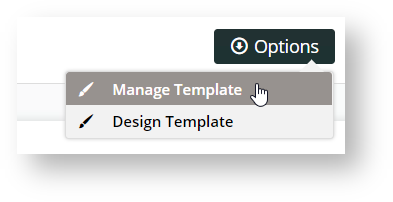
In the top right, hover on Options and select either Design Template (to edit the template being used by this article) or Manage Template (to assign or create a new template).
Design Template
The Design Template option appears only if a template exists for this article. If selected, you will be taken to the Edit page for the template. See step 3 below.
For this example we'll choose Manage Template so we can create a new template.
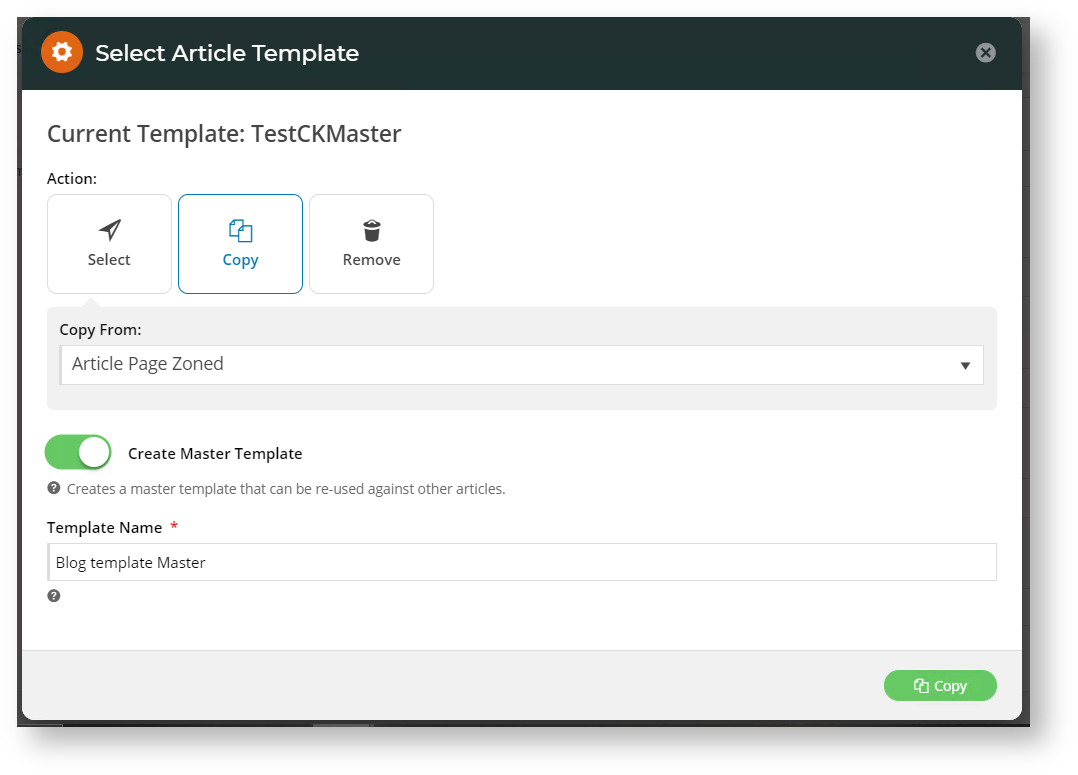
- In the Select Article Template popup, select an existing template for use, copy to create a new template, or remove a template. Because we want to create a new template, we'll click Copy.
- From the Select Template dropdown list, select the article template you want to make a copy of.
- If you want to be able to use this template for other articles later, toggle on Create Master Template.
- In Template Name, give your new template a name.
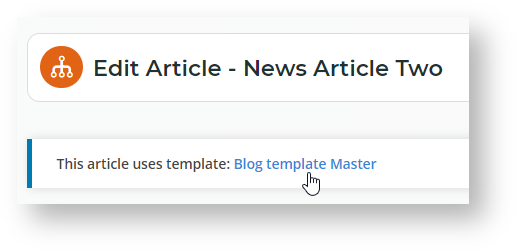
- To save the new template, click the Copy button. You'll be returned to your article, and newly created and assigned template is displayed on the top left corner of the screen. You can make layout changes to the template by clicking on the template name.
3. Change the layout of the article template (optional)
Before you add, edit or remove widgets in your article template, you can select another article template or even design a new layout, for instance, if you want to add or remove zones.
- To change the layout, under Options, select Design Template.
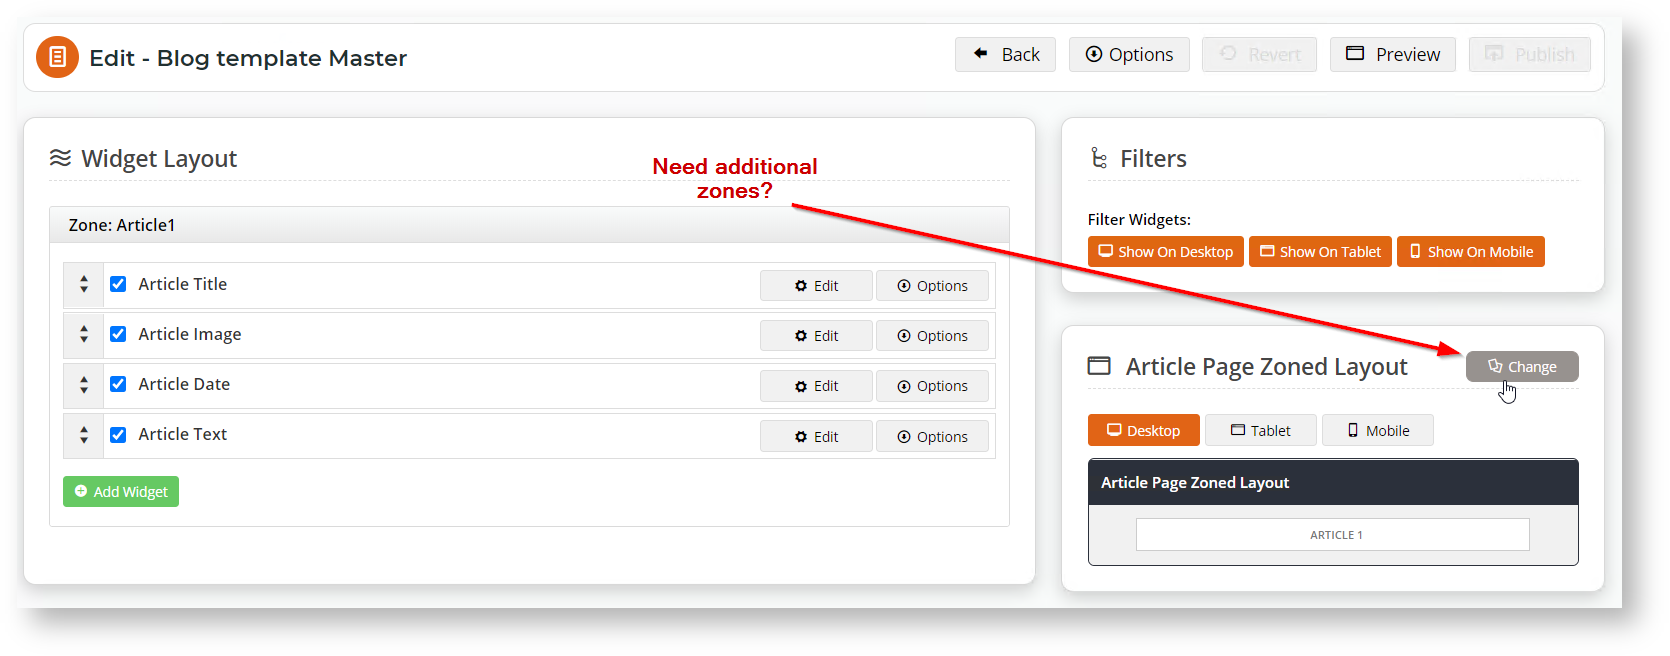
- In the 'Article Page Zoned Layout' section, click Change.
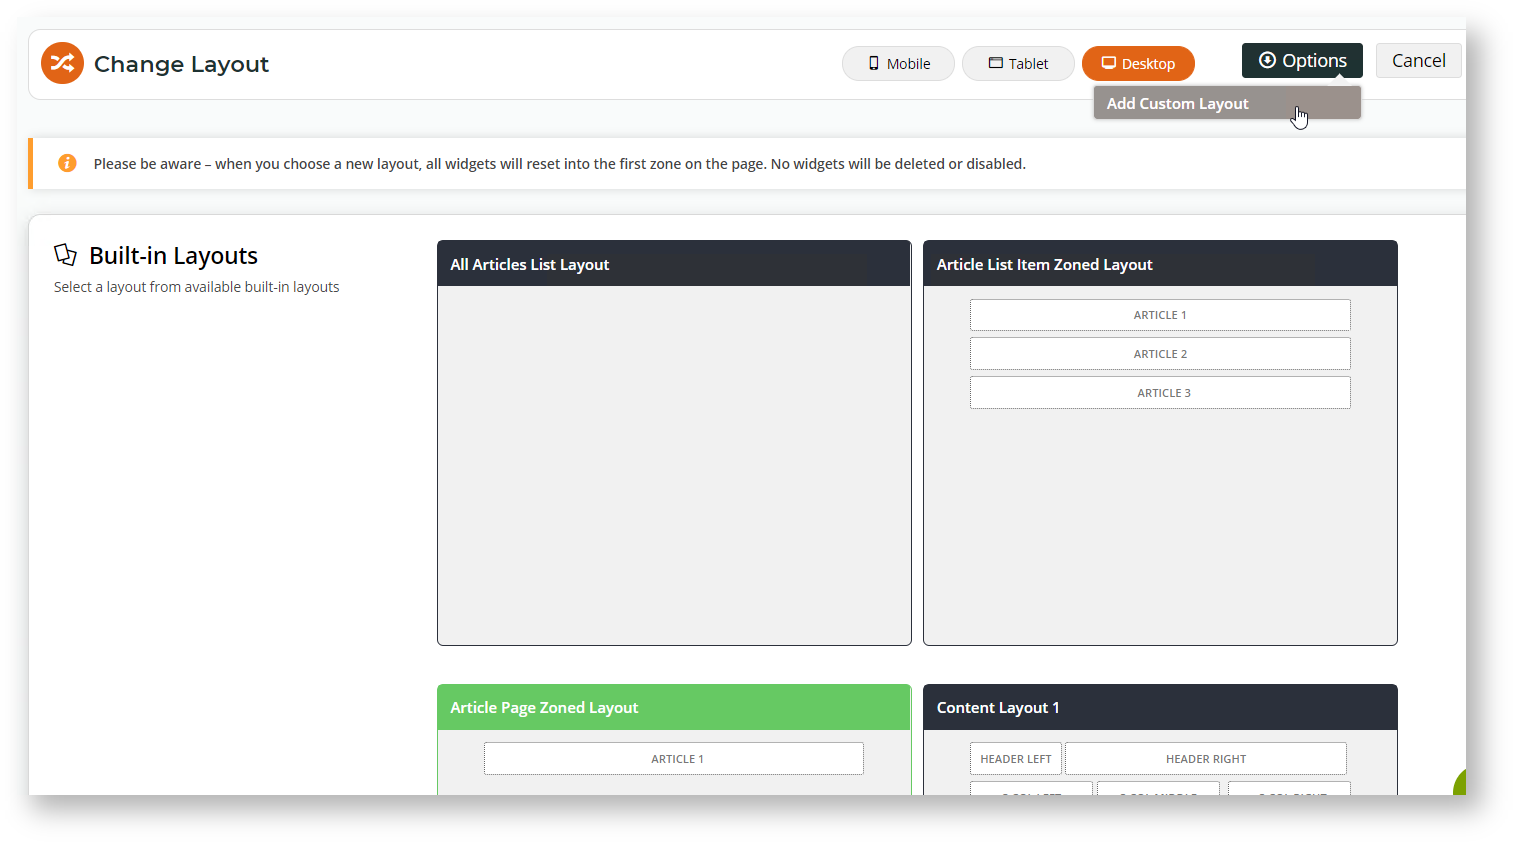
- In the Change Layout page, you can select an alternate layout or create a new custom one via Options → Add Custom Layout.
- Select an existing option that fits your needs, or 'Add Custom Layout' to create a new one from scratch. (TIP - If you need some guidance in creating a new layout, see our Layout Creator help page.)
- When you have finished changing the template, click Save.
4. Add, Edit and Remove Widgets to Individual Zones in an Article
Once your article's template layout is ready, you can add, edit and remove widgets to suit. Any default or pre-existing widgets will be in the template. For instance, if your template is based on a pre-existing article template, the Article Title, Article Image, and Article Date widgets might be present.
- If you are not in the 'Edit Article' page for the article's template, navigate to the article, click Edit, then in the top left corner, click the template name.
- In the 'Edit Template' page, drag and drop widgets to re-order them or move into different page zones, or add and delete widgets as needed. (TIP - If you need guidance, see the Article Page - Zoned Layout (step 2) help page.)
If Page Preview is on, you can see how the page looks like before saving it. Click Preview and go to the article page in Draft mode. Otherwise, you can go straight to the article on your website.
If you do not like your changes, you can always click Revert to return the template to the last published version.
- To save your article template changes, click Publish.
Additional Information
| Minimum Version Requirements | 4.23 |
|---|---|
| Prerequisites | n/a |
| Self Configurable | Yes |
| Business Function | Marketing |
| BPD Only? | Yes |
| B2B/B2C/Both | Both |
| Ballpark Hours From CV (if opting for CV to complete self config component) | n/a |
| Ballpark Hours From CV (in addition to any self config required) | n/a |
| Third Party Costs | n/a |
| CMS Category | Content |
Related help
