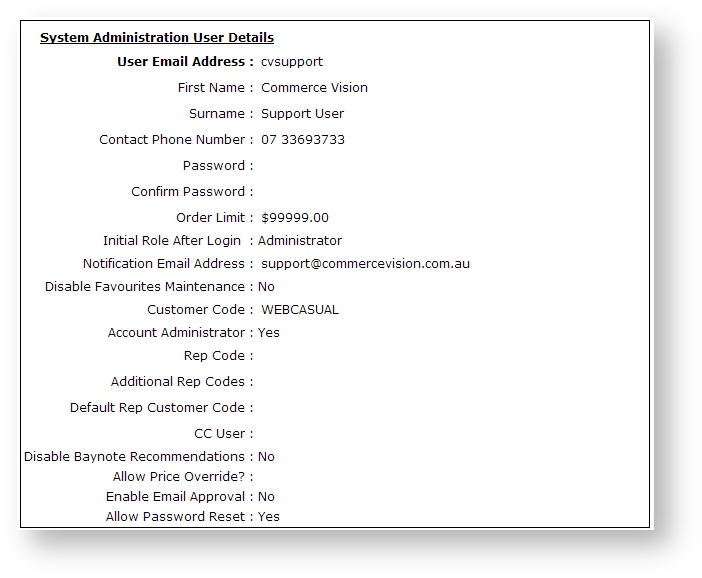
'Field Groups' allow fields from a database table to be grouped together. The Field Group can then be used to present the fields to a user on a particular page of the website.
Examples of Field Groups in use would be:
- User Registration page
- Checkout Address fields
- User Maintenance screens
Step-by-step guide
Create a Field Group
To create a Field Group:
- As Administrator logged into your site, navigate to Settings → Field Groups (/zFieldGroups.aspx).
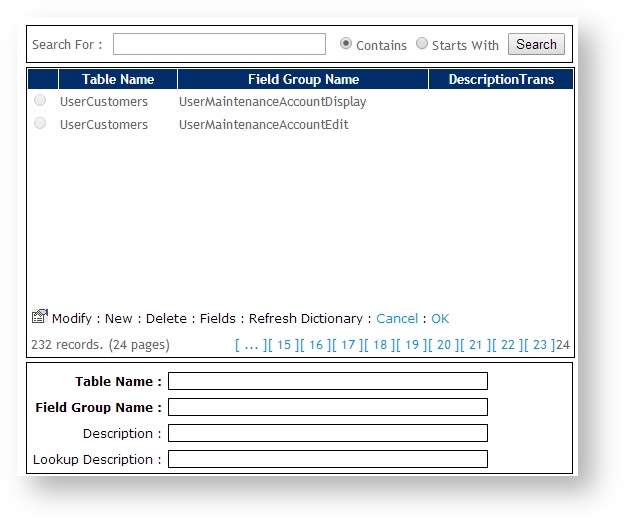
- Click New.
- Update values as follows:
- Table Name - the table name from the CSS Dictionary. Examples of common table names are PRODUCT, USER, CUSTOMER, PRONTOSALESORDER.
- Field Group Name - a unique code/name for the new Field Group.
- Field Group Description - a description for the use of the Field Group, e.g. 'User Administration'.
- Lookup Description - leave blank.
- To save, click OK.
- To refresh the site's cache, click Refresh Dictionary.
Once the Field Group has been created, it can be populated with Fields.
Add a Field Group
To add Field Group fields:
- As Administrator logged into your site, navigate to Settings → Field Groups (/zFieldGroups.aspx).
- Search for the required Field Group.
- Select the record via radio button.
- Click Fields.
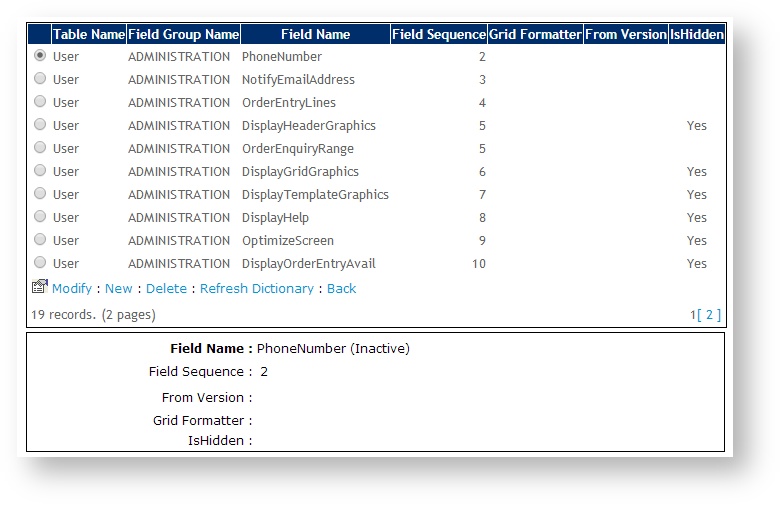
The Field list screen will load.
- To add a new field, click New.
- Update values as follows:
- Field Name - select from the drop-down list. (If the required field does not already exist, it will need to be defined in the CSS Dictionary.)
- Field Sequence - the order in which the field will appear to the user.
- From Version - if required, specifies that this field should only be available in a specific version or later.
- Grid Formatter - restricts the field value to a particular data type (e.g. numeric, date, etc). Can be left at default / 'Please Select'.
- IsHidden - tick if the field should not be made visible to the user.
- To save, click OK.
- Repeat Steps 6 - 8 as required.
- To refresh the site's cache, click Refresh Dictionary.
Maintain Field Group fields
To maintain Field Group fields:
- As Administrator logged into your site, navigate to Settings → Field Groups (/zFieldGroups.aspx).
- Search for the required Field Group.
- Select the record via radio button.
- To load the Field list screen, click Fields.
- Select the required Field via radio button.
- To edit, click Modify. Or to remove the field, click Delete.
It is recommended that field group fields are never deleted, but rather hidden (unless the field group has been created by the editing user). Otherwise, the field will be added back in during a site upgrade.
When changes, including creating and removing fields, are made to Field Groups, the website's cache must be refreshed for the changes to display on the site.
After you update a Field Group or the Field Group fields, click the Refresh Dictionary link. You can also refresh the cache by going to zDictionary.aspx and clicking the Refresh Cache button. See Cache Refreshing.
Related help


