| Table of Contents |
|---|
Overview of Scripts & Styles
Past functionality
Previously, whenever you needed to upload customised JavaScripts or Style Sheets for use in CMS, you would use the File Manager function, then reference them in a HTML Snippet widget, and apply to a page(s).
If you had to change the scripts, you couldn’t edit them within CMS. Instead, you had to make your changes locally and then upload the amended files to CMS.
The HTML Snippet widget allows you to do so much more than applying styles or running scripts. Therefore, unless you added a meaningful description to the HTML widget, how would you know what it was doing? You couldn't.
New functionality
| Multiexcerpt | ||
|---|---|---|
| ||
The CMS Scripts & Styles function allows you to create and edit scripts and styles as CMS widgets. And because these widgets are dedicated only to running scripts or applying styles, you will know at a glance if a page is using customised JavaScript or Style Sheets. With the Scripts & Styles widget, you can bundle related scripts and styles into one widget, to function as a unit. Or you can load multiple Scripts and Style widgets to operate independently on a page. You can also easily turn them on and off by ticking the checkbox next to the widget in the page layout. IMPORTANT - Access to CMS Scripts & Styles is automatically available for version 4.13.02 or higher. If your system needs to be upgraded, please contact us. |

How does Scripts & Styles work?
When you create a customised script or style sheet in CMS, the system automatically adds them to the correct system folder. All files are minimised once you click Save to reduce load times.
The system retains historical versions of the files along with an audit trail of the date, time, and the user who made the changes. If the current version is not behaving as expected, then rollback roll back to a previous one.
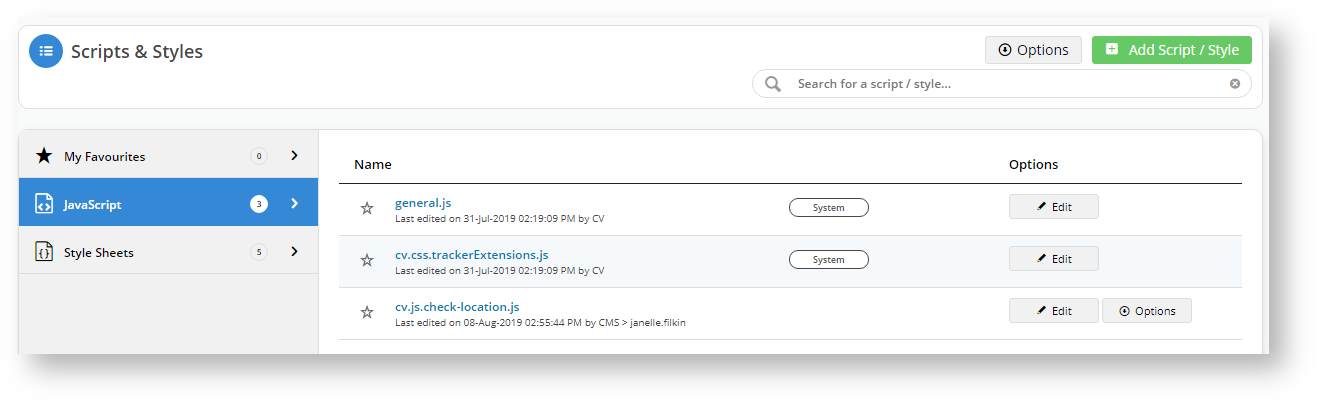
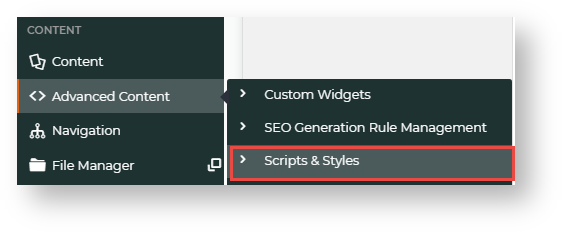
To see view the scripts and styles that exist in your CMS, navigate to Advanced Content → Scripts & Styles.

...
Add a script or style in CMS
To best explain the functionality, we will make a simple change to the background colour of our Store Locator page.
- In your CMS, Go to Advanced Content .
Click → Scripts & Styles.- Select Style Sheets.
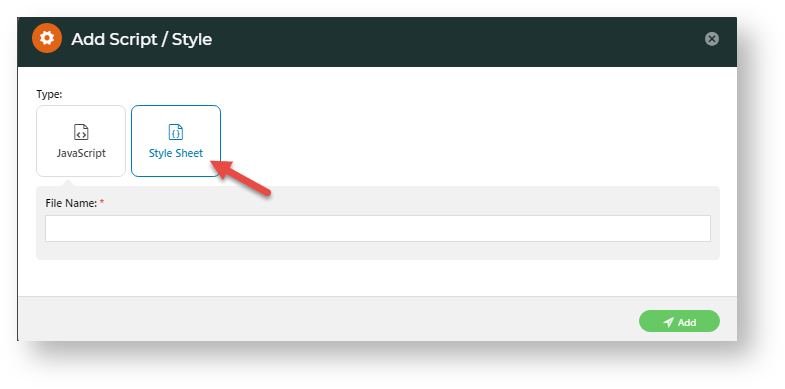
Click + All existing style sheets are displayed.- Click Add Script/Style at the top right corner of the browser.
You can choose to create a JavaScript or a Style Sheet. Select .- In Add Script/Style, select Style Sheet.
- In File Name, enter an appropriate name that follows the naming conventions of our site.
- Click the the Add button. The system will open a blank editing window.
- Type Start typing in your custom style sheet or . A list of suggestions will display. Or you can paste text from a file you already created elsewhere.
- When you have finished, click Save.
- Click Cancel to exit out of the script editor.


...
Apply a script or style to a page/template
Now we will apply that style sheet to our Store Locator page (or the Page that you have chosen).
- In your CMS, select Content → Pages & Templates
- At the top right of the screen, type use the Search to find Store Locator into the “Search for a page/template” prompt box. . NOTE - Your page name may be different.
- Click Edit. for for the page/template name.
- Once in the page, click Add Widget.
- In the search field, start typing 'Scripts & Styles' — the system will auto-fill the results.
- Select 'Scripts & Styles' and click
to open the .
- The Scripts & Styles windowWidget automatically opens.
In Description, enter a meaningful description for the use of this style. This will display next to the style name when it is in use.- Add a Layer if required. (See help on adding layers.)
- From the Scripts & Styles dropdown list, select the style you created and click Add.
- Click Edit if you want to make some last minute changes to the Style Sheet, otherwise, to apply the script or style, toggle ON Enable widget on Save, then click Save.
The CMS will now show you have applied that Script & Style. You can add multiple scripts or styles to the same widget.
To see the script or style applied on the page/template, select- If the Page Preview setting is on, click Publish (top right of the screen).
- Go to your site and open the Store Locator page (or the page to which you made changes).


Reverting to an earlier version of a script or style
...
- In the CMS, navigate to Advanced Content → Scripts & Styles.
- Depending on whether you want to delete a javascript or style sheet file, click on the Javascript or Style Sheets tab.
- Notice that System files have limited functions to users. For example, the 'theme.css' file allows you to view its contents only and cannot be edited or deleted. User-created files will have both 'Edit' and 'Option' buttons.
- To delete the file, hover over its Options button and click Delete.
- In the 'Delete widget' box, if you are sure you want to delete this file, click OK otherwise, click Cancel.
Checking where a script or style is currently used
- In the CMS, navigate to Advanced Content → Scripts & Styles.
- Depending on whether you want to check a javascript or style sheet file, click on the Javascript or Style Sheets tab.
- Find the file name, hover over its Options button and click Where It's Used.


Additional Information
...