...
| Info | ||
|---|---|---|
| ||
|


...
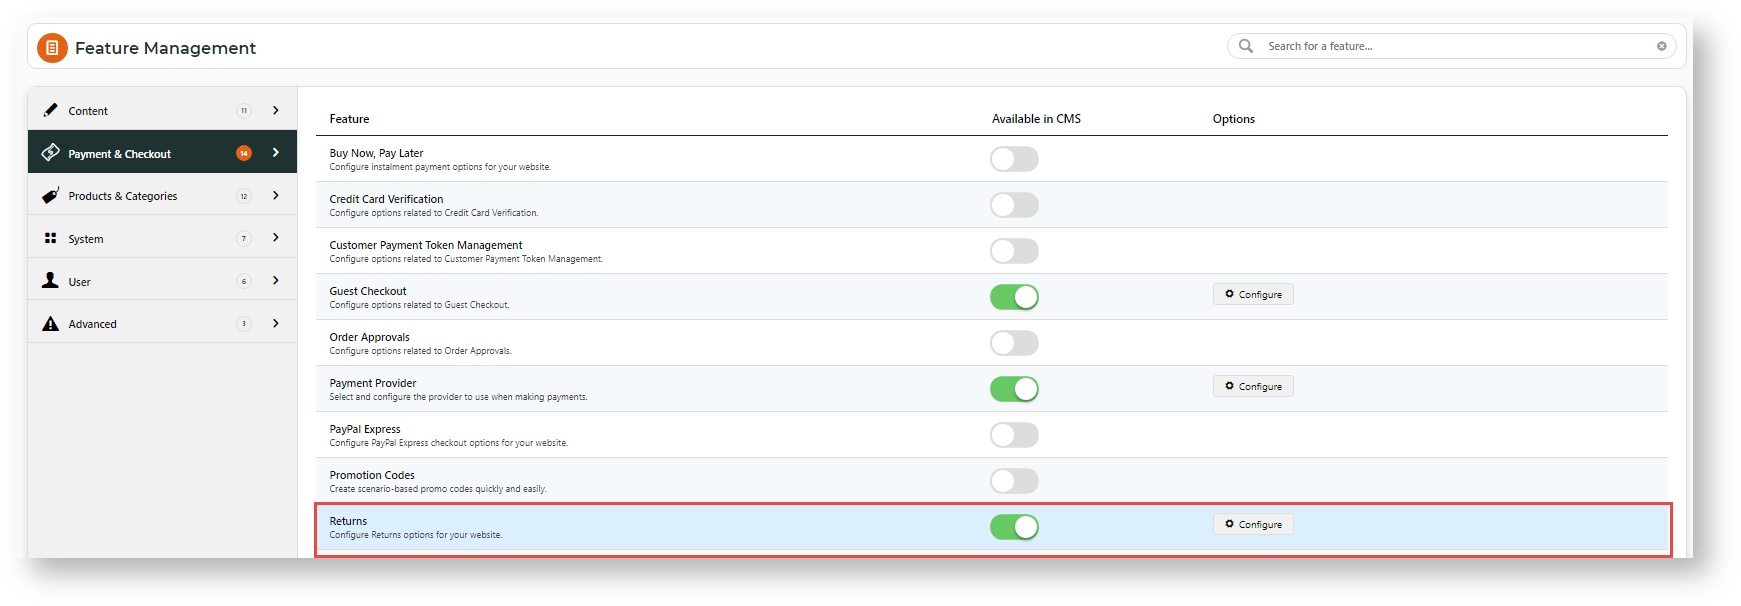
- In the CMS, navigate to Settings → Feature Management.
- Select the Payment & Checkout tab.
- For the Returns feature, click Configure.
In the Returns Feature Settings page, configure the options to suit your business rules.
Expand
title Click here to view Returns settings...
Setting Description Notes Enable Returns Toggles the functionality on and off for your site. TIP - Leave it off until you've configured all settings. Role overrides available.
Only One Return Per Order If ON, a user is limited to submitting one return, including part returns, on a particular order.
Role overrides available.
Enable Returns for Orders with Charge Lines If ON, allows returns against orders that have special charge lines on them, e.g., bulky freight, installation, etc. Role overrides available.
Enable Return Order Confirmation Emails
If ON, a confirmation email is sent to the user once they've submitted an online return. Enable Returns For Kits
If ON, allows kit items to be eligible for returns, including kit components. Role overrides available.
Search Returns Label
The description for the dropdown list when searching order history. Role overrides available.
Statuses of Returned Orders
ERP status codes for orders classed as 'Returns'. Orders with these statuses will be displayed when Order History searches are filtered for 'returns'. Role overrides available.
Statuses of Returnable Orders
ERP status codes for orders eligible for returns. Only orders with these statuses will display the 'Submit Return' button. Role overrides available.
Maximum Returns Time Frame The number of days (from invoice date) that an order can have a return submitted against it. Role overrides available.
Low Value Order Amount The dollar amount under which a return is classed as "low value". For many businesses, this stock is written off instead of being returned to inventory. The user will be eligible for an automatic refund. Customer overrides available. Disable Returns for Orders With Customer Prefixes Advanced setting, applies Applies only to custom implementations. Role overrides available.
Disable Returns for Orders With Service Branches Advanced setting, applies Applies only to custom implementations. Role overrides available.
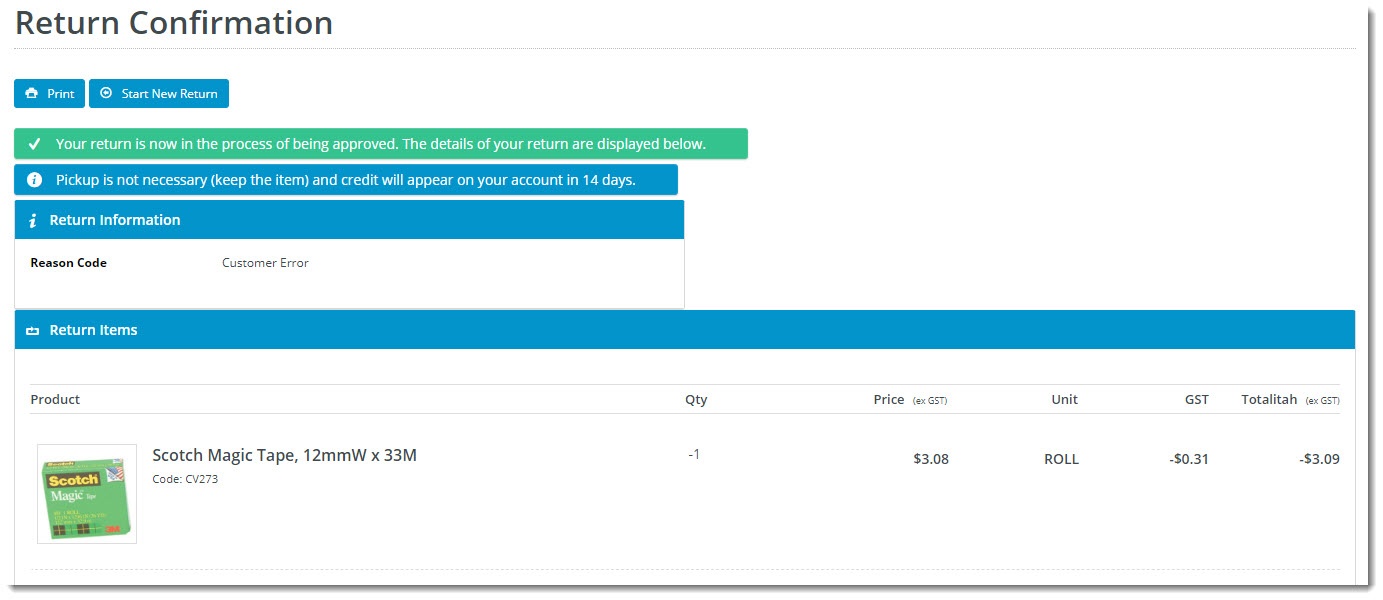
Status of Submitted Return Orders
The ERP status return orders will be set to. Status of Submitted Low Value Return Orders
The ERP status that low value returns will be set to. Returnable Order Confirmation Status
The ERP status that triggers the Return Order Confirmation email to be sent to the user. Returnable Order Confirmation Low Value Status
The ERP status that triggers the Return Order Confirmation email to be sent to the user (for low value returns). Default Warehouse Code for Low Value Return Orders
The warehouse code that low value returns are processed against (since stock is not being returned to inventory). Default Order Type for Return Orders
Defines the order type for submitted return orders. Integrates to the SoOrderTypeCode in PRONTO sales order. Return Information Widget Field Group
The JSON field group that determines the displayed fields for the Return Information Widget. Defaults to ReturnInformationFieldGroup, which includes the following Pronto Sales Order table fields:
- SoOrderPackages
- SoOrderReasonCode
- ReturnReason
Return Information Widget Resalable Field Name
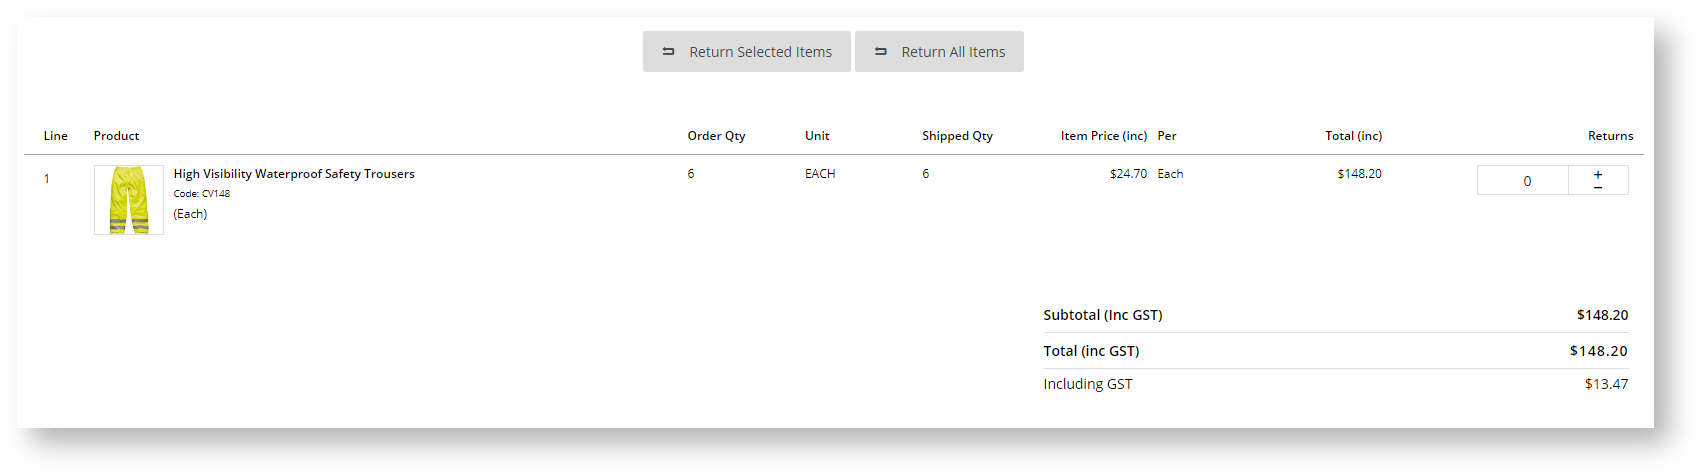
Defines the 'resaleable' field (from the JSON field group) which that gets displayed by the Return Information Widget. Defaults to CM_ReturnResalable Enable Product Quantity Check on Return Request? If ON, the order return history is checked to ensure the current requested return quantity of a product plus any quantities in previous returns for this order are not greater than the shipped quantity. If it is, the return cannot be submitted. Default: OFF
Role overrides available.
Enable Refund Limit Check on Return Request? If ON, the order return history is checked to ensure the requested refund amount plus any amount previously returned is not greater than the original order amount. If it is, the return cannot be submitted. Default: OFF
Role overrides available.
- Save your changes.
...
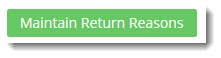
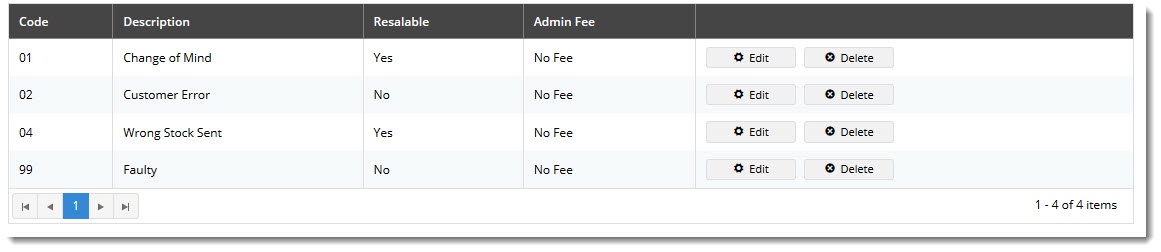
- To do this, in the Returns feature settings page, click the 'Maintain Return Reasons' button button.
- Click Add New Return Reason.
- Enter the return details:
- Code - the reason code, integrated to the ERP against the return order.
- Description - the description the user sees in the dropdown selector when submitting an online return.
- Resaleable - indicates whether this reason prevents the product from being re-sold (pending stock condition).
- Admin Fee - the fee charged if this reason is selected. TIP- commonly applied to 'change of mind' scenarios.
- Save and repeat Steps 2-4 to add all required reason codes.
...
- Navigate to Content → Pages & Templates.
- Use the Search tool to find the Track Orders template, then click Edit.
- Find the Track Order widget, then click Edit.
- Select the Returns tab on the left hand side to view all return-related options. Refer to See Track Order Widget help.
- To save changes, click Save.

...