...
| Multiexcerpt | ||||
|---|---|---|---|---|
| ||||
...
This guide provides step-by-step instructions to setting up, configuring and using clusters. . We will use the example of a website that supplies school items and create a 'school year' cluster category, say a 'stationery and book list' for Year 7s from a particular school. Items for such a category may include stationery and textbooks etc. It is expected that parents of children in Year 7 in the school will visit the site and purchase needed items. To simplify things, let's just focus on one product type - pens.
1. Switch on Cluster Maintenance
Cluster Maintenance is available for versions 4.17 and laterhigher. To use the feature, it needs to be switched on in the CMS.
- In the CMS, navigate to Settings → Feature Management → Products & Categories and toggle on Cluster Line Type Maintenance.
| Info |
|---|
Once 'Cluster Line Type Maintenance' is toggled on in 'Settings', Cluster LineType Maintenance will appear as a menu item in the Products & Categories menu. You can select it to navigate to the Cluster Line Type Maintenance page to maintain cluster line types at any time. |
2. Add Cluster Line Types
A cluster 'line type' is used as a header the system uses to group and sort products in a cluster category. Once created, a line types are type will be available for selection for all cluster categories . As an example, suppose we sell school-related items and want to create a 'school year' cluster, say a 'stationery and book list' for Year 7s from a particular school. Items for the cluster may include stationery and textbooks etc. To simplify things, let's just focus on one product type - pens. We but you can always create new ones to suit a specific category cluster. For our example, we know that some products will be compulsory, others optional, for purchasers and we want to use these buying conditions as line types. So we can create headers for two line types: 'Compulsory' and 'Optional'. (Note - you can also create a line type that allows customers to choose options from two or more products listed. For instance there may be various brands available for 'black gel pens' but the purchaser needs to buy only one. We will look at this line type later. (See Category Cluster Maintenance below.)
...
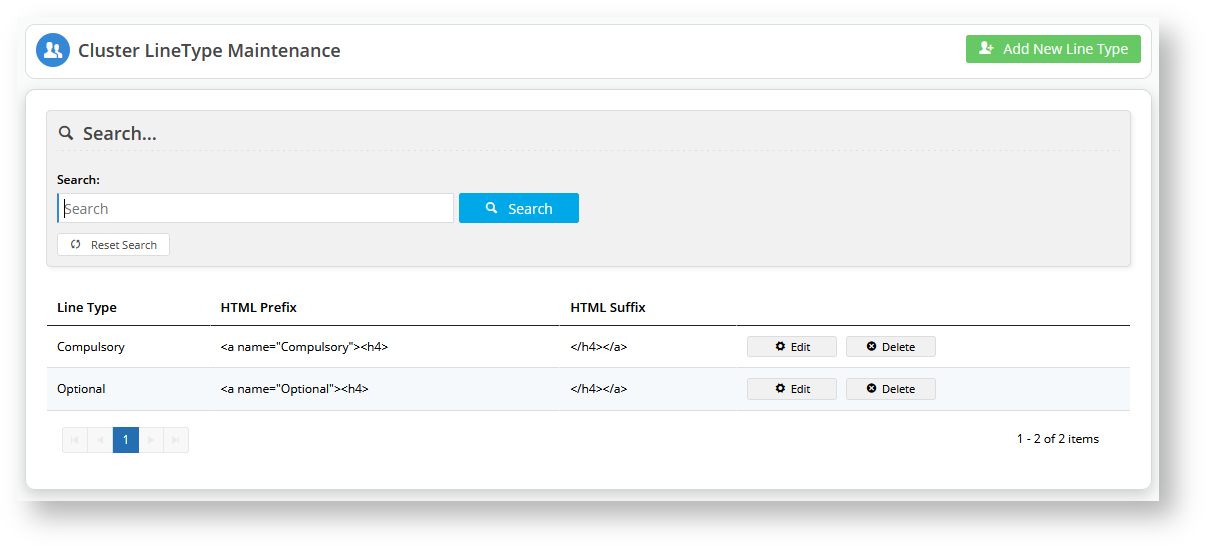
In Settings → Cluster Line Type Maintenance, click Configure to go to the 'Cluster Line Type' page.
- Click Add New Line Type.
- Enter details for Line Type, HTML Prefix, and HTML Suffix.
- Click Save. The line type will be listed in the list of line types available for selection when you configure a cluster.
- Create any other line types you need. For our example, repeat steps 3-5 to create the 'Optional' line type.

3. 'Enable cluster' for a category
A category has to be enabled to contain clusters in its Category Maintenance page(instead of directly displaying 'products' and 'sub-categories'). You can set an existing category to contain clusters or create a new category for this purpose. Just as for other categories, a cluster category is maintained in Category Maintenance. For our example, we will create a new category, then 'enable cluster' for it. Just as for other categories, a cluster category is maintained in Category Maintenance. To (If you are working with an existing category and just want to 'enable cluster' for it, go straight to step 3.)
To add a category and 'enable cluster' for a categoryit:
- Navigate to Products & Categories → Category Maintenance.
- In Add New Category..., enter the category name and click Create. The new category will be added at the bottom of the list.
- To enable the category to contain clusters, click Edit for the category.
- Go to Enable Cluster and select 'Yes'.
- Click Save & Exit. You are return to the list of categories. Notice that next to this category, '0 clusters' instead of '0 products' is displayed.


4. Build a cluster for a category
Once a category has been enabled to contain clusters, you can populate it with one or more cluster sections. A cluster section consists of a heading and a line type. You can add products into each cluster section as needed. For our example, we are going to create cluster sections that specify which pens are compulsory and which are optional buys, and then add products to each one.
- In the Category list of categories, hover over Options for the category and select Cluster.
- In Description, add the header heading for the cluster. This text is displayed as a heading on your site so it should be informative for customers. For the example, we will add the header 'Compulsory'.Pens: compulsory' as this tells customers they need to buy all products under this heading.
- In Type, select a line type. Here, we will select 'Compulsory'.
- To save this line type to the categorycluster section, click Add None Product. The cluster section appears in the list.
- Repeat steps 2 to 4 for each extra line type any additional section clusters you need. For the example, we have added 'OptionalPens: optional'.


5. Add Products to Cluster
...
Sections
Once cluster sections have been created, you can add products and sort them under each section as you wish.
- In the Maintain Category Cluster page, click Edit for the line type you want to add products to.
- In Product Search, type in the name of a product and click Add Product. The product will appear at the end of the list.
- Drag and drop the product under a header. In our example, we will add our first product to 'Compulsory products'.
- Repeat steps 2-3 for all the products you want to add to each line type in the Cluster.


...