| Excerpt | ||
|---|---|---|
| ||
Allow certain Roles or Users a particular Website User to assume the identity of a User. |
...
another User and be able to perform tasks as the latter. |
Overview
The User Impersonation feature permits Administrators to let a Website User switch to another User while logged in on your website. While in the switched mode, the User has full access to orders and accounts of the impersonated User, including viewing, performing or completing the latter's tasks. All switches are logged in the system.
User Impersonation is useful for a range of scenarios, e.g., it allows managers to complete tasks for new or absent staff, or those located in other locations (when each location is treated as individual customers with its own separate Customer code). ETC...
Step-by-step guide
- Login as an Administrator.
Navigate to 'Accounts' --> 'User Maintenance'.
- Search for the required user.
- Select the user via radio button.
- Click 'Modify'.
- In the field labelled 'Restricted IP Address', enter the desired IP v4 address (e.g. 162.3.367.25).
- Click 'OK' to save.
The next time the user attempts to login, they will only be granted access if their originating IP v4 address matches the value in the 'Restricted IP Address' field. User impersonation is set against a user as an override. It cannot be set as a global feature.
- As Administrator, navigate to Settings → Feature Management → User.
Toggle on 'User Impersonation' to switch on the feature and click Configure.

- IMPORTANT - In the 'User Impersonation Feature Settings', leave Enable User Impersonation disabled. This ensures that User Impersonation is not switched on globally. HAS NO EFFECT

- To allow a user to have User Impersonation access, click Overrides.
- Click the Add Override Setting button.
- From the User dropdown list, select the required user.
- Toggle on Override Value.
- Click Confirm to exit the screen.
- Click Save to save the User Impersonation override. Notice the message informing you the override has been saved and the number of Overrides has increased by 1.

How User Impersonation works for the User
When the User logins to the website, they will see the Switch User icon. 
Clicking on it opens the 'User Impersonation Select' list. This list contains all users the User can switch to. The User can click on the user they wish to impersonate. 
After switching to the other User, the screen including the Dashboard now displays the impersonated User's order and account management history and website access. Note - an Impersonating User will not have access to locations they do not usually have access to under their own User identity.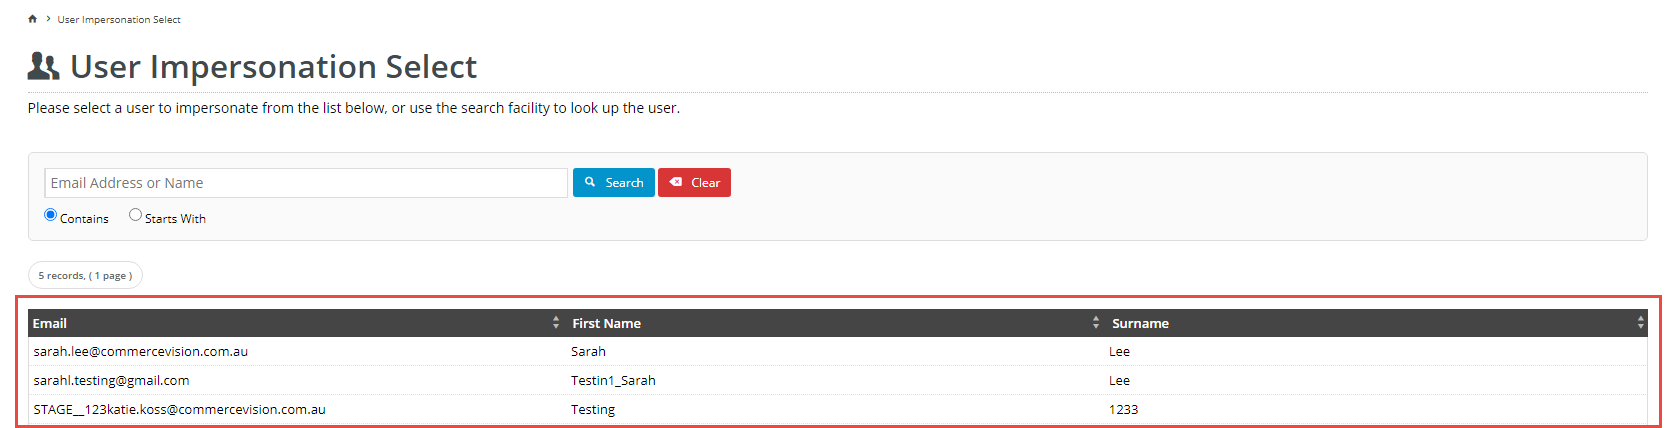
Related help
| Content by Label | ||||||||||||||||||
|---|---|---|---|---|---|---|---|---|---|---|---|---|---|---|---|---|---|---|
|