...
- In the CMS, navigate to Content → Banners.
- Select a Banner Type.
- Click 'Add New Banner'.

- Populate the banner details as required:
- Description - A short description to identify the image
Banner Link - The URL, /category, or /product page the image links to
Start Date - The date the banner becomes active (and therefore, visible)
Expiry Date - The date the banner expires and is automatically removed from view
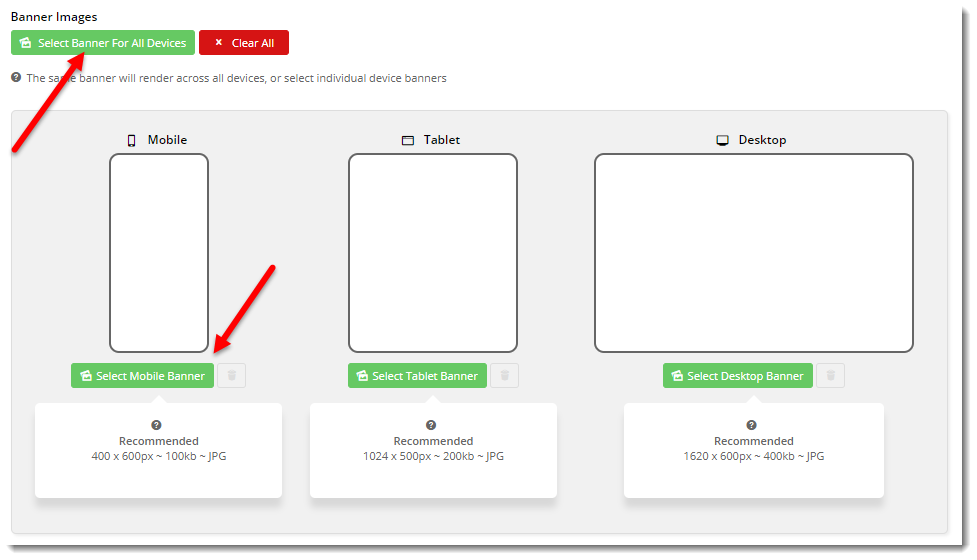
To upload the same image for all devices, click 'Select Banner for All Devices'. NOTE - For fast page load, the maximum image file sizes recommended are 250kb for desktop/tablet and 50kb for mobile devices.
To upload different images for different devices, click 'Select Mobile Banner' against the device your require.- Browse to an existing image in your file manager, or click 'Upload' to add a new image from your local directory.
- Configure other banner options (overlay content, filters) if required.
- Save & Exit.
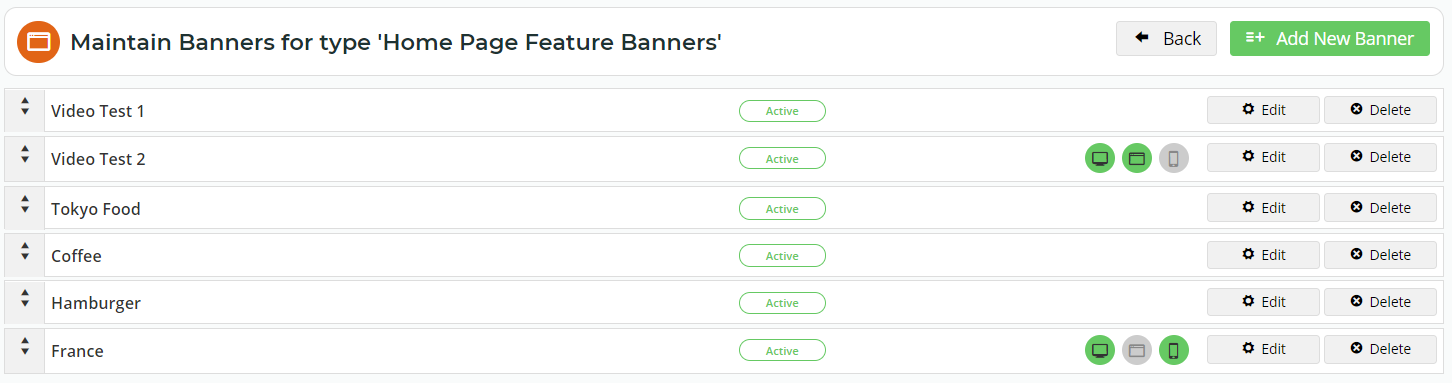
You'll see that if you've only uploaded your banner for a particular device, or uploaded it for all devices but then removed one (using the bin icon), that will be indicated with icons.
In the example image below, Video Test 2 has been disabled for Mobile, and France has been disabled for Tablets. All of the rest are visible for all devices.
...