This feature needs to be implemented by Commerce Vision.
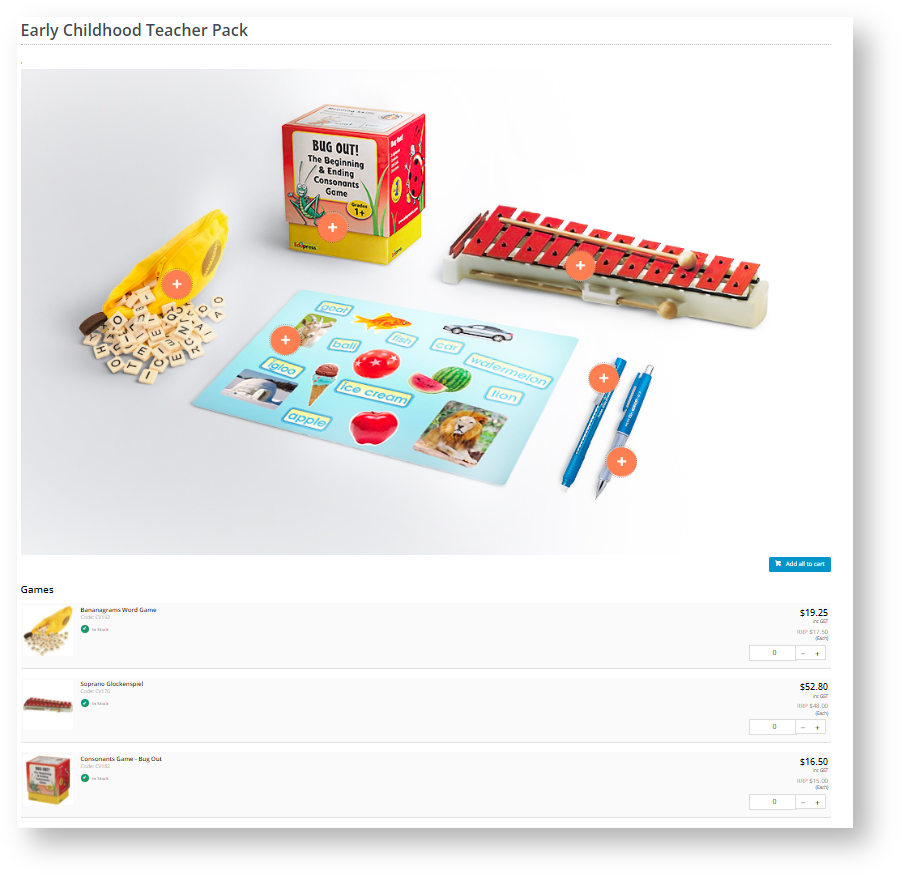
A hotspot banner provides a visual display of products clustered on a page for a particular purpose. It could be a school year book pack. Or the compulsory set of uniform items a new starter has to purchase. Or spare parts for a specific machine. Or even an attractive way to display newly arrived items your site is selling.
Each product in the banner has a clickable hotspot - usually a small circle. When that area is clicked, the viewer is taken to the product on the same page, where it can be added to cart.
Example:
Here, a hotspot is marked by ![]() . A viewer clicks on it to jump to the product (listed below the banner).
. A viewer clicks on it to jump to the product (listed below the banner).
On this page:
Step-by-step guide
Before you begin...
Ensure these have been created:
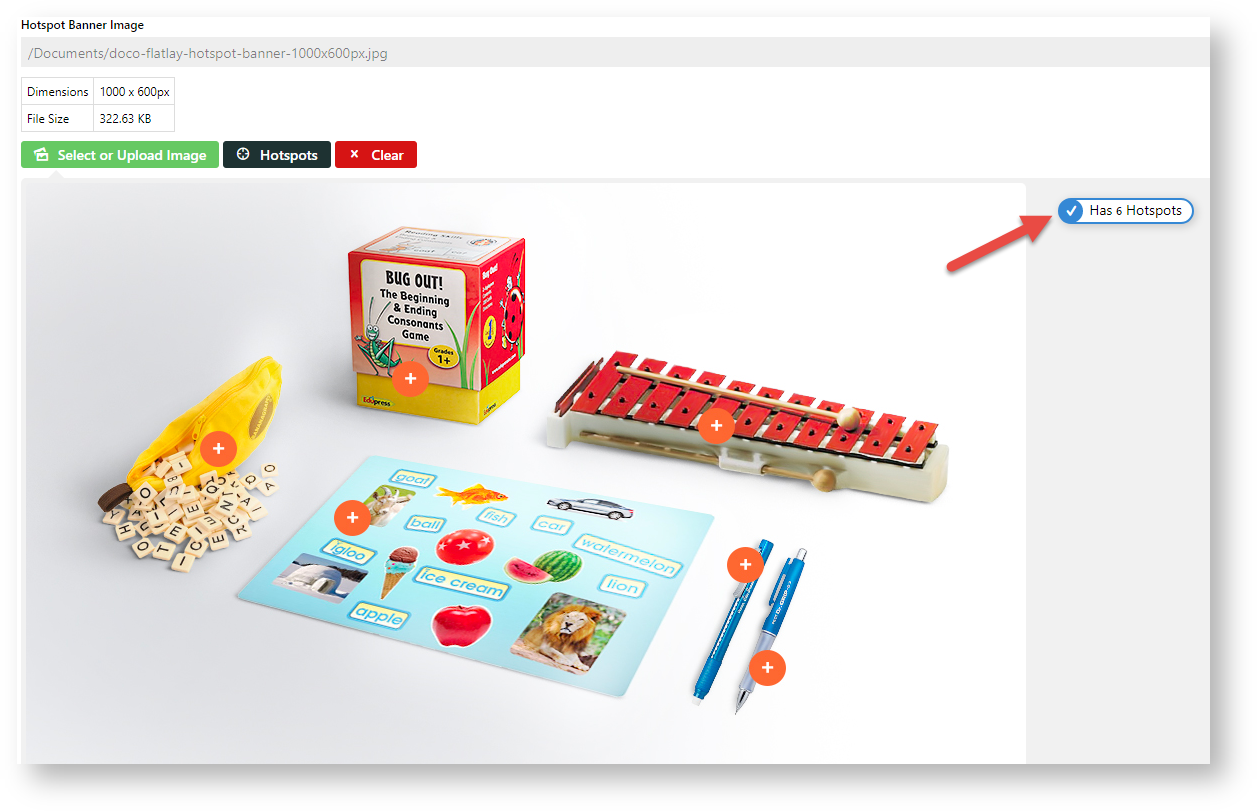
To create a hotspot banner:
- Go to Products & Categories → Category Maintenance.
- Find the cluster category for this hotspot banner and click Edit. NOTE - If the category has not been flagged as a cluster, you can do that next.

- If this category has not been flagged as a cluster, in Enable Cluster, select Yes.
- Scroll down to the Category Hotspot Banner panel.
- Click the Select or Upload Image button.
- Select the banner image. After insertion, the banner pathway, dimensions and file size are displayed.
- To add hotspots, click the Hotspots
button.
- Position the cross where you want a hotspot and click. The hotspot area is displayed as a revolving circle.
- Use the lookup tool to select the product for the hotspot.
- To add another hotspot, repeat steps 6-7.
- When you have finished adding hotspots, click Confirm.
The number of added hotspots is shown.- To save the hotspot work you have just done, click Save or Save & Exit.
- Refresh the cache.
- If this cluster category's page is accessed from the main navigation menu, a link will be displayed there just like other categories. Ensure the Hotspot Image Widget is in the Product List template.


Add/Edit Hotspot Image Widget
You may have to add the Hotspot Image Widget to the page on which the banner is to display. The banner will not display without this widget. You can also change the width of the hotspot area and add an offset so that product links land
Additional Information
Minimum Version Requirements 4.31
Prerequisites --
Self Configurable Yes
Business Function Products & Categories
BPD Only? Yes
B2B/B2C/Both Both
Third Party Costs n/a
Related help