Overview
The layout creator essentially lets you add rows to a layout, and then divide those rows up into columns. Each row can be made up of one column, or many. The guide below will show you how to create your own page layouts quickly and easily; there's even a video demonstration at the end of the article.
The Layout Creator in the CMS allows you to create custom layouts for various pages throughout your site. You can even create a custom Theme, if you choose.
Enabling the Feature
Layout Creator functionality is not on by default, but we can enabled it for you in a flash. Contact our Support Team to request it.
Creating a New Layout
- Login to the CMS and navigate to the page you wish to design the layout for.
- In the layout preview pane is the current layout, with the ability to toggle between Desktop, Tablet, and Mobile views.

- Click ‘Change’. Any existing custom layouts will be displayed, followed by out-of-the-box BPD layouts.
- Hover over ‘Options’, and click ‘Add Custom Layout’.
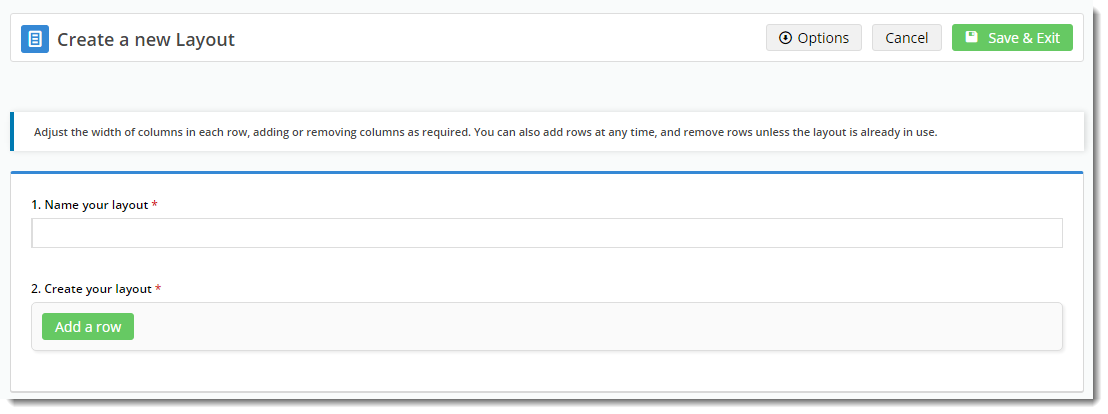
- Give your Layout a Name.
- If you like, you can load an example layout, then edit as required.

- Otherwise, start by adding a row.

- The modal ‘Add New Row’ window launches. This is where you specify:
- CSS classes to apply to the row display.
- Whether the row is full width (e.g. no container wrapping the row)
- How many columns you’d like (up to 6). If there are 2 or more columns, they will be created with equal width.
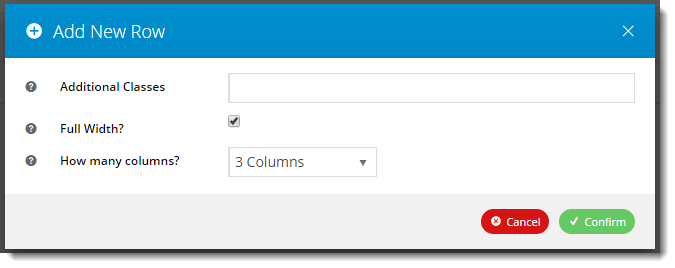
- Click ‘Confirm’ and voila! You’ve got your first row.
(The rows and columns are automatically named in the format Row1Column1, Row1Column2, and so on. Don’t worry – you can rename these to anything you like!)
- Click the 'Add a row' button to continue building your layout, adding as many rows as required.
- Click 'Save & Exit' to save your new layout.

Editing a Column
- Hover over one of the columns in your row – you’ll see 2 options appear: Edit & Delete.
- Click ‘Edit’.
- The Column Options modal window launches. Here’s where you can:
- Give the column a unique name - one that is meaningful to you.
- Specify an additional CSS class for the column’s display.
- Change the column width. The row will never exceed 100% width, so your column options will take that into account. If you want to increase the width of one column, you may need to first delete or decrease the width of another.
- Click ‘Confirm’ to save your changes.


Editing a Row
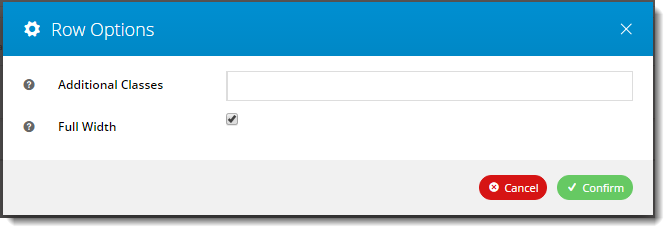
- On the right hand side of each row, you’ll see 2 buttons: ‘Edit' and ‘Options’.

- Clicking ‘Edit’ gives you the ability to make changes to the CSS classes and the Full Width setting for that row.
- Hovering over the ‘Options’ button gives you 2 choices:
- Add Column
- Delete Row

- Keep in mind that your row cannot exceed 100% width. If you have 3 columns at 33% and you click ‘Add Column’, a message will appear advising you to resize other columns first.

Editing Layouts currently in use
A layout that is currently in use somewhere on the website will have only limited editing options. This is to protect the look and functionality of the page(s) currently using that layout.
If a layout is in use, you will be shown a message regarding which pages are currently using the layout.
You will also be able to:
- Add a new row
- Change column widths and class names for the newly added row
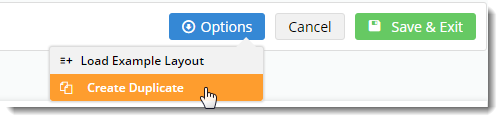
- Create a duplicate/copy of the layout
See how easy it is to use our Layout Creator!
(Firefox users may need to use another browser to view video)
Additional Information
| Minimum Version Requirements |
|
|---|---|
| Prerequisites | |
| Self Configurable |
|
| Business Function |
|
| BPD Only? |
|
| B2B/B2C/Both |
|
| Ballpark Hours From CV (if opting for CV to complete self config component) |
|
| Ballpark Hours From CV (in addition to any self config required) |
|
| Third Party Costs |
|
| CMS Category |
|
Related articles