For versions 4.37+
Overview
Adding the Order Documents Widget in the Payments panel of the Checkout page lets users upload payment evidence when submitting an order. Just set document upload against the payment types documents are needed. Payment evidence can be mandatory for a payment type.
This feature is useful for orders that have been prepaid, third-party financed, or part-paid, or other payment scenarios where evidence of payment is needed. If made mandatory, a customer using this payment type cannot submit an order without uploading at least one document. (Multiple documents can be uploaded.)

On this page:
Access to payment documents
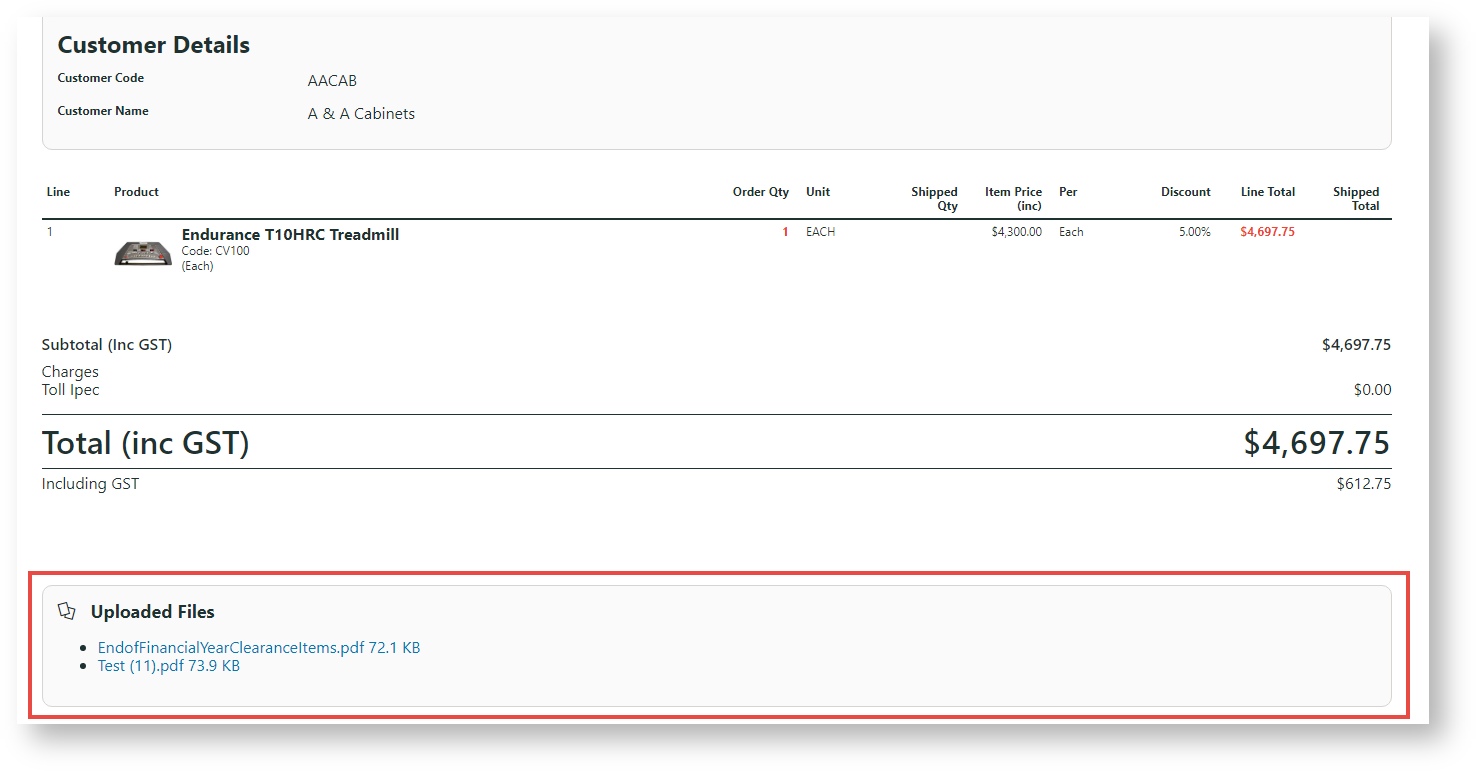
Document files are stored on the server. They can be accessed by your team members and customers via a link on any order-related emails, e.g., Order Placed, Order Received. Just add the Order Documents Widget to the template.
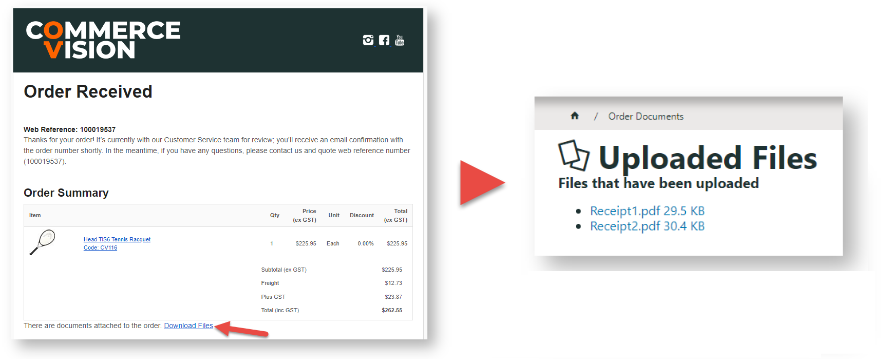
Users can also access the documents in Order History.
Step-by-step guide
1. Add Order Document Widget to Checkout template
- In the CMS, go to Content → Pages & Templates → Checkout.
- Select the Checkout template.
- Locate the Checkout Payment Options Widget. In the same zone, click Add Widget.
- Search for Order Documents and click Add Widget.
- Edit the widget. See: Order Documents Widget.
- Enter document file types accepted. For multiple file types, separate each one with a comma, e.g., .pdf,.jpg.
- Ensure 'Show document link' is toggled OFF.
- Save the widget.
- IMPORTANT - Move the Order Documents Widget so that it is positioned just above the Checkout Payment Options Widget in the same zone.

Next, edit the Checkout Payment Options Widget.
- Click Edit for the Checkout Payment Options Widget.
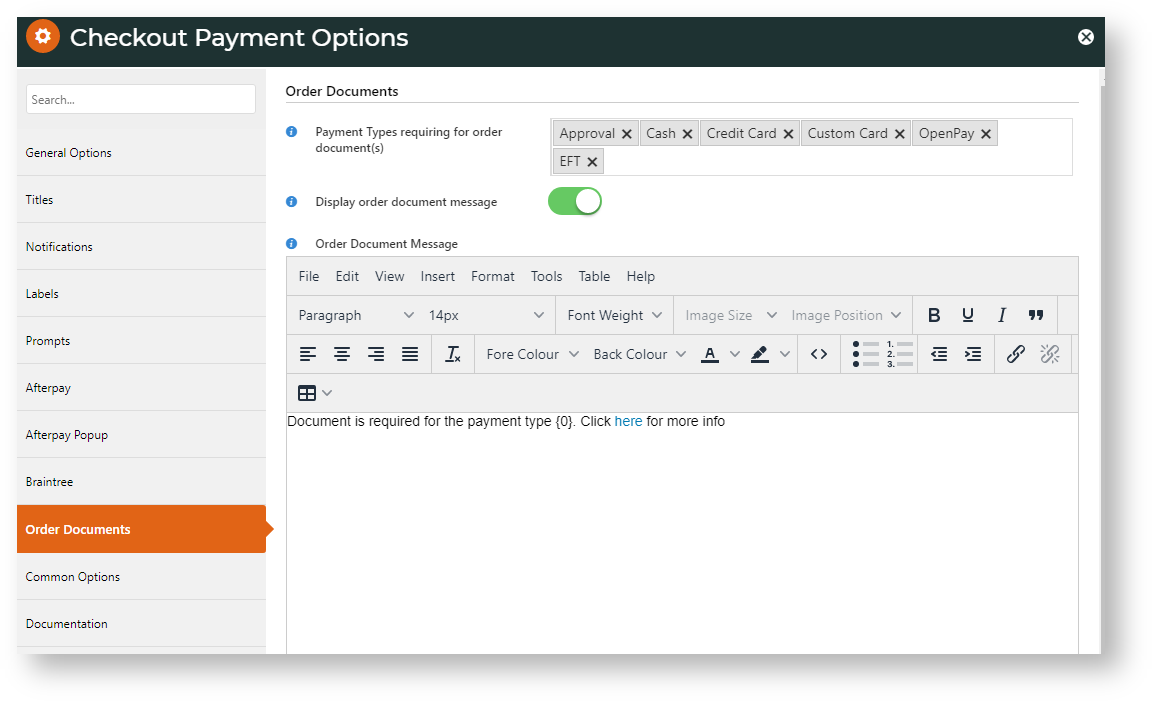
- Click the Order Documents tab.
- In Payment Types Requiring Order Documents, add one or more payment types that need a document uploaded.
- If required, edit the Order Document Message. NOTE - The default message contains a placeholder for the payment type.
- Click Save.

2. Add Order Document Widget to Order Documents template
This step may have been done for your site already.
- In the CMS, go to Content → Pages & Templates → Orders.
- Select the Order Documents Page template.
- Ensure the Order Documents widget has been added. If not, click Add Widget.
- Search for Order Documents and click Add Widget.
- Edit the widget. See: Order Documents Widget.
- Enter document file types accepted Format: .pdf For multiple file types, separate each one with a comma, e.g., .pdf,.jpg.
- Ensure 'Show document link' is toggled OFF.
- Save the widget.
3. Add Order Document Widget to an Email Template
This widget must be added to every email template you want the link to appear. For example, you may want the link to appear in the Order Received and Order Comfirmation emails. The widget must be added to each template separately.
- In the CMS, go to Content → Email
- Go to the email template.
- In the location you want the link displayed, add the Order Document Widget.
- Edit the widget. See: Order Documents Widget.
- Ensure document file types accepted are the same as those in the Checkout page's widget.
- Enter document file types accepted Format: .pdf For multiple file types, separate each one with a comma, e.g., .pdf,.jpg.
- Ensure 'Show document link' is toggled ON.
- Click Save.

Additional Information
Minimum Version Requirements |
|
|---|---|
| Prerequisites |
|
| Self Configurable |
|
| Business Function |
|
| BPD Only? |
|
| B2B/B2C/Both |
|
| Third Party Costs |
|
Related help
Related widgets