...
Step-by-step Guide To Category Clusters
1.
...
Switch on Cluster Maintenance
- In the CMS, navigate to Settings → Feature Management → Products & Categories and toggle on Cluster Line Type Maintenance.
...
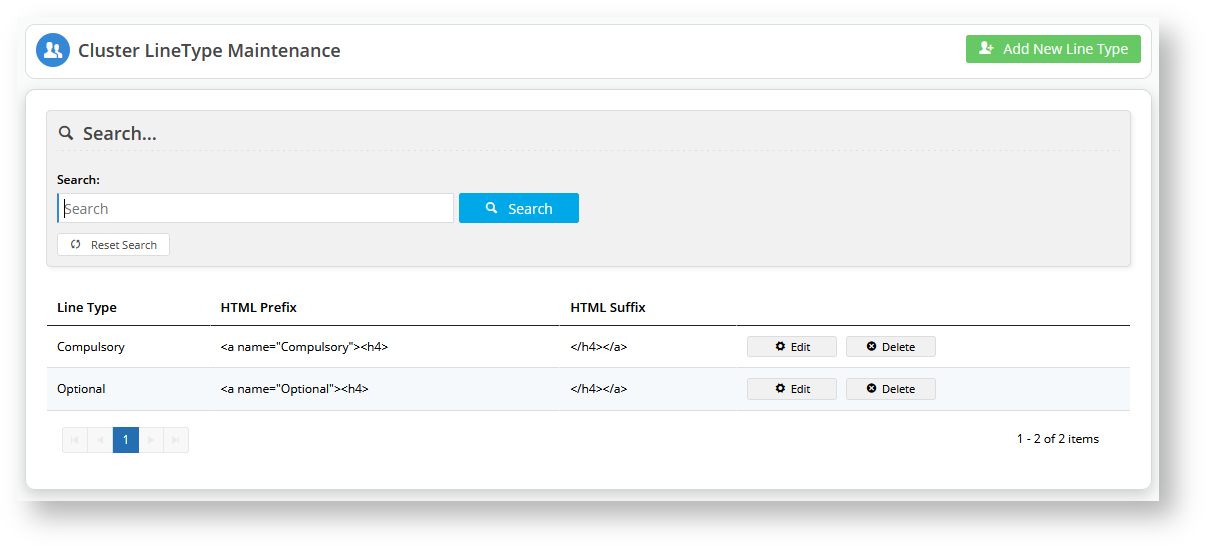
In Settings → Cluster Line Type Maintenance, click Configure to go to the 'Cluster Line Type' page.
Info Once 'Cluster Maintenance' is toggled on in 'Settings', the Cluster LineType Maintenance menu item is available in the Products & Categories menu. You can also add, edit and delete line types here.
- Click Add New Line Type.
- Enter details for Line Type, HTML Prefix, and HTML Suffix.
- Click Save. The line type will be listed in the list of line types for the cluster.
- Create any other line types you need. For our example, repeat steps 3-5 to create the 'Optional' line type.
2.
...
Enable cluster for a category
...
A category has to be enabled as a cluster in its Category Maintenance page. You can turn set an existing category into as a cluster or create a new category first. For our example, we will create a new category, then set it as a cluster.
- Navigate to Products & Categories → Category Maintenance.
- In Add New Category..., enter the category name and click Create. The category will be added to the bottom of the list.
- To turn the category into a cluster, click Edit.
...
- In Enable Cluster, select 'Yes'.
...
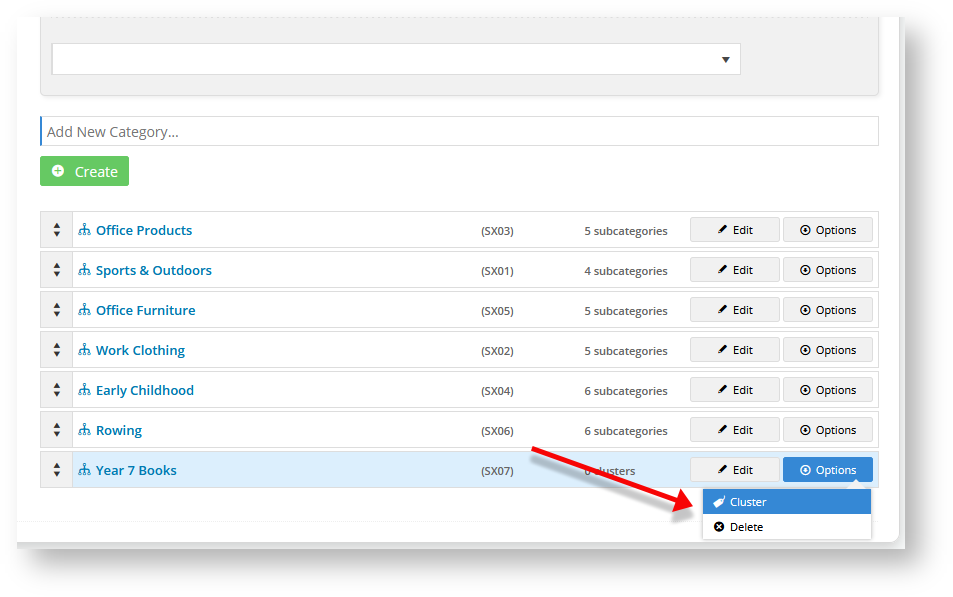
- Click Save & Exit. In the Category list, this category is now displaying '0 clusters' instead of '0 products'.
3. Build a cluster for a category
- In the Category list, hover over Options for the category and select Cluster.
...
- In Description, add the header for the cluster. For the example, we will add the header 'Compulsory'.
...
- In Type, select a line type. Here, we will select 'Compulsory'.
- To save this line type to the category, click Add None Product.
...
- Repeat steps 2 to 4 for each extra line type you need.
...
- For the example, we have added 'Optional'.
...
4. Add Products to Cluster Types
Now we need to add products to each cluster type.
- In the list of line typesIn the Maintain Category Cluster page, click Edit for the line type you want to add products to.
- In Product Search, type in the name of a product and click Add Product. The product will appear at the end of the list.
- Drag and drop the product under a header. In our example, we will add our first product to 'Compulsory products'.
- Repeat steps 2-3 for all the products you want to add to each line type in the Cluster.
5. Edit cluster properties for a product
...
in a cluster
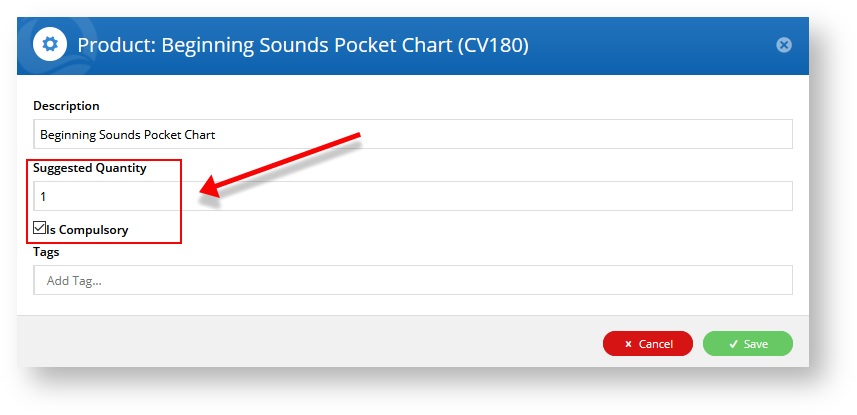
Each product contains details that define its cluster properties.
- For each product in the cluster, click Edit.
- Edit the fields as required.
Description: the product name will default but you can change it to something more helpful to your customers if you wish
Suggested Quantity: enter at least '1' if this product is under the compulsory or choose one line types. If the product is optional, leave it at '0'.
Is Compulsory: check the box if the customer must buy this product
Tags: tags are used to associate two or more products when the line type gives the customer a choice between two or more products. To add an associated product, type its product code, then hit 'Enter' on your keyboard.- When you have finished editing the product, click Save.
...
Other Cluster Line Types
Create a 'choose one' cluster line type
Apart from compulsory and optional line types, you can configure a line type to contain a list of products from which the customer can or must select one. In our example, we want customers to choose between the products Sight Words Readers (CV187) or and Sight Words Flash Cards (CV186).
...


