Overview
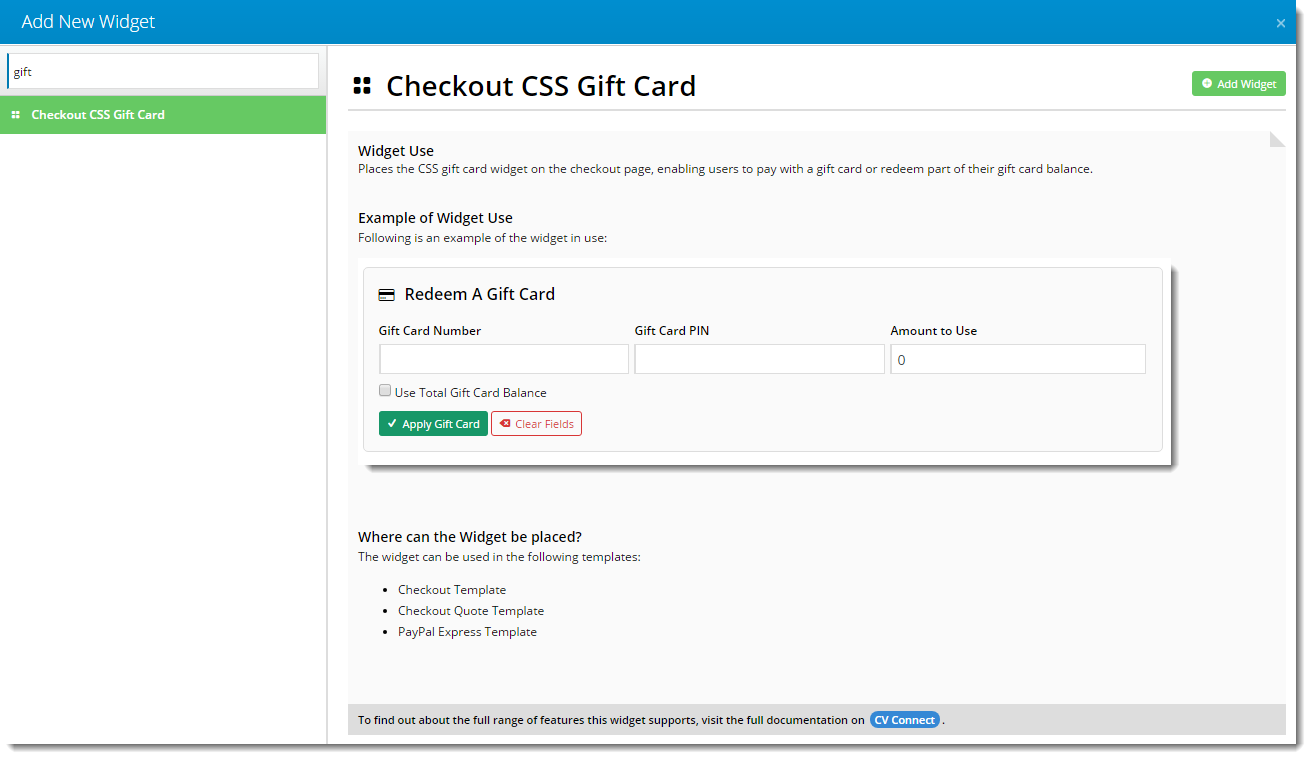
CSS supports online Gift Cards via the implementation of the Gift Card widget.
Gift Cards can be created and maintained on the web, and redeemed by the user during checkout with a Gift Card Number and PIN. Users can combine Gift Card funds with traditional payment options, and may use a card multiple times until its balance is depleted.

Contents
Prerequisite
See below for Prerequisites!
Enabling The Functionality
There are 2 system flags which need to be set in order for Gift Cards to work correctly.
1. The first is the Gift Card Provider flag:
- In the CMS, navigate to Settings → Settings.
- Select the 'Orders' tab.
- Select the 'Credit Cards' tab.
- Scroll to the setting 'Gift Card Provider' and set to 'CSS'.
- Click 'Update' to save changes.
2. The second is the 'Allow B2C Pay By Gift Card' flag, which should be set to 'Yes' at Customer level.
- In the CMS, navigate to Users --> Customer Maintenance.
- Search for the default B2C Customer Code for your site.
- Select the 'Customer Details' tab.
- Check the value of 'Allow B2C Pay By Gift Card' - it should be set to 'Yes'.
If required, click 'Modify', set the flag to 'Yes' and click 'OK'.
For sites with many B2C Customer Codes, contact Commerce Vision Support and request a bulk update.
Adding The Widget & Configuring Options
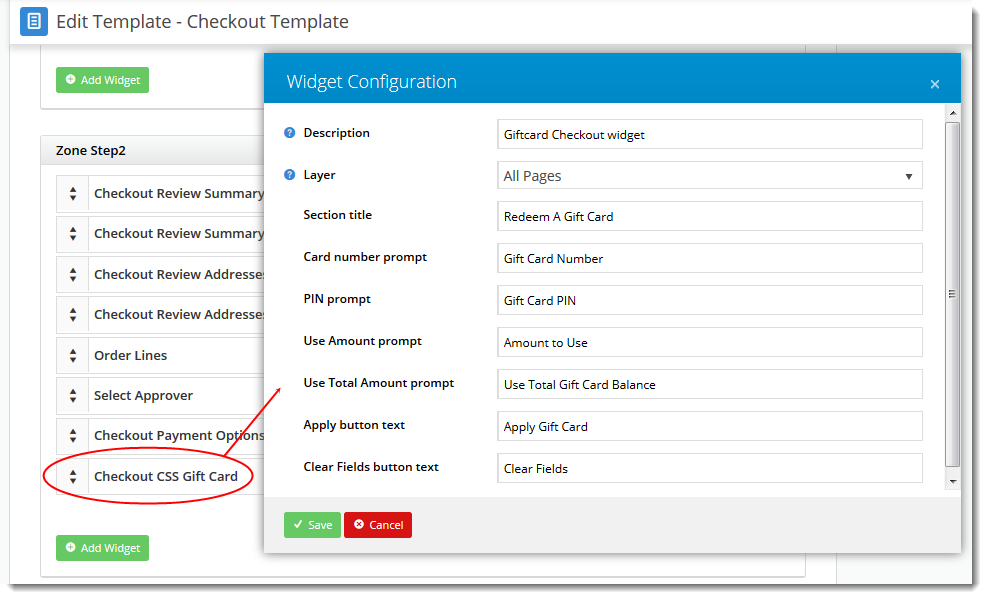
Gift Card options can be easily customised within the CMS.
Button text and prompts can be edited, and the Gift Card widget itself can be restricted to a certain audience or particular position on the checkout page.
To configure the Gift Card widget:
- In the CMS, navigate to Content → Standard Pages.
- Select the 'Checkout' template.
- Scroll to 'Zone Step2' and click 'Add Widget'.
- Search for 'gift card', then select 'Checkout CSS Gift Card' and click 'Add Widget'.
- Edit the newly added widget and modify options as required.
- Click 'Save'.
- Your changes will be visible immediately.

Tip
To place the Gift Card widget above the Payment options at checkout, drag the Gift Card widget up and drop it above the 'Checkout Payment Options' widget in the Checkout Template. 
The change will be reflected once the web page is refreshed.

Creating Gift Cards
Creation and maintenance of Gift Cards is performed by the Administrator in the CMS. Cards can be created manually or imported in bulk via CSV flat file.
To Create a Gift Card manually:
- In the CMS, navigate to Gift Card Maintenance (/zGiftCardMaintenance.aspx). If this page does not appear on your menu, contact Commerce Vision Support.
- Click 'New'.
- Populate the fields as required:
- Gift Card No - numeric only, between 1 - 13 digits
- Gift Card PIN - alphanumeric, any number of characters
- Original Amount - the initial card balance
- Current Balance - the current card balance (same as 'Original Amount' at time of creation). This figure updates automatically as funds are used.
- Expiry Date - the date the card becomes invalid (12:00 am on the specified date)
- Comments - for the Administrator's reference
- Click 'OK' to save.

To Create Gift Cards via Import:
- Create and save a CSV file containing Gift Card data.
- Columns should contain data in this order (no header row):
- Gift Card No.
- Gift Card PIN
- Gift Card Amount
- Expiry Date (format DD/MM/YYYY)
- Comments
- Login to the site as an Administrator.
- Navigate to Gift Card Maintenance (/zGiftCardMaintenance.aspx).
- Click the 'Import' tab.
- Drag and drop the CSV file into the file selection window, or click the 'Select' button to browse to the file location.
- Click 'IMPORT NOW'.
The dialogue box will display a success message and any failures upon import.

Maintaining Gift Cards
If a Gift Card PIN is lost, a new one can be set by the Administrator via the Gift Card Maintenance page. Similarly, the Expiry Date can be modified, as can balances and comments. Cards can also be deleted if required.
To Maintain Gift Cards:
- Login to the site as an Administrator.
- Navigate to Gift Card Maintenance (/zGiftCardMaintenance.aspx).
- Select the required card via radio button.
- Click 'Modify'.
- Reset the User's PIN, edit dollar amounts, change the Expiry date, or update Comments.
- Click 'OK' to save.
Redeeming Cards (end user)
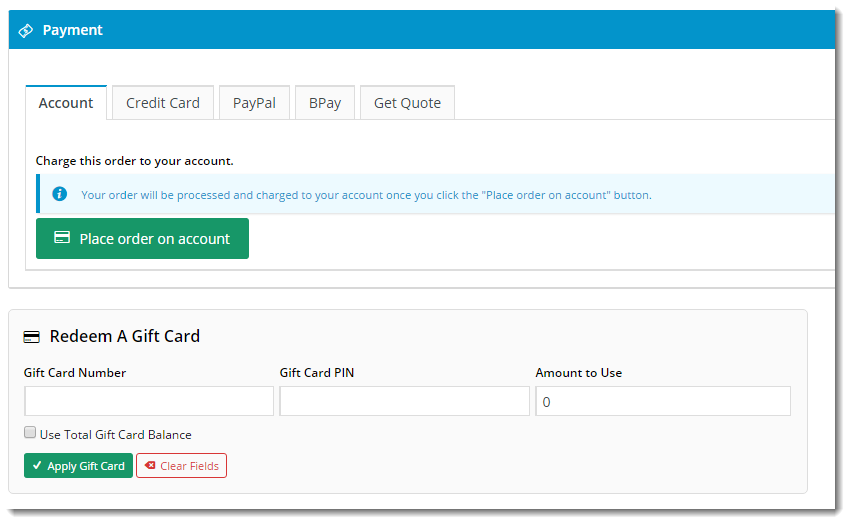
As the customer proceeds through Checkout, a Gift Card section will be presented on the Order Review and Payment page.

Here, the user can enter the Gift Card number + PIN, and nominate an amount to redeem. The entire remaining card balance can be redeemed by ticking the box labelled 'Use Total Gift Card Balance'.
The User can also remove a Gift Card from the order by clicking the 'X' against the line in the Order Summary.
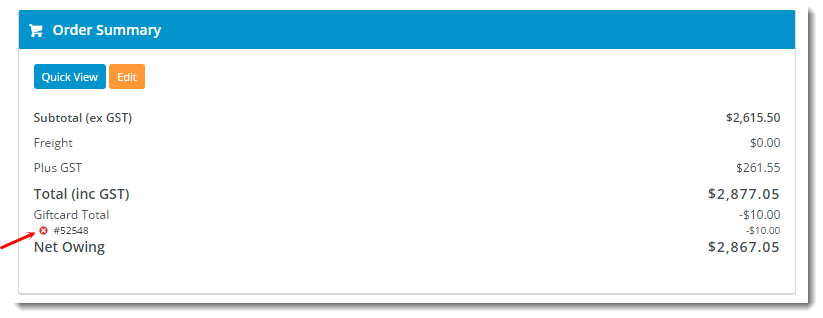
Multiple cards can be used on one order, and the net amount owing is adjusted automatically. The User can then pay the remainder of the order as normal - by Credit Card, PayPal, or on Account if applicable.
If the User attempts to redeem an expired card, an error message will be returned.
Related articles
Additional Information
For sites with many B2C Customer Codes, contact Commerce Vision Support and request a bulk update.
| Minimum Version Requirements |
|
|---|---|
| Prerequisites |
|
| Self Configurable |
|
| Business Function |
|
| BPD Only? |
|
| B2B/B2C/Both |
|
| Ballpark Hours From CV (if opting for CV to complete self config component) |
|
| Ballpark Hours From CV (in addition to any self config required) |
|
| Third Party Costs |
|
| CMS Category |
|